

If I could replace my eyes with thermal imagers I would! It is absolutely amazing what this new sense of perception allows you to accomplish. It makes you feel super human. A thermal imager can diagnose problems before they happen and find things you would never see with the naked eye. Later in this article I will show you some of the cool things I found with the M12 Imager.
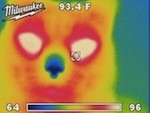
As you know Milwaukee is always expanding the M12 line with new tools. Milwaukee wants to dominate the contractors tool bag and lately has been doing a really good job of doing so. The 2260-21 M12™ 160 x120 Thermal Imager is part of their Test and Measurement line up which has produced some impressive tools like the innovative fluorescent light tester. We had a sneak peak at the imager last year at the 2011 New Product Symposium and instantly fell in love with it. It was made to diagnose and report, one pull of the trigger not only saves a thermal image to the the included 2gb SD card but it also takes a regular picture for reference. Temperature Range is: 14 to 662 Degrees F with a refresh rate of 60 times per second. You can change between iron, rainbow, gray color palettes, I found rainbow to be the best overall and gray was awesome at night vision. The 3.5″ screen was big and easy to read, it is especially good when you need multiple people to look at the problem.

I am going to keep this review relatively simple and try not to overcomplicate the tool because it really is extremely easy to use. It literally takes less that 5 minutes to become familiar with the 2260-21, the interface is simple and intuitive. 5 buttons and a directional pad allow you to navigate the menu options. Check out the video for screen menus. The pistol style grip has rubber over molding for a tight grip. The imager is power hungry and we were surprised that it only included 1 Redlithium battery. An XC pack would have been a lot better here for longer runtime and better tool balance as the head of the tool felt heavy. To protect the imager lens it has a camera style flip lid that locks in both the open and closed position. It also focuses like a camera, just twist the lens ring. On the right side is a protective rubber cover that houses the SD card and USB port. Overall it is well built, rugged, has a IP54 rating and an awesome 5 year warranty.

For dark locations the imager has two bright white LED lights on the front. When in grayscale mode it works great as a night vision camera. I actually could see animals in the woods at night with this tool. I dropped my iPhone in the lawn and could not find it with the naked eye, but found it within seconds with the imager. It can even spot airplanes. I found the tool awesome at checking electrical panels for overworked circuits and looking for thermal leaks. The only downsides we noticed was that every minute or so the unit calibrates itself which causes the screen to freeze for a second or 2 and when you pull the trigger to take an image it freezes the unit for about 15 seconds, hopefully they can speed up the picture saving process in future firmware updates.

There were so many cool things we could do with a thermal imager, here are some things we did:


I do not own a Windows PC, so I had to pass the article on to Eric who wrote the following:
Milwaukee M12 Thermal Image Software
Well you may have one of the cooliest tools around, but if you can’t show your clients or boss your thermal finds, what good is it really. Not only did Milwaukee make the tool easy to use and navigate, they even made the software very easy. Now you don’t have to install any software to use the tool, but if you want to run reports and keep a history, the software is a must. What is that, your a Mac lover. Well bad news, the current software that comes with this tool doesn’t support Mac. The kit includes everything else you need to get started such as a 2 gig SD card, thumb drive, a install CD and a cord to hook up from the imager to your computer.


Before you get started, you have to install the software. Just insert the CD and the software will guide you through the process, very easy. Once you have it installed, just open the icon and your set to make yourself look like a pro.

The above picture is the screen you get when you open the program. As you can see it is designed to be used by anyone, even a dummy like me can easily navigate this. Do you want to load the pictures from a thumb drive or right from the camera?

Once you click the location, it asks for a customer name and job. This is the information that will be used in the report and if you ever need to go back and look at the history.

Now it will show you what images will be loaded.

Once the images are loaded, you can go through each one. Here is where it gets pretty cool. You can now see a side by side comparison from the thermal image to a standard picture. On the bottom you can name your picture and include other important information that will show up on the report. But this is what is really cool. You can move your mouse all around the thermal picture and it will show you the exact temperature reading. Click on your mouse and it takes a reading. It puts an icon on the picture and logs the reading on the bottom right pane. Plus this shows up on the report. So in this example you can see how the temperature changes when hot water runs through a cast iron heater.

Now that you have described all your pictures, listed any problems with solutions, you can build a nice looking report. Milwaukee lets you choose different templates and font. Plus you can include your own logo.

The last item is running and viewing the report. Here is where you can double check everything. If you like, you can now export it to a PDF or print the report.
Below is an example of a PDF you can create. As you can see it has a very nice layout. Picture quality could be better, but you can easily see the pictures. Again this is just an example so we didn’t put much into the report. The reports are great because they help tell a story. As you can see with the first cast iron, the heat is great, 127 coming in and 119 leaving. However the second heater is showing 119 coming in and 94 leaving which is awful. Here is where you can pinpoint problems and tell your story. In this case it there are no problems, the heater just wasn’t running long enough to get up to temperature.
Boiler – Tools in Action – PDF Report Example.
WOW that was a long article. So to wrap it all up, we are happy to see a thermal imager added to the M12 line, but the $2500 price tag make it out of reach for most users. We would like have to seen 2 XC batteries included instead of the included single red lithium. However it is feature packed, rugged and invaluable to some contractors. The ability to run professional reports with your logo can save you time and make you money. The 5 year warranty is awesome. DeWalt recently announced a 12V Max imager for $999, it will be interesting to compare the two.
Check out Milwaukee Tool

Hi I love your review on the Milwaukee thermal camera, maybe you can answer my question, I am in home inspection ad looking at this camera and the flir e30bx, I want friendly tool not to complicated but need to do a lot. The flir have a beep sensor that tells you where you loose heat. But the real live image on the Milwaukee is very nice. Please let me know what you think
Hi Christian, We have not tested the Flir so cannot comment on that. but Have you checked out the DeWALT 12V thermal? it’s rugged and less than half the price of the 2 you just mentioned.
Thanks for including some Boiler pics, I could really use one of these in the trade I do. I work on small electric steam generators(boilers) (up to 140kw) and autoclaves for hospitals, this could come in incredibly handy detecting steam leaks!