
Dust collector works so well! I bought the dust port a few weeks ago to put on the jointer but realized my shop vac would never be able to keep up with it. I used double sided tape and foam insulation tape to adhere and seal the port to the jointer. Hooked up the vac and see how it did. Flawless! Before and after pics. [External image (uploads.tapatalk-cdn.com), not copied][External image (uploads.tapatalk-cdn.com), not copied][External image (uploads.tapatalk-cdn.com), not copied]
Sent from my Pixel XL using Tapatalk
Got a hold of some free walnut this week! Not sure how much I got. Also a few boards of an unknown wood. Any ideas what it might be@chrisk? Need to make some more stickers as well but ran out of time. [External image (uploads.tapatalk-cdn.com), not copied][External image (uploads.tapatalk-cdn.com), not copied][External image (uploads.tapatalk-cdn.com), not copied][External image (uploads.tapatalk-cdn.com), not copied]
Sent from my Pixel XL using Tapatalk
rrich1 wrote:
3 hours ago, rrich1 said:Got a hold of some free walnut this week! Not sure how much I got. Also a few boards of an unknown wood. Any ideas what it might be@chrisk? Need to make some more stickers as well but ran out of time. [External image (uploads.tapatalk-cdn.com), not copied][External image (uploads.tapatalk-cdn.com), not copied][External image (uploads.tapatalk-cdn.com), not copied][External image (uploads.tapatalk-cdn.com), not copied]
Sent from my Pixel XL using Tapatalk
Wow, the walnut is easy but the other stuff? Kind of looks like tome Hickory boards I have in the shop but I’m at a loss!
@rrich1 What are you planning to make with the boards? If you don’t mind me asking?
@FrosBros82 no idea. I’ll wait and see what I am left with after it dries.
Sent from my Pixel XL using Tapatalk
Vise is back together. I am still trying to source a t section for the handle. Waiting to hear back from someone. Works great as is though. To get it to sit flush with the top of the table I will need to route out some of the underneath of the bench top though. Very happy with how well it turned out. Far cry from what it was a few weeks ago. [External image (uploads.tapatalk-cdn.com), not copied][External image (uploads.tapatalk-cdn.com), not copied][External image (uploads.tapatalk-cdn.com), not copied][External image (uploads.tapatalk-cdn.com), not copied]
Sent from my Pixel XL using Tapatalk
Wow that’s a hell of a score on that Walnut that is expensive wood really beautiful when finished.. can’t wait to see what it becomes
Did a quick clean up on a record A151 spokeshave. Now I just have to figure out how to sharpen it. [External image (uploads.tapatalk-cdn.com), not copied][External image (uploads.tapatalk-cdn.com), not copied][External image (uploads.tapatalk-cdn.com), not copied][External image (uploads.tapatalk-cdn.com), not copied][External image (uploads.tapatalk-cdn.com), not copied][External image (uploads.tapatalk-cdn.com), not copied]
Sent from my Pixel XL using Tapatalk
Also got started on a new shop project. A much needed table saw sled. Plans from Nick ferry. [External image (uploads.tapatalk-cdn.com), not copied]
Sent from my Pixel XL using Tapatalk
Did some work today. Got the walnut restacked with 3/4″ stickers. My son Owen was all about helping me put the stickers on. He was a big help and let me know ow it too. This walnut has some awesome color and I cannot wait to use it.
Also made some progress on the table saw sled. I had to stop. My cutters were not liking having to cut the screws and my Dremel was already broke. Will need to figure out another way to cut the screws for the t track. [External image (uploads.tapatalk-cdn.com), not copied][External image (uploads.tapatalk-cdn.com), not copied][External image (uploads.tapatalk-cdn.com), not copied][External image (uploads.tapatalk-cdn.com), not copied][External image (uploads.tapatalk-cdn.com), not copied]
Sent from my Pixel XL using Tapatalk
Got the table saw sled basically done. I need to make the cover for the blade, 45 degree miter triangle, and put a coat of finish on it. I realized as I was finishing up that I messed up on the construction. I put the larger side to the right and it was supposed to be on the left. Oh well. A right to left tape measure is on the way.
Sent from my Pixel XL using Tapatalk
[External image (uploads.tapatalk-cdn.com), not copied]
Sled is done besides a coat of poly. I got the rear blade guard box attached and used my Sargent 5307 to get some nice rounded over edges. Hand tools come up big once again. I don’t mind running power tools late at night (and neither to my neighbors) but the router is a bit much at night. The plane did as good as a job as the round over bit did.[External image (uploads.tapatalk-cdn.com), not copied][External image (uploads.tapatalk-cdn.com), not copied][External image (uploads.tapatalk-cdn.com), not copied]
Sent from my Pixel XL using Tapatalk
Did a quick restore on my “new” #5 record jack plane. I sold the Sargent and finally found this one. Need to sharpen the blade and continue to sand the sides and sole a little bit more. [External image (uploads.tapatalk-cdn.com), not copied][External image (uploads.tapatalk-cdn.com), not copied][External image (uploads.tapatalk-cdn.com), not copied][External image (uploads.tapatalk-cdn.com), not copied][External image (uploads.tapatalk-cdn.com), not copied][External image (uploads.tapatalk-cdn.com), not copied][External image (uploads.tapatalk-cdn.com), not copied][External image (uploads.tapatalk-cdn.com), not copied][External image (uploads.tapatalk-cdn.com), not copied]
Sent from my Pixel XL using Tapatalk
What do you do when you need to plan 76″ boards when your workbench still isn’t done? You improvise! Worked great too. [External image (uploads.tapatalk-cdn.com), not copied]
Sent from my Pixel XL using Tapatalk
Still waiting on the leg vise screw from my father in law. He said he would get to it this month so hopefully it is soon. I did drill holes in the stretchers for the dowels. I’ll transfer these holes to the legs and should add a nice detail when done. Trying to keep away from all metal fasteners in the bench build. I need to build a drill press table. The small Craftsman table isn’t going to cut it for woodworking.
I also forgot I built a table saw sled! Nick ferry’s table saw sled in fact! It came out pretty well. Haven’t gotten a chance to really use it yet though. I messed up on the build. The larger side was supposed to be on the left but I goofed up. Oh well. It will work all the same. A nice hand plane will do a good it not better job on rounding over an edge too! [External image (uploads.tapatalk-cdn.com), not copied][External image (uploads.tapatalk-cdn.com), not copied][External image (uploads.tapatalk-cdn.com), not copied][External image (uploads.tapatalk-cdn.com), not copied][External image (uploads.tapatalk-cdn.com), not copied]
Sent from my Pixel XL using Tapatalk
Not a shop project but made it in the shop. Quick prototype build. It isn’t perfect but it’s pretty good. Needs sanding and finish. [External image (uploads.tapatalk-cdn.com), not copied][External image (uploads.tapatalk-cdn.com), not copied]
Sent from my Pixel XL using Tapatalk
Got it sanded and first coat of Danish oil on. [External image (uploads.tapatalk-cdn.com), not copied]
Sent from my Pixel XL using Tapatalk
White Ash & Walnut?
Maple and walnut.JMG wrote:
White Ash & Walnut?
Also cut a rabbet into the stretchers of the workbench for a plywood shelf.
[External image (uploads.tapatalk-cdn.com), not copied][External image (uploads.tapatalk-cdn.com), not copied]
Sent from my Pixel XL using Tapatalk
Drilled holes in the legs to accept the dowels. Also cut the leg chop to a more manageable size. Still deciding on a design for the chop. [External image (uploads.tapatalk-cdn.com), not copied]
Sent from my Pixel XL using Tapatalk
Some more crosses in the works. I think I am going to try and sell these. Would be nice to make this hobby pay for itself. Lol left and right are cherry and maple. The middle is padauk and walnut. [External image (uploads.tapatalk-cdn.com), not copied]
Sent from my Pixel XL using Tapatalk
Modified the table saw fence today. I bought a 3″ piece of 80/20 extruded t track and replaced the side of the fence with it. I had to enlarge the holes in the fence upward to fit the slots in the track. I was hoping I wouldn’t have to modify the line for the measurement but I had to. The newer piece was just too thick. I had to cut a line 1/4″ to the left of the original line. I used a red paint marker to make it look as close to the original as possible. I just have to remember to always use the left line.
Very happy with how it turned out as the original fence had a cup in it. This one is straight. [External image (uploads.tapatalk-cdn.com), not copied][External image (uploads.tapatalk-cdn.com), not copied][External image (uploads.tapatalk-cdn.com), not copied][External image (uploads.tapatalk-cdn.com), not copied][External image (uploads.tapatalk-cdn.com), not copied]
Sent from my Pixel XL using Tapatalk
rrich1 wrote:
1 hour ago, rrich1 said:Modified the table saw fence today. I bought a 3″ piece of 80/20 extruded t track and replaced the side of the fence with it. I had to enlarge the holes in the fence upward to fit the slots in the track. I was hoping I wouldn’t have to modify the line for the measurement but I had to. The newer piece was just too thick. I had to cut a line 1/4″ to the left of the original line. I used a red paint marker to make it look as close to the original as possible. I just have to remember to always use the left line.
Very happy with how it turned out as the original fence had a cup in it. This one is straight. [External image (uploads.tapatalk-cdn.com), not copied][External image (uploads.tapatalk-cdn.com), not copied][External image (uploads.tapatalk-cdn.com), not copied][External image (uploads.tapatalk-cdn.com), not copied][External image (uploads.tapatalk-cdn.com), not copied]
Sent from my Pixel XL using Tapatalk
Fantastic dude, looks awesome.
Thanks Chris.ChrisK wrote:
Fantastic dude, looks awesome.
Sent from my Pixel XL using Tapatalk
saw looks good man. Need a outfeed table now huh.. do you plan on getting ur bench done soon? Looking forward to seeing that beast finished.. o and what is on the other side of your flip top tool stand I just couldn’t figure it out LOL
I cut the bench down a little to work as an out feed table when I need it. If that doesn’t suit my needs I will build one that is attached to the table saw.Jscott wrote:
saw looks good man. Need a outfeed table now huh.. do you plan on getting ur bench done soon? Looking forward to seeing that beast finished.. o and what is on the other side of your flip top tool stand I just couldn’t figure it out LOL
I hope so! It’s frustrating that it isn’t done yet. I’m going to hopefully get it done soon.
It’s a grinder. I put it there is I can have enough room to put the Ridgid sander on the same side whenever I buy it. [External image (uploads.tapatalk-cdn.com), not copied][External image (uploads.tapatalk-cdn.com), not copied]
Sent from my Pixel XL using Tapatalk
Ok Got ya.. I added mine because I was tired of moving stuff off the table to cut little anything over two foot lol..
That will be cool to see hope you get to finish it up.
That’s a good use of it for sure and the Sanders look pretty sweet..
O ya I’m stealing your idea on the table saw side flip top box thing you made.. it is a really good idea.. but I’m putting it on the left side of mine in place if the crappy steel wing
Thanks. It’s my favorite shop project to date. Super useful. I took out the left wing to put a router table inside of mine. I kept the right wing in and the box filled in where there was a gap from the wing to the support bar that was there. Pics when you do it.Jscott wrote:
O ya I’m stealing your idea on the table saw side flip top box thing you made.. it is a really good idea.. but I’m putting it on the left side of mine in place if the crappy steel wing
Sent from my Pixel XL using Tapatalk
I will post pics for sure I have been trying to remember to take pictures of the shop projects but always forget until later lol. I will keep updating my shop post on here as I remember lol. My router table went on the right side of mine right were you put the box on yours but I like the idea so much I decided to make it work on the left side
I finally drilled the holes doe the vise screw. The chop is centered perfect but the leg is an 1/8′ off errrrrrrrr. Oh well it will be fine. Think I am going to either tonight or tomorrow do a glue up with the leg supports. Still have to do final shaping of the chop as well. [External image (uploads.tapatalk-cdn.com), not copied][External image (uploads.tapatalk-cdn.com), not copied]
Sent from my Pixel XL using Tapatalk
I have a workbench! It isn’t finished yet. I still need to sand all the joints and make sure the top mortises are flush. Feel like it but will make sure later. I needed to get this done as it was the only place I could put the aprons for the gaming table up to route in the t bolt access holes. The top isn’t glued and honestly I don’t think it needs it. I cut a piece of maple plywood in for a shelf as well. I made rabbets earlier in the process for a flush fit. So have castor’s that I will put on that you can drop it down to the bar floor. [External image (uploads.tapatalk-cdn.com), not copied][External image (uploads.tapatalk-cdn.com), not copied][External image (uploads.tapatalk-cdn.com), not copied][External image (uploads.tapatalk-cdn.com), not copied][External image (uploads.tapatalk-cdn.com), not copied]
Sent from my Pixel XL using Tapatalk
That bench looks awesome man… Looks sturdy as hell to nice job
Thanks! It seems very solid. I might put my off cuts on the bottom shelf or make a cabinet with lots of drawers. Either will add sufficient weight to the bench as well.Jscott wrote:
That bench looks awesome man… Looks sturdy as hell to nice job
Sent from my Pixel XL using Tapatalk
Got some work done after shift tonight! Got the castor’s on and 2 coats of Danish oil! She is looking great! The power tech castor’s I had bought came with dinky screws. I replaced them with 2″ lag screws to be safe. 2 of them broke on me even though I pre drilled. I got one out but the other I had to leave in. I drilled two holes in the bracket and used 2 1/2″ kreg screws along with the bottom lag bolts. I don’t see it being an issue.
The castor’s work extremely well and give a lot of lift. They are rubber and glide over the garage floor.
The Danish oil gave the bench a nice color. I used natural. Almost with I went with a walnut but thought it might be too dark. It looks great though and am happy. It made the cherry dowels really stick out which I was hoping for. Some before during and after pics below.
Still need to finalize a chop design and still waiting on the vise screw. Other than that I think the bench is done. I originally bought an old brod head Garret vise to put on but I don’t think I am. It would require me to route a lot of the top out to get it almost flush with the top and i don’t want to do that. At some point in the near future I will drill some dog holes. [External image (uploads.tapatalk-cdn.com), not copied][External image (uploads.tapatalk-cdn.com), not copied][External image (uploads.tapatalk-cdn.com), not copied][External image (uploads.tapatalk-cdn.com), not copied][External image (uploads.tapatalk-cdn.com), not copied][External image (uploads.tapatalk-cdn.com), not copied][External image (uploads.tapatalk-cdn.com), not copied][External image (uploads.tapatalk-cdn.com), not copied][External image (uploads.tapatalk-cdn.com), not copied]
Sent from my Pixel XL using Tapatalk
Modified the router table fence today. The original hole was too big. I needed a way to close it off so the wood wouldn’t shift on me. Made a simple slide fence with some extra star knobs. Turned out pretty well. Still need to add a t track for a stop block. I didn’t have a long enough piece so that will have to wait. I’ll just use double sided tape for now. [External image (uploads.tapatalk-cdn.com), not copied][External image (uploads.tapatalk-cdn.com), not copied][External image (uploads.tapatalk-cdn.com), not copied][External image (uploads.tapatalk-cdn.com), not copied][External image (uploads.tapatalk-cdn.com), not copied][External image (uploads.tapatalk-cdn.com), not copied]
Sent from my Pixel XL using Tapatalk
Got the vise chop cut to final size. Need to bevel the chamfer the edges. Still waiting on the screw.
rrich1 wrote:
On 1/21/2017 at 1:30 PM, rrich1 said:
Figured I am going to be doing a few of these coming up and putting them into one thread might be a better idea.
So far to upgrade the shop…I mean garage I have built the flip top table stand and a clamp rack. The next projects is more storage, this time for the table saw. I got the idea from Ryan at shop built on YouTube. He built a storage unit into the wing of the table saw. This solves a lot of problems and keeps the necessary tools and accessories close by. Need to get to the gym today so I was only able to get all of the pieces rough cut except for the bottom.
The plan right now is to put it to the right of the steel extension wing. I’m hoping it won’t be too much weight for the bars. I will need to drill a few more holes into the steel I believe. [External image (uploads.tapatalk-cdn.com), not copied]
[External image (uploads.tapatalk-cdn.com), not copied]
Sent from my Pixel XL using Tapatalk
Thanks for sharing, just getting caught up on all the posts. Love seeing shop made projects.
WigWagWorkshop wrote:
2 minutes ago, WigWagWorkshop said:
Thanks for sharing, just getting caught up on all the posts. Love seeing shop made projects.
No problem.
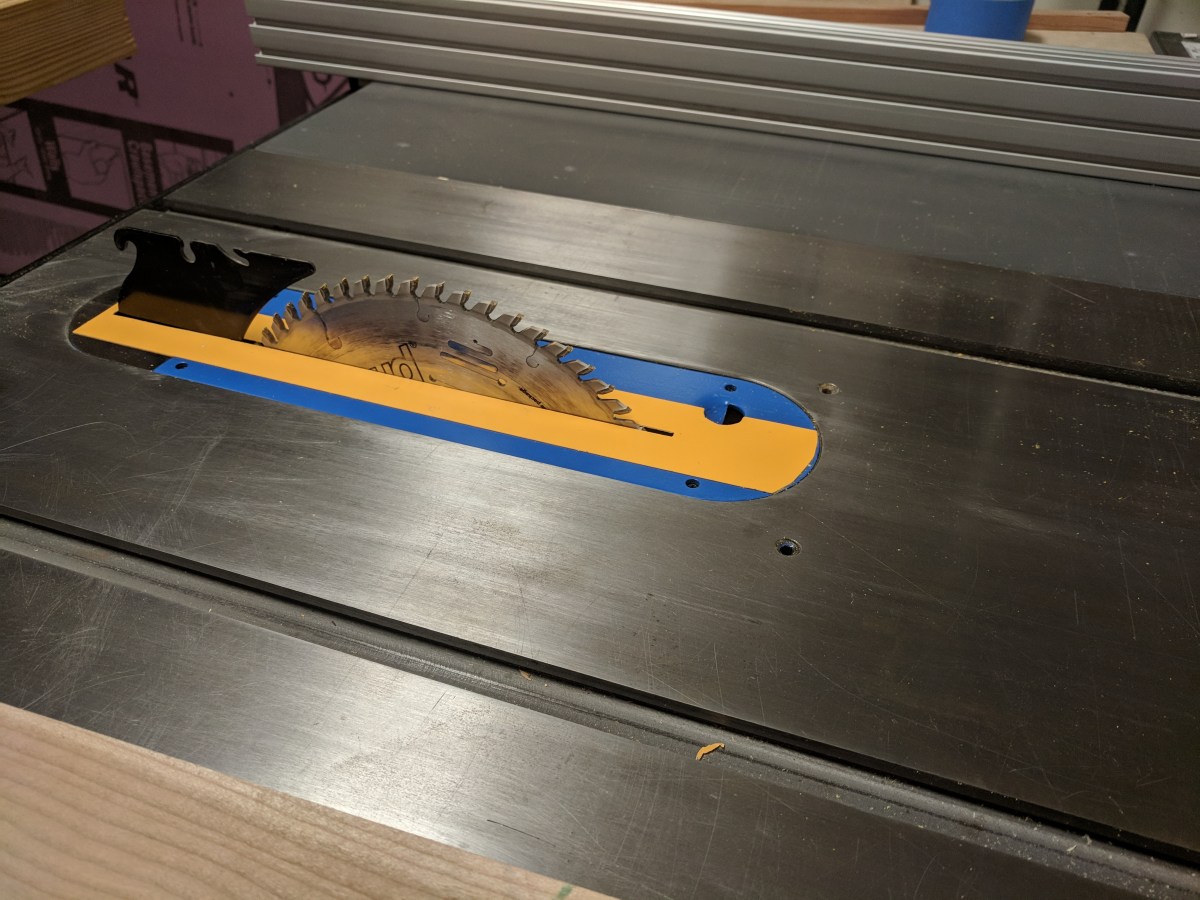
So the delta table saw has an incredibly thin throat plate. I purchased the fast cap zero clearance tape a while ago for the miter saw and it works great. I decided to try it on the table saw since the throat plate was never completely level with the table anyways. It works like a charm. Now I have a zero clearance insert. I rarely bevel so it shouldn’t be an issue.
rrich1 wrote:
7 minutes ago, rrich1 said:No problem.
So the delta table saw has an incredibly thin throat plate. I purchased the fast cap zero clearance tape a while ago for the miter saw and it works great. I decided to try it on the table saw since the throat plate was never completely level with the table anyways. It works like a charm. Now I have a zero clearance insert. I rarely bevel so it shouldn’t be an issue.
Right On, looks good! FastCap Screwed me over, with false advertising, and wanting me to purchase all kinds of add-ons on a product I purchased. I have no negative feelings with them anymore, I just won’t purchase any of their products.
WigWagWorkshop wrote:
Just now, WigWagWorkshop said:
Right On, looks good! FastCap Screwed me over, with false advertising, and wanting me to purchase all kinds of add-ons on a product I purchased. I have no negative feelings with them anymore, I just won’t purchase any of their products.
That’s a downer. I love their tape measures. Those and the tape are the only things of theirs I have.
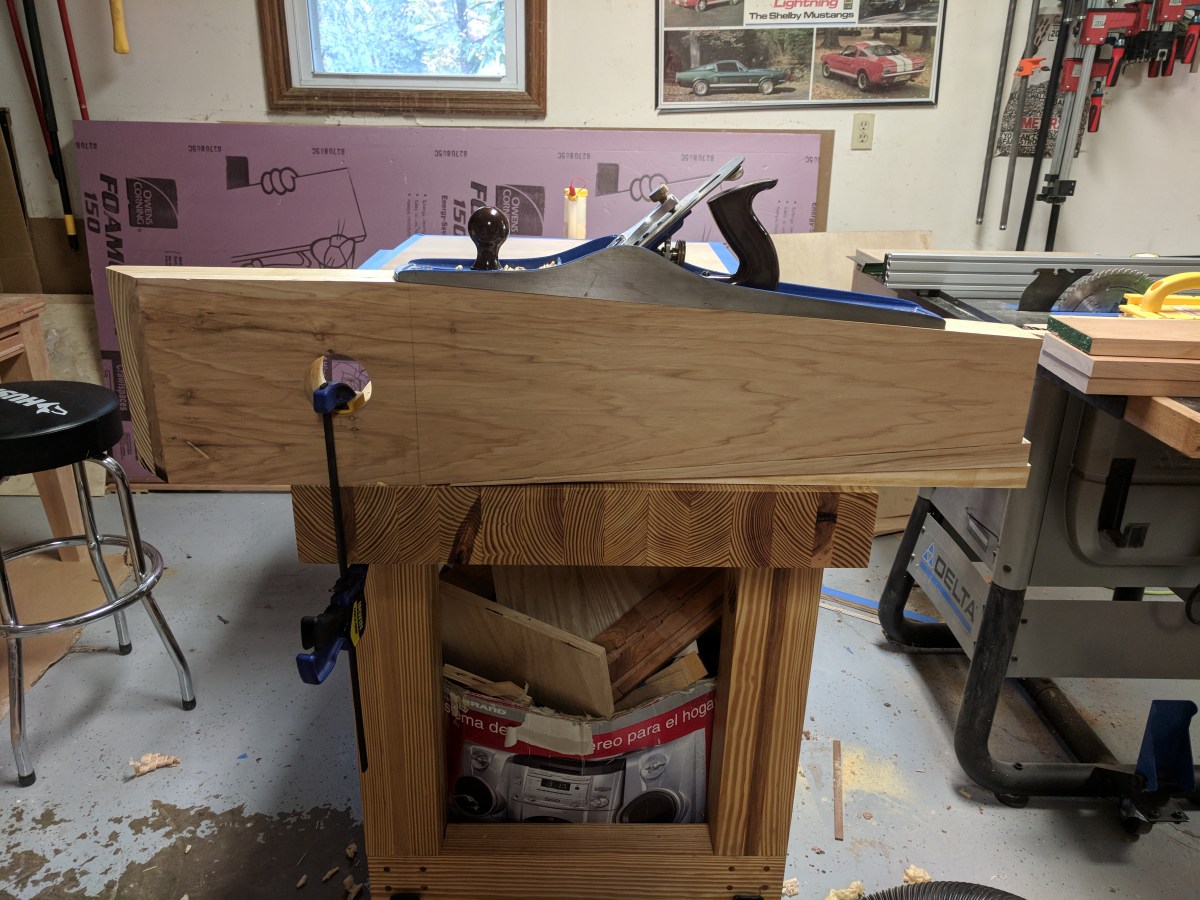
I dimensioned and cut the leg chop this week as well. I took the plane and chamfered the edges on the front to add a nice look. HOPEFULLY I will get the leg vise soon and I can finish this all up.
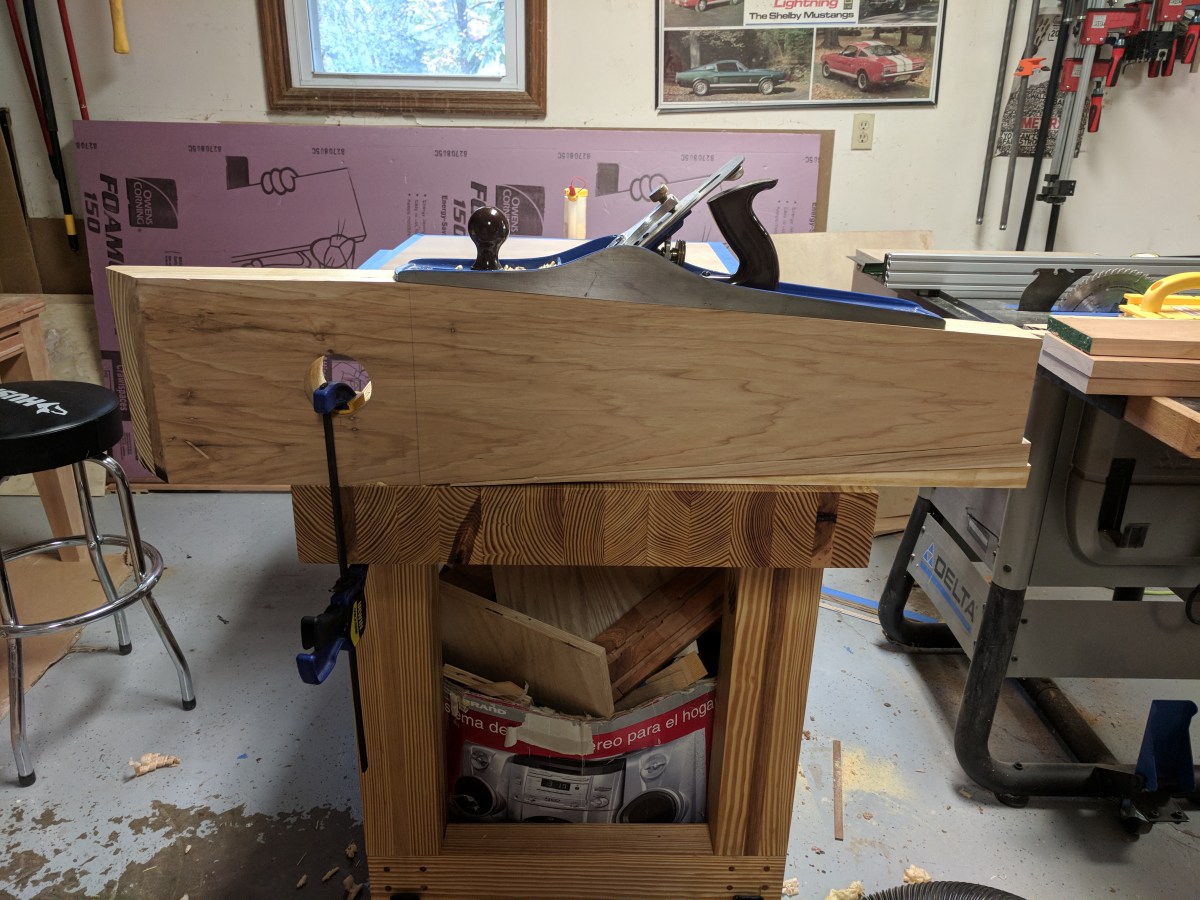
Vise screw is here! Hard maple screw and nut. My father in law turned it on a lathe and router at his work. Came out awesome. Turns pretty smooth now. Will get even better when I put some wax on it.
I laminated the hub with hickory and he cut it to a nice shape to mimick the Acer ferrous screw. I still need to drill a hole for the handle, make a garter for it, and finish it. I still have the gaming table curing the last coat of finish in the garage right now so no making saw dust at the moment. Maybe next week. We shall see. [External image (uploads.tapatalk-cdn.com), not copied][External image (uploads.tapatalk-cdn.com), not copied][External image (uploads.tapatalk-cdn.com), not copied][External image (uploads.tapatalk-cdn.com), not copied][External image (uploads.tapatalk-cdn.com), not copied][External image (uploads.tapatalk-cdn.com), not copied][External image (uploads.tapatalk-cdn.com), not copied][External image (uploads.tapatalk-cdn.com), not copied][External image (uploads.tapatalk-cdn.com), not copied]
Sent from my Pixel XL using Tapatalk
With the table done and gone and me now having my vise screw it is time to try and finish the bench. Between watching the kids today and housework, I was able to get some shop time in. I made the garter for the screw and got it attached. I also attached the nut to the leg as well. The nut was slightly bigger than the leg so I trimmed it to fit. I countersunk the screw holes with a forstner bit as the kreg screws were not long enough on their own. It came out really well.
I am waiting on a handle from Lee valley to get here so I will hold off on drilling the handle hole. I can tell it is not going to be fun to drill a large hole through all of this hickory for the handle.
Up next is trying to figure out a parallel guide system. I think I am just going to go old school with a guide and pin. I have an awesome piece of hickory that will work perfectly. I like the Jay Bates’ approach with the wedge but my bench is mobile and I don’t feel like having to deal with moving that as well.
I can’t wait to see this hickory with finish on it. It’s going to look amazing.
Also a helpful tip for today. I did this a week ago and did it again today. The piece of wood I used for the garter was too short to run through the planer on its own so I glued it to a longer piece of wood with CA glue. Worked perfectly and the larger piece takes any snipe if there is some. Just make sure to put it in the middle of the longer piece. [External image (uploads.tapatalk-cdn.com), not copied][External image (uploads.tapatalk-cdn.com), not copied][External image (uploads.tapatalk-cdn.com), not copied][External image (uploads.tapatalk-cdn.com), not copied][External image (uploads.tapatalk-cdn.com), not copied][External image (uploads.tapatalk-cdn.com), not copied]
Sent from my Pixel XL using Tapatalk
Built a tapering/straight line jig for my microjig dovetail clamps. Simple build that I’m sure will get some good use out of. [External image (uploads.tapatalk-cdn.com), not copied]
Sent from my Pixel XL using Tapatalk
Well that was terrifying! Hole is drilled. Some resistance to it right now which is fine. [External image (uploads.tapatalk-cdn.com), not copied]
Sent from my Pixel XL using Tapatalk
[External image (uploads.tapatalk-cdn.com), not copied]
Got the mortise mostly cut out. Working on chiseling it out and then it is on to fitting the board to the mortise. [External image (uploads.tapatalk-cdn.com), not copied][External image (uploads.tapatalk-cdn.com), not copied]
Sent from my Pixel XL using Tapatalk
Got the mortise all cut out and parallel guide cut to fit. I routed out the back of the leg chop and made a tenon on the parallel guide to go into the chop. The test piece was a lot more snug than the guide was after it was cut. Oh well. It will be fine.
The grain is going to look great with finish on it. Can’t wait to see it all done. Now I need to mark the holes for the pin to go into.[External image (uploads.tapatalk-cdn.com), not copied][External image (uploads.tapatalk-cdn.com), not copied][External image (uploads.tapatalk-cdn.com), not copied][External image (uploads.tapatalk-cdn.com), not copied]
Sent from my Pixel XL using Tapatalk
Vise is almost done. Got the guide holes drilled today and the rear shaped. Rounded over all the edges and sanded to 240.
The only thing left before glue up is to drill 2 holes for dowels to help pin the guide into the chop. I don’t have any cherry dowels left so that won’t happen until Monday unfortunately.
I oiled the vise screw and it glides smoother now. Once it is all in I will put some wax on it.
I cannot wait to get out on all of this hickory. It is going to look so good. [External image (uploads.tapatalk-cdn.com), not copied][External image (uploads.tapatalk-cdn.com), not copied][External image (uploads.tapatalk-cdn.com), not copied]
Sent from my Pixel XL using Tapatalk
Sanded some before I had to go to work today. Also got a few pieces coated in oil. [External image (uploads.tapatalk-cdn.com), not copied][External image (uploads.tapatalk-cdn.com), not copied][External image (uploads.tapatalk-cdn.com), not copied][External image (uploads.tapatalk-cdn.com), not copied][External image (uploads.tapatalk-cdn.com), not copied]
Sent from my Pixel XL using Tapatalk