
Archived from the Tools In Action forum (Power Tools). This thread is read-only.
hello all! i think this is pretty easy stuff for most of you, but i am having a hard time understanding the diagram shown to switch my powermatic artisan table saw (model 63) from 110 to 220. i got the new power cable with male and female connections done, my question is regarding the actual wiring in the motor. it seems pretty straight forward, but the diagram says to “tare” 2 of the wires that needee to be disconnected, but i simply don’t know what “tare” means! i think i am supposed to tape and isolate them, but do i tape them together? separate? I’d greatly appreciate any help! thanks! photos attached of the wires exposed, and the diagram on the motor
thanks!
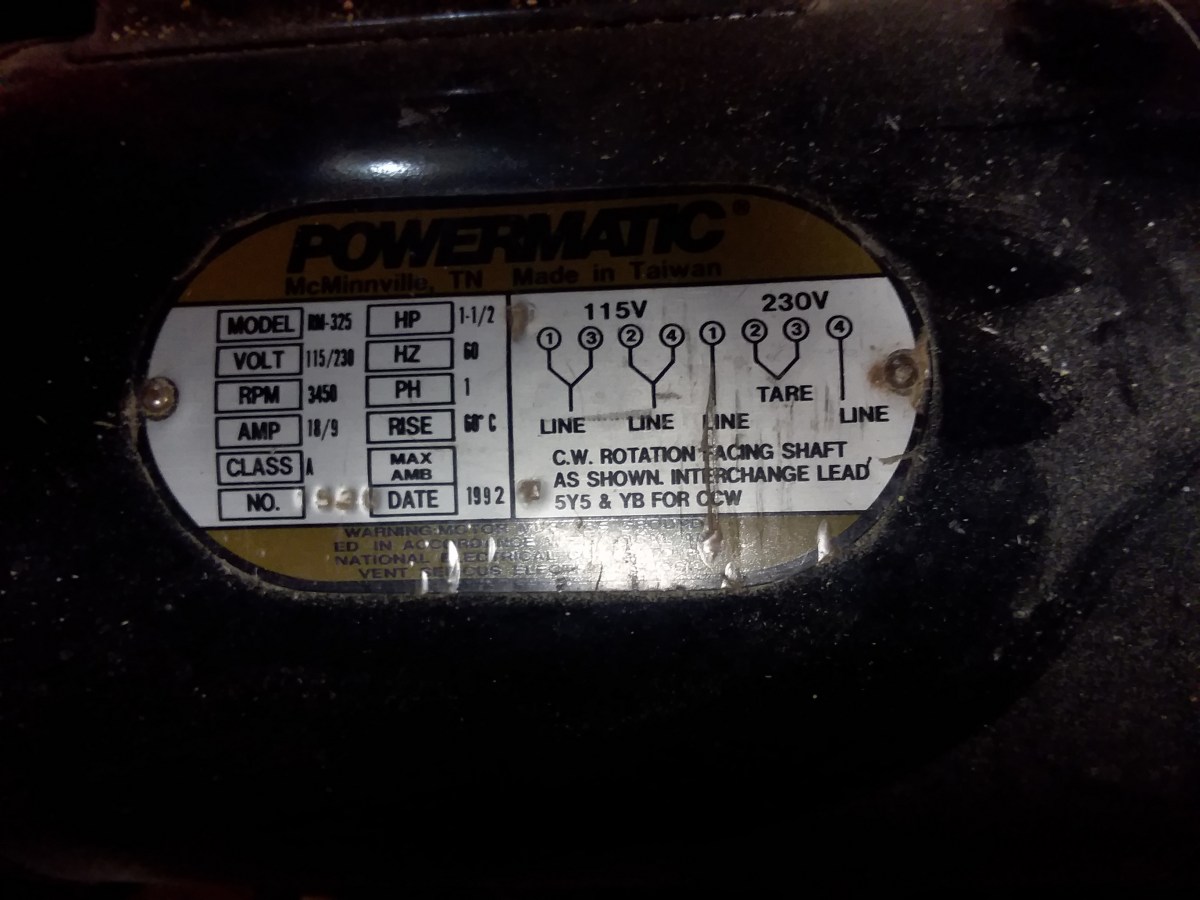
That is clearly a misprint. It should say TAPE. They want you to tie and and insulate those two wires together. I prefer a wire nut to tape. To clarify what is going on, draw the 120 and 240 wiring diagrams on paper. Now add a coil between terminals 1 & 2 and another between 3&4. Those are the two windings inside the motor, that the numbered wires go to. On 120 the two windings are in parallel so there is 120 across both of them. On 240 the windings are in series, so there is still 120 on each winding.
Sent from my SM-G900V using Tapatalk
Mycrossover is correct.
Snip off the terminals on wires 2 & 3, strip off the insulation at the end, twist together and use a wire nut.
It is acceptable practice to manually color the end of white wire insulation carrying line voltage to red, blue or black. I use a marker pen for that purpose.