Don”t you hate when you cant fit your drill in a tight area and the smaller drills just wont cut it. Well Milwaukee has something for you, the 2615-21 Right Angle Drill. It packs a lot of power, technology and can fit into the tightest of spaces. It includes an innovative electronic clutch which delivers precise torque to your project.
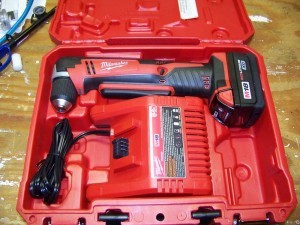
Milwaukee M18 Right Angle Drill. The model number of this kit is 2615-21.
Specifications of the Angle Drill
- 125 in-lbs of torque
- 3/8” single sleeve chuck
- 0-1,500 RPM
- 11 + 1 Clutch Settings
- 11.25” for tool height
- Head length 3.75”
- Weight – 4.25 lbs.
Features
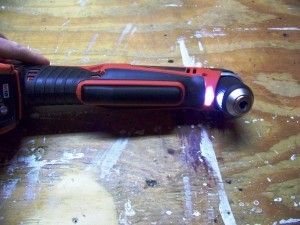
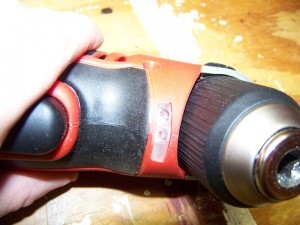
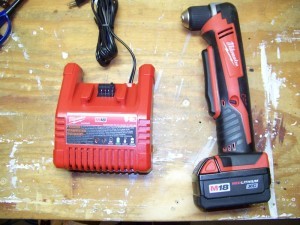
As stated this is the right angle drill kit model number 2615-21. In the kit it comes obviously the drill which is model 2615-20, a 1 hour charger, 1 XC Lithium-ion battery and a carrying case. On the front of the drill there is a nice LED work light that helps the user see what they are doing in dark locations. Sometimes we have seen LED lights that do not do much except show a shadow, so we were extremely please how bight and efficient this light is, partly because of the small head on the drill. Another feature is the red LED on the front of the drill. When your drill is maxed out or clutched out, a red led light will flash to let you know that this event happened.
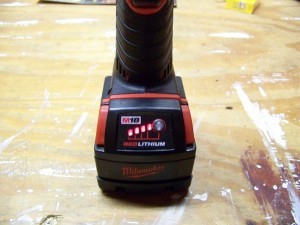
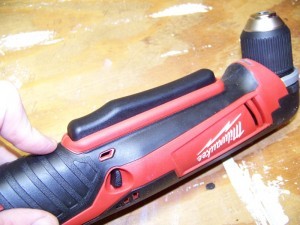
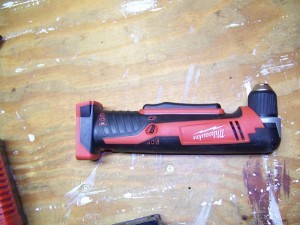
The system is equipped with an electronic clutch which provides 11 different settings and one drill mode. This clutch operates the 3/8” single sleeve ratcheting head chuck. The drill is powered by 1 18V Lithium-ion XC Redlithium battery. The battery slides onto the bottom of the drill as you can see in the pictures.
Operation & Handling
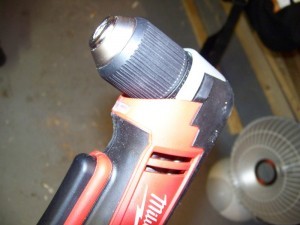
First looking at this drill you would think the balance would not be great. Once you pick up the drill, the first thing we noticed was that the balance of the tool is great, it just feels right in your hand. Now thinking about it and the design of the tool, it’s basically a long rod, so we guess the balance should be good compared to a standard drill. The over molded grip helps provide extra grip control, which is always a key when working in small areas. Speaking of small areas, the head on the drill is only 3.75” long so you are able to get into tighter spots. Also the length of the tool is shorter than most coming in at 11.25”. The overall weight of the tool isn’t bad either weighing only 4.25 lbs. The grip, the head length, tool length and weight makes this a great drill to have on hand when you need to get into tight spots. We found the drill very easy to control and maneuver in almost any circumstance.
As you know working in tight spots can be very challenging, since there is not a lot of room for the tool and your hand. The paddle switch is a great design for this tool. The paddle switch is what operates the drill to start the drill spinning. The paddle switch is nice and long and we found it very easy to control the speed whether or not we used the top, middle or bottom of the paddle switch to operate the drill. We could be very precise in matching the speed to our work and also keeping a steady speed at all times. This is the beauty of the paddle switch since when we are working in tighter spots, sometimes we cannot always grip a tool the right way and even sometimes need to use two hands. With the placement of the switch, this makes working in tighter spots much easier.
Performance
All in all we found the performance of the drill just as good as the overall design of the tool. We had the drill for a week and put it to good use. We even lent it out for a couple of days, we gave the drill to our friend down at the marina. With summer coming up, a lot of people are getting their boats ready for summer and what better place to use this drill in tight spots then a tight engine compartment of a boat. We tried to get some good video of this, but it’s hard to get a good camera angle when Ty’s arm is hiding the work. Now the drill is not an impact drill, but we were able to remove some nuts and do a lot of tightening of screws and nuts.
We had another day we gave it to Bill to video him drilling some holes in joists for wiring. Bill know his tools, but Bill doesn’t know technology. After he came back all proud of his work and told us he had some great videos, we had to take a look. We were going to show you the videos, but I am sure you didn’t want to see a video of his thumb in front of the camera lens. We never did get a good shot, but we can pass along that Bill had a lot of fun using this tool and was happy for once not having to drag around his corded angle drill for the day. The only suggestion he would make is if you are buying this tool, get one with an extra battery so there is no down time.
Dan wanted to use the tool in action and show me under the hood of my GMC truck taking off bolts in tight spots. I am not a mechanic, so I know that whatever bolts I take off for testing purposes would probably be the wrong bolts and end up doing damage to my truck, so I politely passed on this incredible opportunity Dan raised. After Dan was persistent that we work on my truck, even though it wasn’t broken, I told him that it would be hard to film and show this and we should use his F150 instead. Just at that time I made my suggestion of using his truck instead, he came up with a great idea to show the tool in action on our makeshift wall. He stated this would be better suited, so the users can actually see what is happening and how the tool worked.
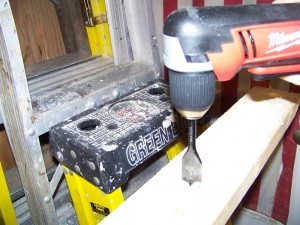
In the video below we wanted to show you the features of the tool and a little bit of the drill in action. We used our makeshift wall and videotaped it ourselves, is it still called videotaping? That way we know we would be able to see the work, without having to look at an arm and thumb. The only problem is you have to listen to us talk. In all seriousness, this drill has a wide use of applications it can be used for. We had a lot of fun testing it and would also like to say almost any situation. As you can see by going through the 2×4, it fly’s through without any problems. There is more than enough room to get in-between joist and studs to get work done. The drill has good power and torque and over all very impressed with Milwaukee’s Right Angle Cordless Drill.
Conclusion
All we can say is the Milwaukee Right Angle Drill is awesome. The balance of the tool is great and it’s very easy to work with. Enough power for even the most stubborn jobs. Surprisingly enough the LED light in the front is very bright and lights up your work area such as working under a car. The paddle switch is long enough and designed properly that a user can operate the switch in any positions. All and all this is a great drill. It might not be one of those tools we use all the time, but when you need to get into tight spots, this drill sure will come in handy.


I don’t know why I’m commenting almost two years later, but this drill leaves a lot to be desired – mainly torque. When a standard drill won’t fit, you’re at the mercy of your right angle drill when you try to get the job done. This thing has less than 20% of the torque of my hammerdrill, and stalls every time using a self-feed auger bit larger than 5/8″. I’ve used it with spade bits up 1″, but spade bits are slow in comparison to the self-feeders I usually use.
My 10-year-old DeWalt 18V right angle drill blows this thing away, with 0-500/0-1500 RPM and up to 310 in-lbs of torque. If Milwaukee offer a user-selectable lower speed range, or just a single (lower) speed range with more torque (like 750 RPM and 250 in-lbs of torque, or better yet, 500 RPM and 375 in-lbs) they’d have a respectable drill on their hands.
I’m really interested in the Milwaukee M18 Right Angle Drill 2615-21! I’ve been using a similar tool for my DIY projects and it’s been a lifesaver. The ease of use and versatility of this drill is incredible. I’m impressed by the amount of power it packs into such a small package. Definitely worth considering for anyone looking for a reliable and compact drill solution!
I really appreciate the detailed review of the Milwaukee M18 Right Angle Drill 2615-21. I’ve been looking for a reliable and powerful right angle drill for my upcoming project and this review has given me the confidence to purchase this tool. The pictures and diagrams also helped me understand the features and usage of the drill. Great job!