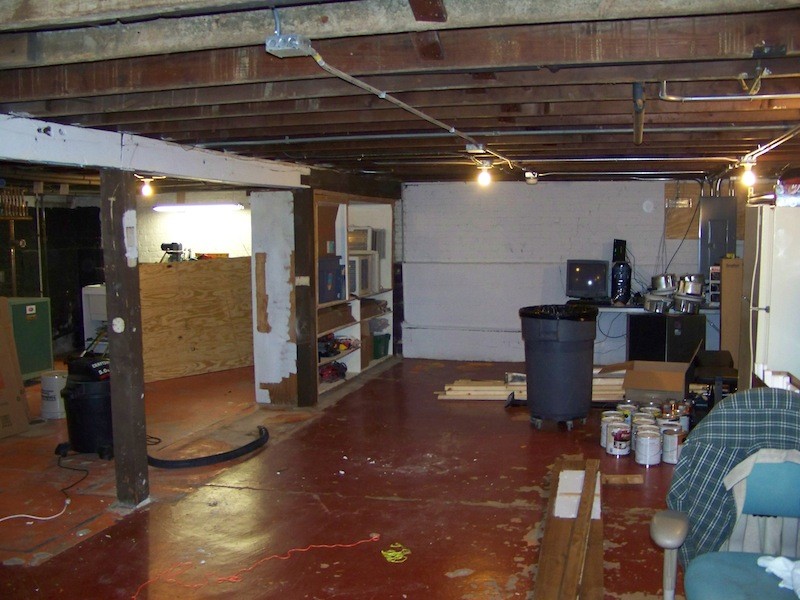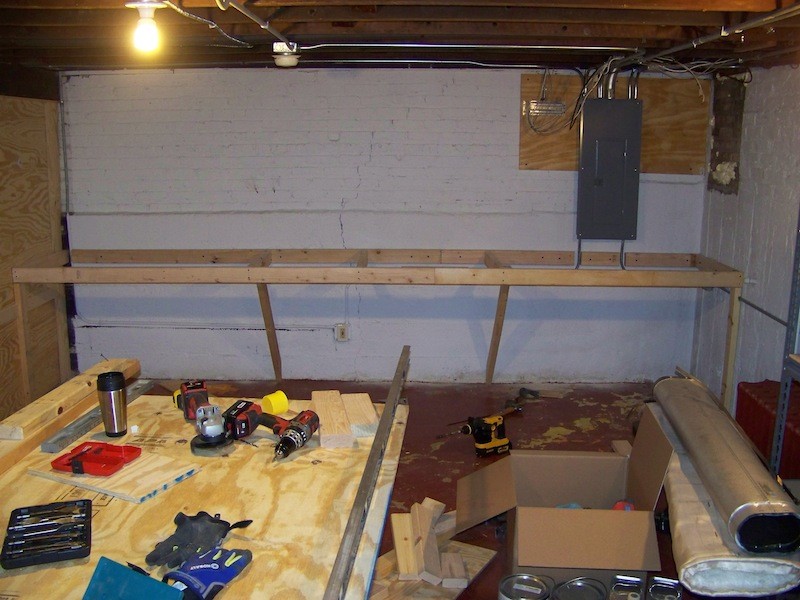

Tools in Action has been doing a lot of different projects lately and we have one more to add to our list. We are going to take an unfinished basement, visit Lowes and turn it into a kid’s playroom for under $750. Now before we get started there are a couple things you have to remember. When we are done, it is still considered an unfinished basement, at least by our standards. The basement still gets leaks, not as much. Since it leaks, we didn’t bother putting up a wall to close off washer, dryer, water heater and boiler. If we would have finished the basement, then a wall would have been put up to block those items. Also, the house was built in 1924, so the ceilings are very low. Almost impossible to finish and have a ceiling, yet still be able to walk. If we finished the basement with a ceiling, we would have to crawl around. Last item is the house is only 1100 square feet. The house has four people living in it, so storage is not prime for this house. So we still have to store some things downstairs, so technically it is not a complete playroom. However, this project does allow for ample room for the kids to throw balls, ride their big wheels and just have some fun. Plus it allows us to take most of the toys from upstairs and store them in the basement.
Our goal of this project is to please everyone in the house, yeah right like that will happen. Personally I wanted to use the basement as a workshop. My wife had other ideas. Guess who won? With that said our goal was to first make enough room for our two boys to play and have fun. We wanted a place where we didn’t care if they tear it up, a place to throw balls and ride their toys around. Second, we wanted to have less clutter. Everything has to have a place as my wife puts it. I was last on the list. I wanted more room to store my tools, but a place where the kids wouldn’t be able to access them. Our main goal was to stay under $750. The $750 is for materials only and doesn’t figure in our time. The $750 includes everything from the paint, wood, rugs and other little items to complete the project. Also we already had the tools to complete the job.
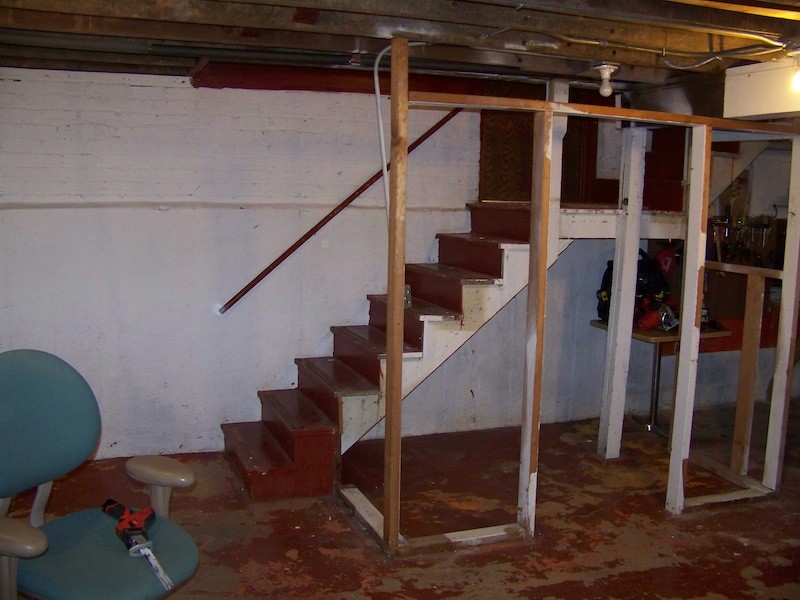
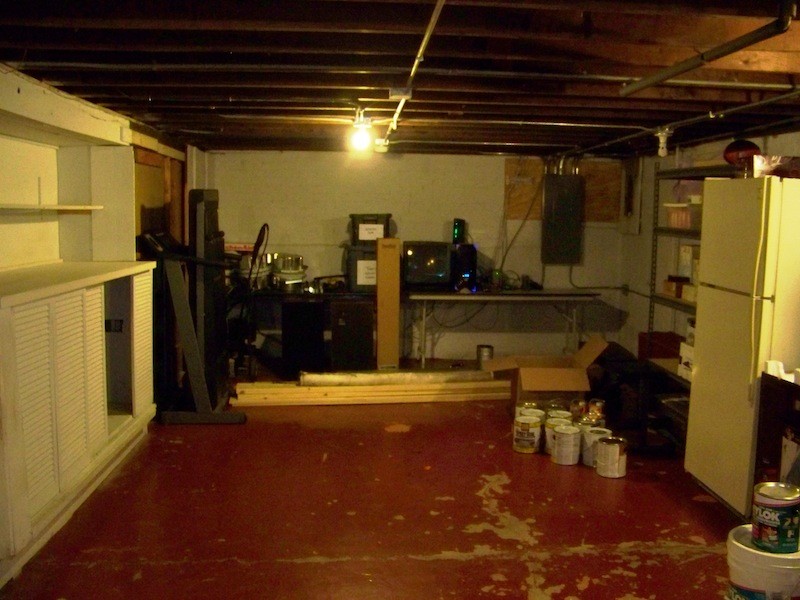
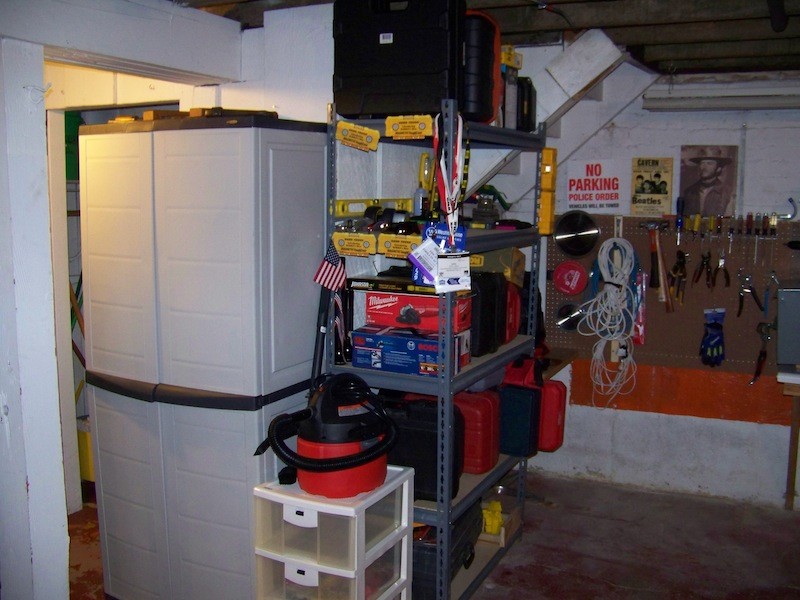
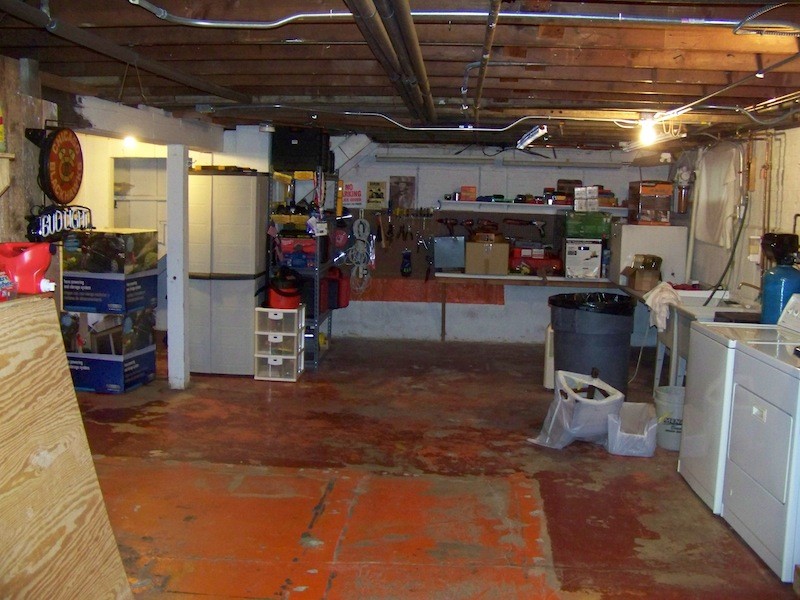
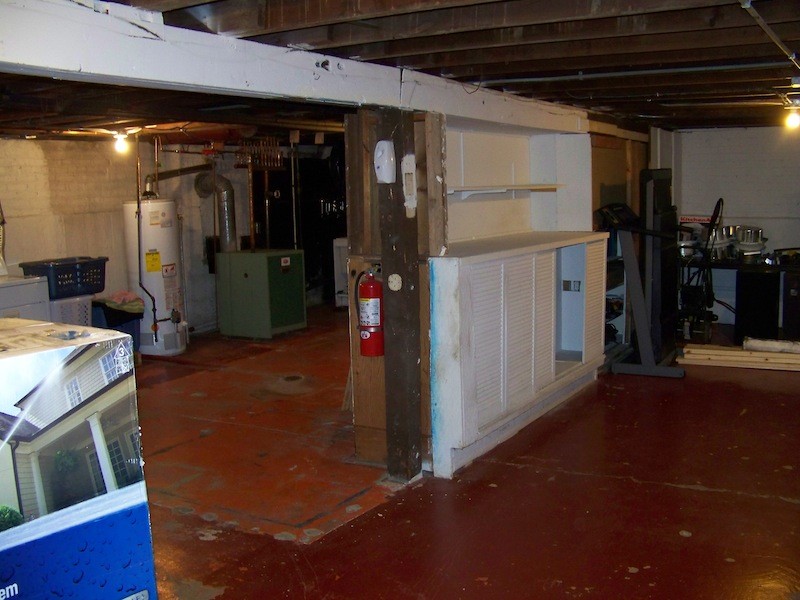
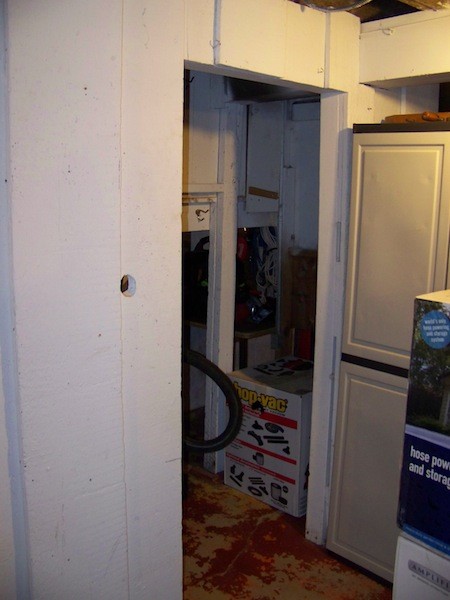
A Couple Before Pictures


Tear Down
The house was built in 1924, so the basement has seen a lot over the years. Different rooms, different walls, etc. We wanted to make the middle of the basement open and have all the junk around the walls. So the first thing we did was tear down the center shelves. One thing you have to remember is when you tear down any wall or anything, just make sure it is not a load bearing wall, a wall that supports part of the house. The part we tore down was not load bearing, but it was attached to beams that were part of a load bearing structure.
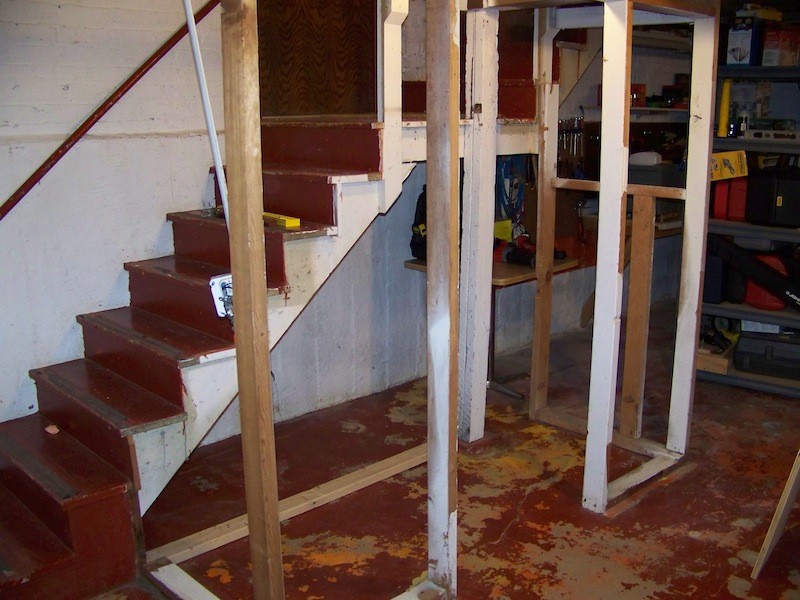
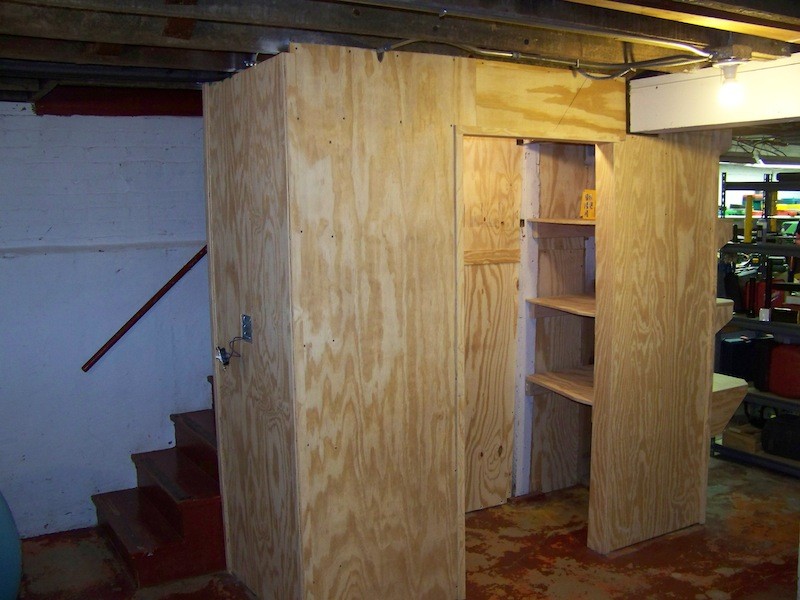
The second part we tore down was a small closet. The closet had old wood that had holes and was basically 1×12″ with overlap. Just didn’t look good, so I tore that down, but left the frame. I figured anything I could save, why not. Why spend the extra time and money to redo something that doesn’t need it.
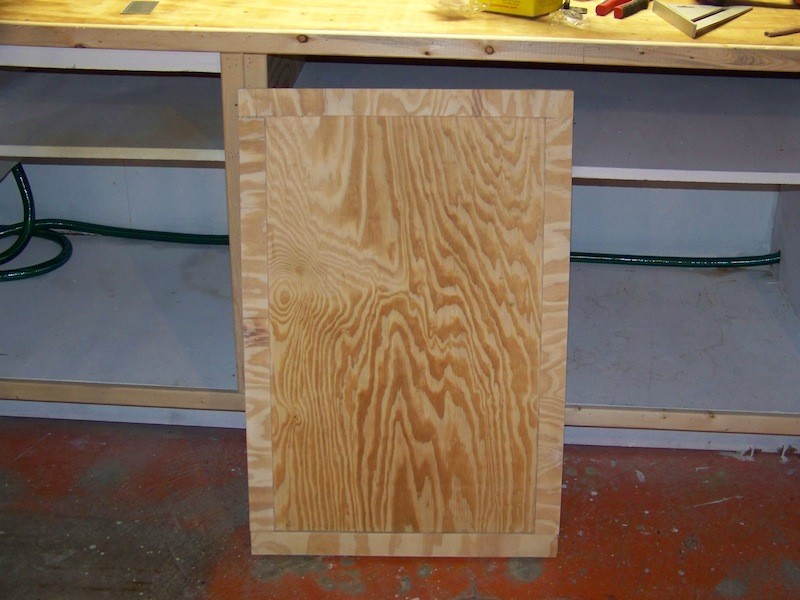
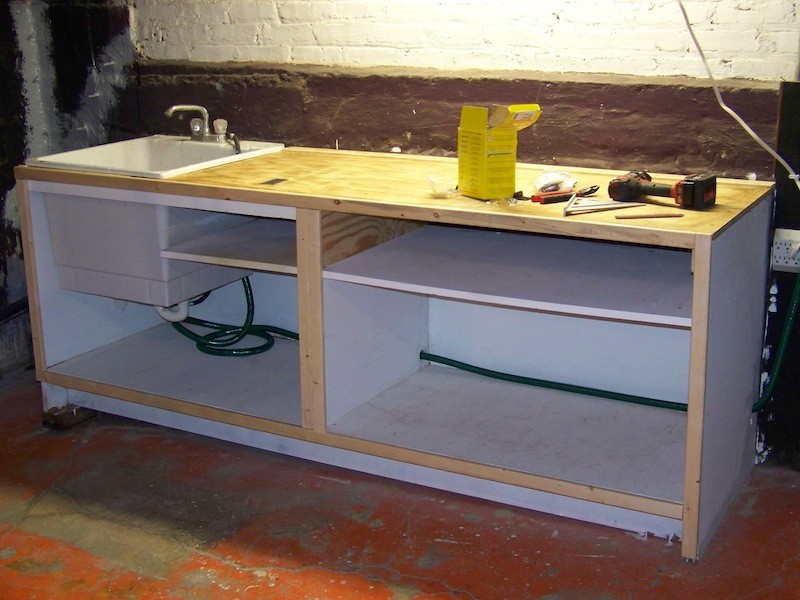
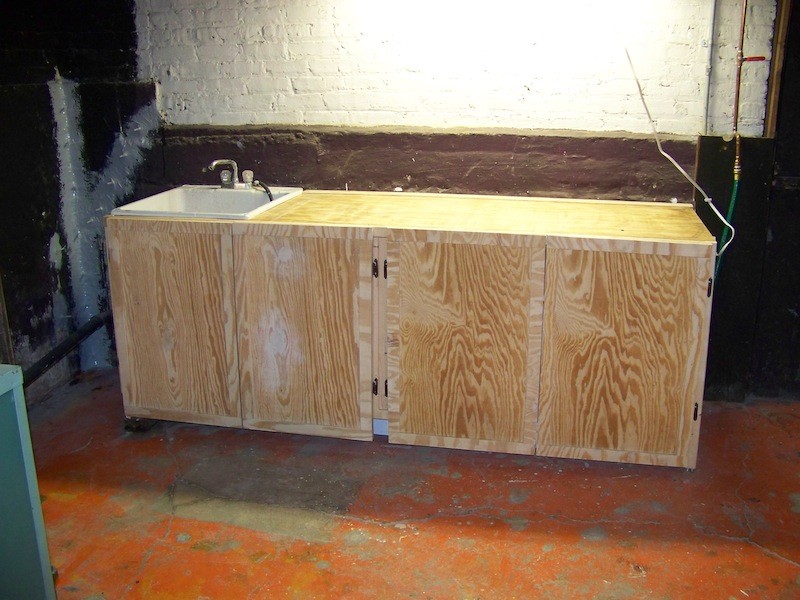
The last item was an old shelf that we use to keep paint and other supplies in. The shelf was in okay shape, so I kept the frame and replaced the top. Since my kids were down there I knew I also wanted doors on the cabinet. They are at the age where they are too old to eat paint and too young to sniff it, at least I hope. But they are at the age where they might think it is fun opening a paint can and spreading it all over the basement. So we figured out of sight, out of mind.
Tear down was actually pretty fun. I think the only one who didn’t like it was my garbage guy.
Shopping
We actually did the initial shopping first to see if this was something we wanted to pursue. We ended doing all our shopping at our local Lowe’s. Well not really local, but I should say our closest Lowe’s. We were lucky because we are just turning an unfinished basement into a neater unfinished basement. So we didn’t have to worry about a lot of expenses like drywall, carpet, etc. We knew the biggest expenses would be paint and wood. The only other things we would have to buy is hardware for the cabinet doors, screens to build screens for the windows, some concrete patch and rugs, etc. to finish the project. We also had to buy a little odds and ends. Before starting this project, I have to say I really didn’t know much about paint, but I was lucky the guy at Lowe’s did. He was able to point us in the right direction and give us good guidance.
Rebuilding
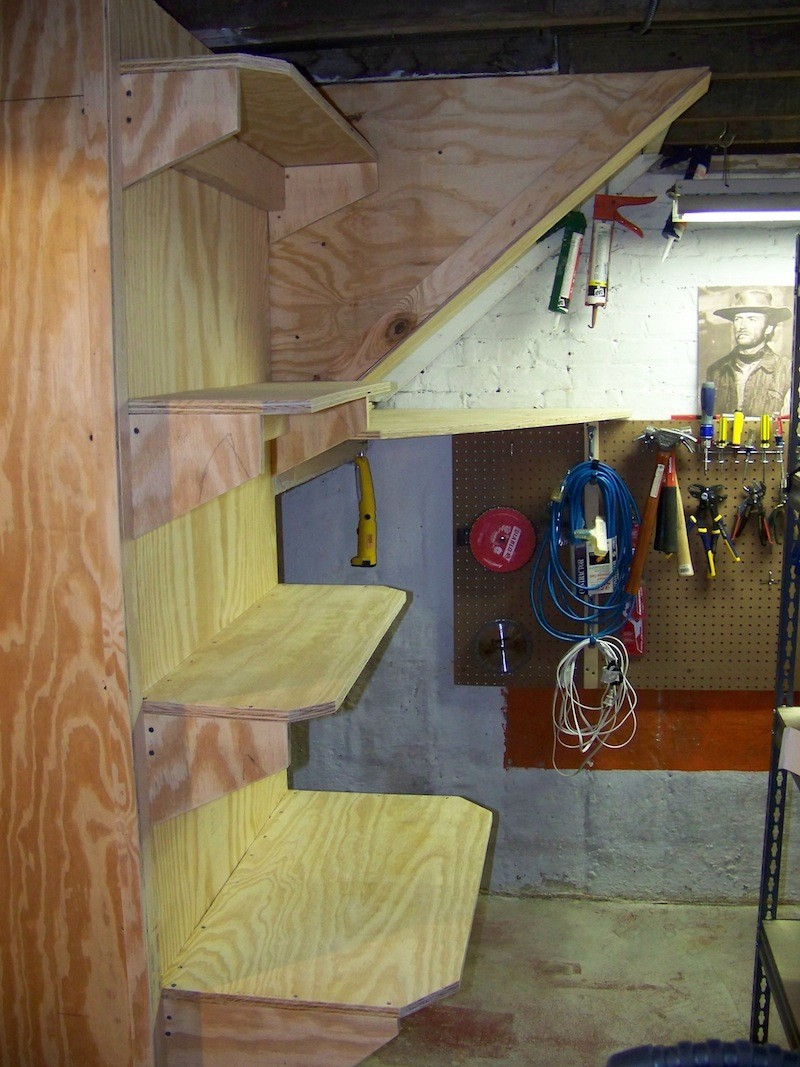
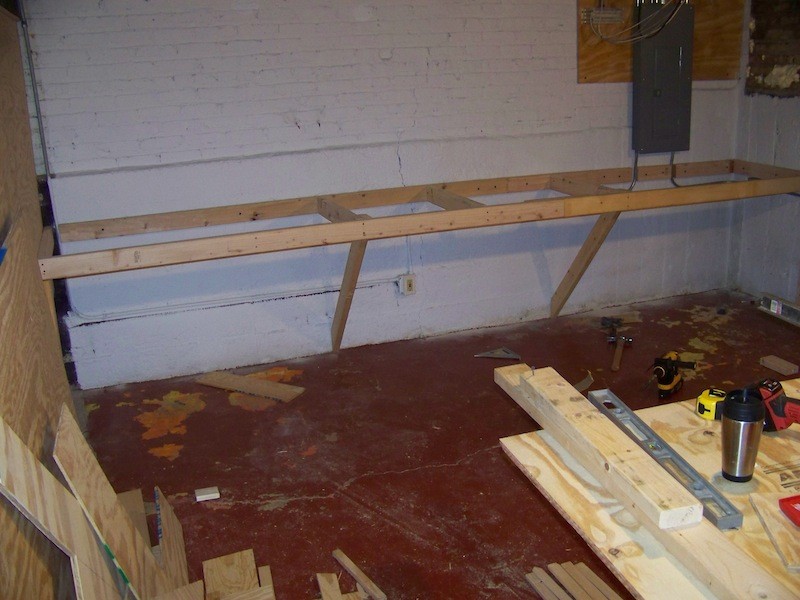
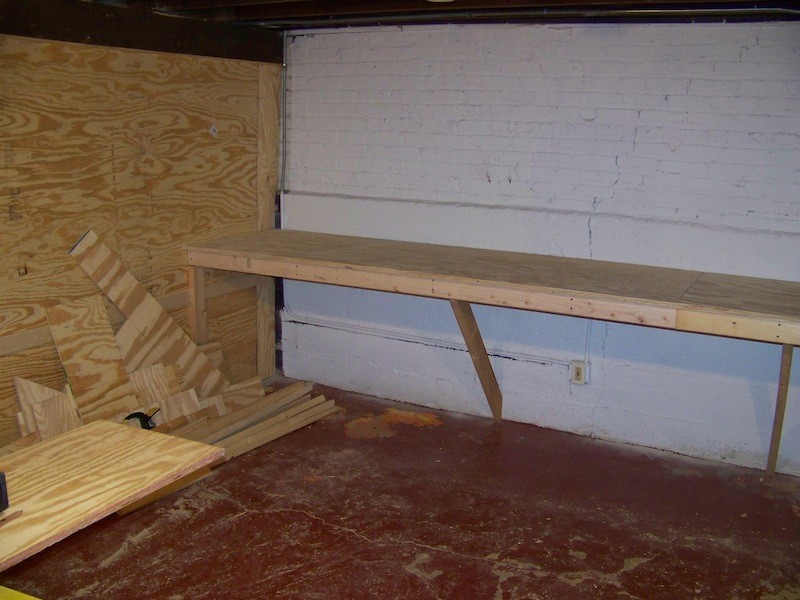
For me rebuilding is the fun part. I hate painting, but I love building. For rebuilding, the main things I wanted to focus on was the floor, rebuilding the closet and the cabinet. I also wanted a nice strong shelf to run the length of the back wall. This way I could put my kids big toys under and other stuff on top.
The big thing I learned was planning is key. I usually always find this out later as I forget this very easily. I was so excited about building everything, I forgot about the concrete work. So I built everything first, then did the concrete last. In reality if your doing any grinding, always try to do that first because of the dust.
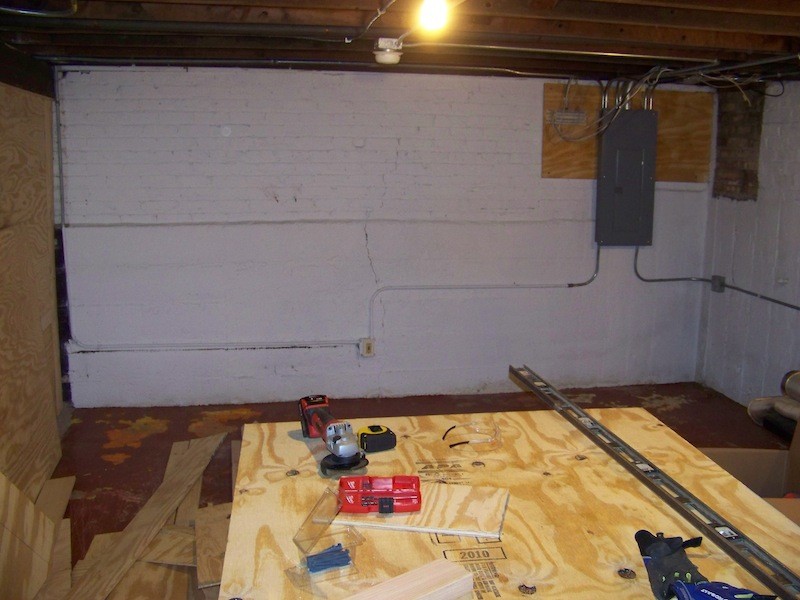
Concrete Work
I needed to do three things to the floor. Fill in all the holes left behind from fasteners that were used over the years for different walls, etc. Also had to fill in all the cracks. The biggest thing was we had a crack that ran about half way through the basement. One side of the crack was about a 1/4 to 1/2″ taller than the other side. I wanted to make this even and fill in the gap.
There are numerous ways to complete these three tasks, but I just used premixed concrete patch for the holes since there were not many. For the cracks I wasn’t sure if they were still moving or what was happening, so I had to find a product that could be paintable and flexible. I found some different things that would work, but decided to use a product that I could use in a caulk gun to make my life easier. For the large crack I used a grinder with a diamond cup blade. These tend to be expensive, anywhere from $50 up. If you are only going to use it once, you can find a cheap one for around $50. Personally I like the Hilti cup the best, but that is very expensive and not designed for the home owner. When you start grinding you can do a dry grinding or wet grinding. Just make sure you read your grinder owners manual to see what you can use. As you can expect, dry grinding is very messy and puts a lot in the air. Wet grinding keeps the dust down. I was lucky and had a floor drain, so I let the hose run and was able to wet grind. However you will still get dust.
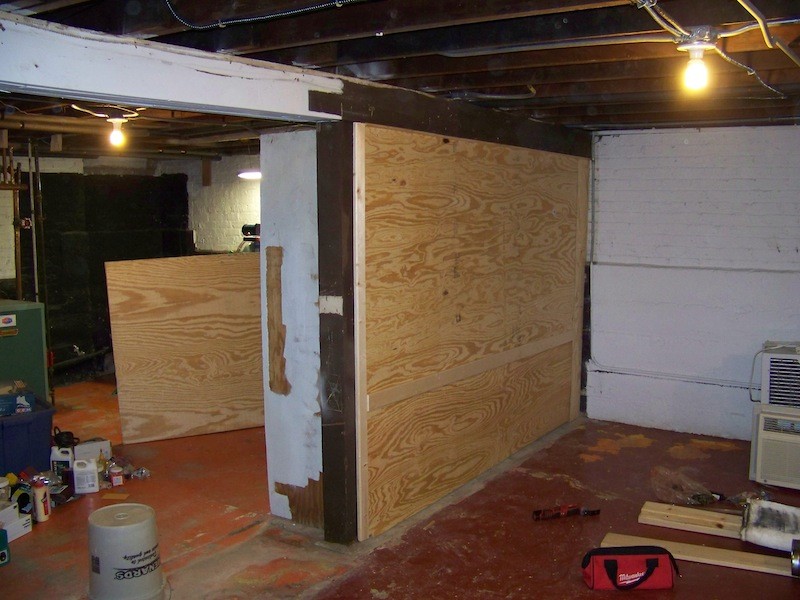
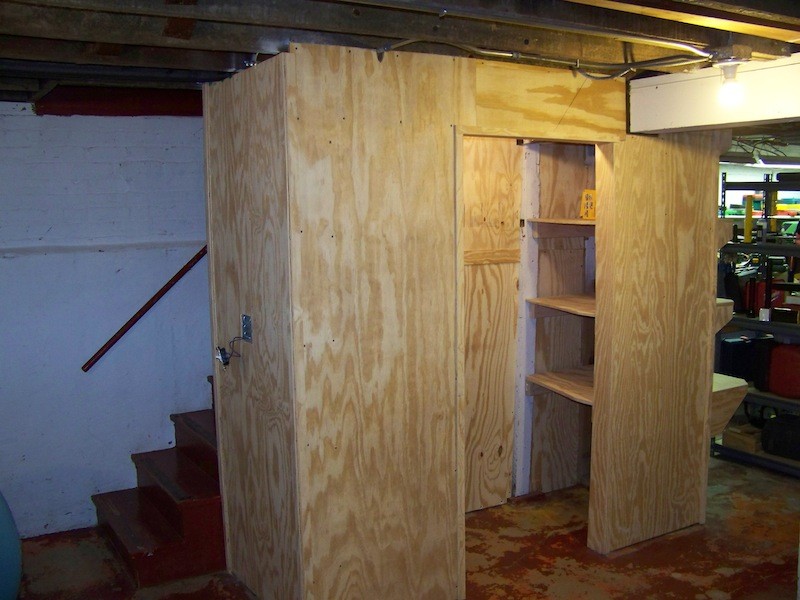
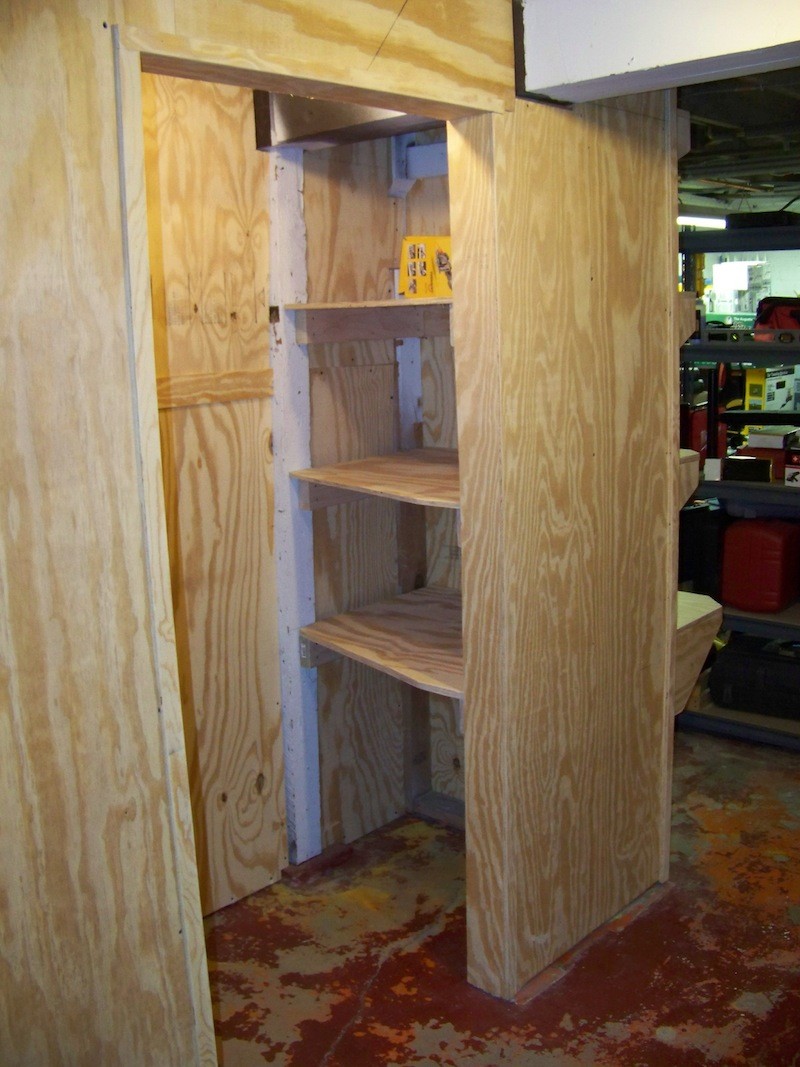
Building Closet
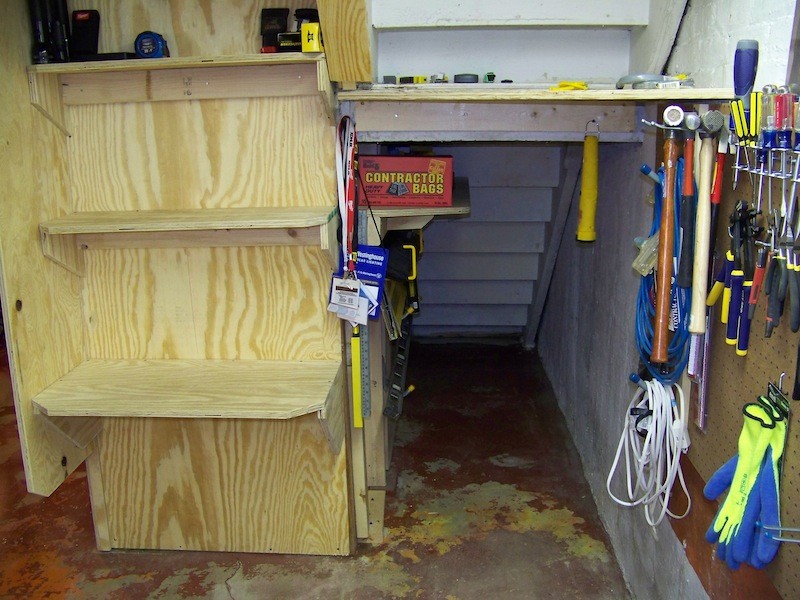
I left the frame in place because everything was sturdy. I did have to add a couple studs, but other than that it was in place. I ended up using 3/4″ plywood for all the walls because I knew my kids and myself were going to be shooting hockey pucks in the basement, so I wanted something that would stand up. You can get away with 1/2″ which will save you some money. Again the basement is unfinished, so if the area was nicer I would have done the shelving different. My main goal was to maximize storage space for all my tools. I really didn’t want to paint this closet because I like the wood look, but again it was up to my wife and I lost.
Building Shelving
Along the back wall I wanted a sturdy table where I could put my kids big toys under and if needed store some heavy stuff on the shelf. I built the frame out of 2×4 and the top out of 3/4″ plywood. I really didn’t want any legs on the table so I built two end legs that were on the end walls for that support. In the middle, I built it like a triangle. I had a 2×4 from the top of the bench leading towards the wall. A 2×4 on its side pushing against a wall is very strong. Not sure the actual weight load, but it is probably one of the strongest designs.
For our next series we will get into painting. Why we picked the colors and what type of paint we used. Well to sum it up, we picked the colors because that is what my wife told me to get. We picked that paint because that is what the guy at Lowe’s said would be best. So basically I really didn’t have a choice. Okay lets get into the painting.
In Progress