
We’re trying something new in the TIA Test Kitchen. We’re smoking a turkey with a Z Grills Pellet Grill and we’re taking you along for the ride. We’re also sharing our process so you can also learn how to smoke a turkey with a pellet grill. This is a fun spin on the standard Thanksgiving bird that adds a new flavor without tossing aside tradition (it also pairs great with the Thanksgiving charcuterie board we taught you how to make earlier this week).
So, follow along with us for this process.
FYI: You need to prep your turkey a few days beforehand. If you plan to smoke your turkey with a pellet grill, give yourself enough time.
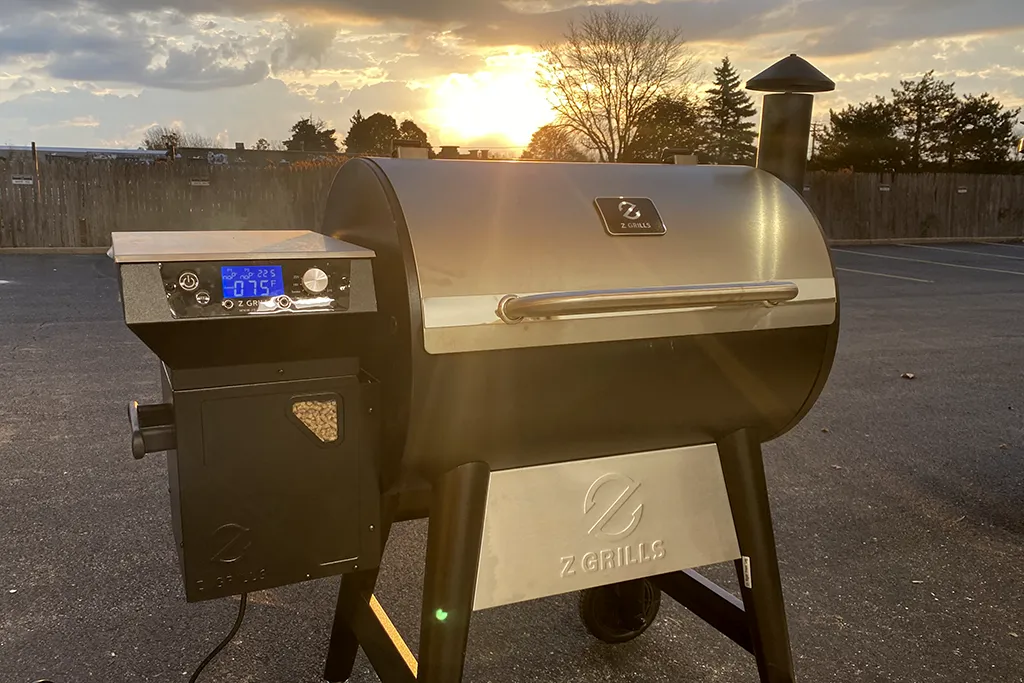
For our smoked turkey we are using the Z Grills “Backyard Warrior” Pellet Grill & Smoker. You could use another barrel-style pellet grill. However, this pellet grill has a lot of great technical features that streamlined the process for us. I even recommend this product and process to a beginner just learning how to grill and smoke.
With that in mind, let’s learn how to smoke a turkey with a pellet grill.
How to Smoke a Turkey Guide
- Our Process & Supplies
- Pellet Grill vs Box Smoker
- How to Brine a Turkey
- How to Smoke a Turkey
- Carving & Taste Test
- BONUS: Smoky Turkey Gravy
- Pros & Cons
- Final Review
Our Process for Smoking a Turkey with a Pellet Grill
Our process was broken into three major steps: brine, smoke, and serve. Each step is important, but you can’t do any of it without the right equipment.
We compiled a list of all the equipment and ingredients we used for this process, plus some links to simplify your shopping.
You Will Need:
- Pellet Grill (Z Grills, The Home Depot, ACE Hardware, Amazon)
- Pellets, preferably turkey pellets (ACE Hardware, Amazon)
- 14-16 lbs. turkey
- 2 cups Kosher or sea salt
- 2 gallons of water
- Large stock pot
- Turkey seasonings (we used, salt, pepper, and Blue Hog Dry Rub)
- Turkey roasting pan
- Extra large cutting board with “juice well”
- Turkey Carving Set
- Optional: garlic, onions, herbs, peppercorns, citrus, Worcestershire sauce, sugar, or dry white wine.
Once you have all of these items you can jump ahead to brining your turkey. However, keep reading if you want to know why we chose a pellet grill over a traditional box smoker.
Pellet Grill vs Box Smoker
Some of you are wondering why we used a pellet grill over a traditional type of smoker. The answer isn’t complicated. Simply, we have the Z Grills “Backyard Warrior” Pellet Grill & Smoker in the TIA Test Kitchen. Luckily, this was a great choice for us because 1) the technological features allowed us to “set and forget” the smoker and continue on our work day, and 2) none of us had smoked a turkey before.
We have reviewed more rustic and traditional-styled smokers before, such as the Oklahoma Joe Marshal Centerbox Smoker. I like that smoker so much that I keep it at my house. However, working with that is a much more involved process. You continuously monitoring and routinely adjusting the smoker’s temperature.
A traditional box smoker requires more attention than I can give it during the workday, and I’m new to smoking meats. The pellet grill was a better option for us right now, but maybe next Thanksgiving…
How to Brine a Turkey Before Smoking
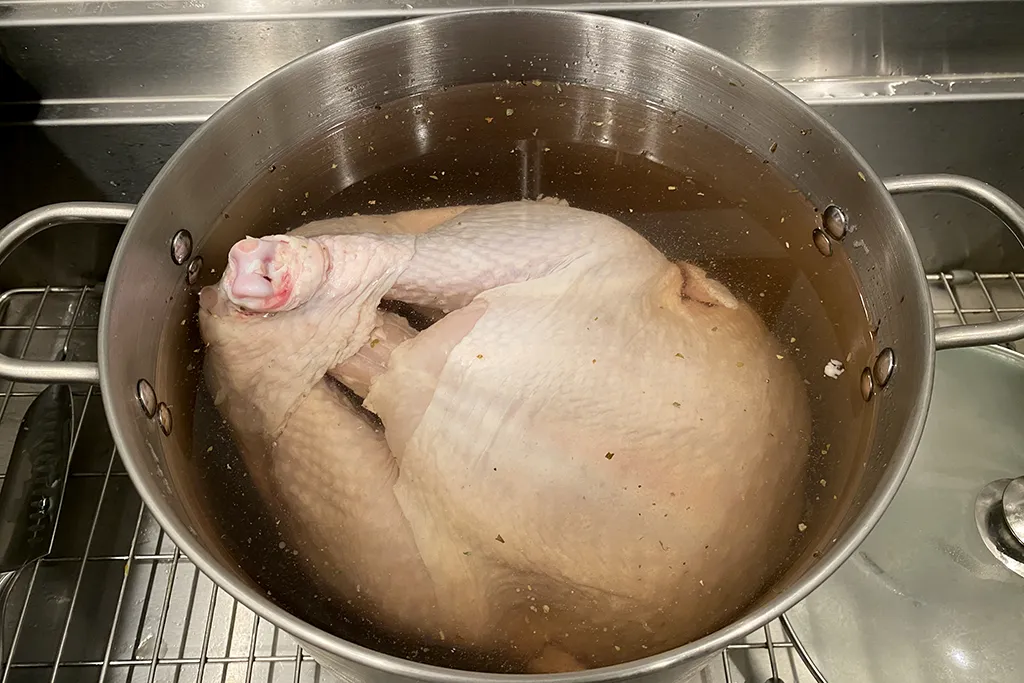
I did a 24-hour wet brine. All you technically need for a brine is two cups of Kosher or sea salt. I added a couple extra things but kept it simple since we wanted the focus of our turkey to be on the smoky flavor.
- For the brine I combined 8 cups/half a gallon of water with two cups of kosher salt, and a half cup of sugar.
- I stirred this until it came to a boil and the salt and sugar dissolved. I let it boil for two minutes and then turned off the heat.
- I added the remaining one and a half gallons of water, one cup of Worcestershire sauce, and some parsley and rosemary I had on hand. Then I waited until the brine came down to room temperature. You can use ice cubes and/or some wine to speed up this process.
- Once the temperature of the brine came down to room temperature I submerged the turkey (make sure all the giblets and extras have been removed from the two inside cavities) and put a lid on the stockpot.
- I moved the turkey to the refrigerator and left it there for 24 hours to brine. However, you can brine your turkey for as little as 12 hours.
- After 24 hours I removed the turkey from the brine. I let it drip, then moved it to a wire rack on top of a sheet tray to drip dry. Then it went into the fridge, uncovered for another 12 hours to dry some more.
After this, I was ready to take my turkey to the TIA Test Kitchen and start smoking it.
How to Smoke a Turkey with a Pellet Grill
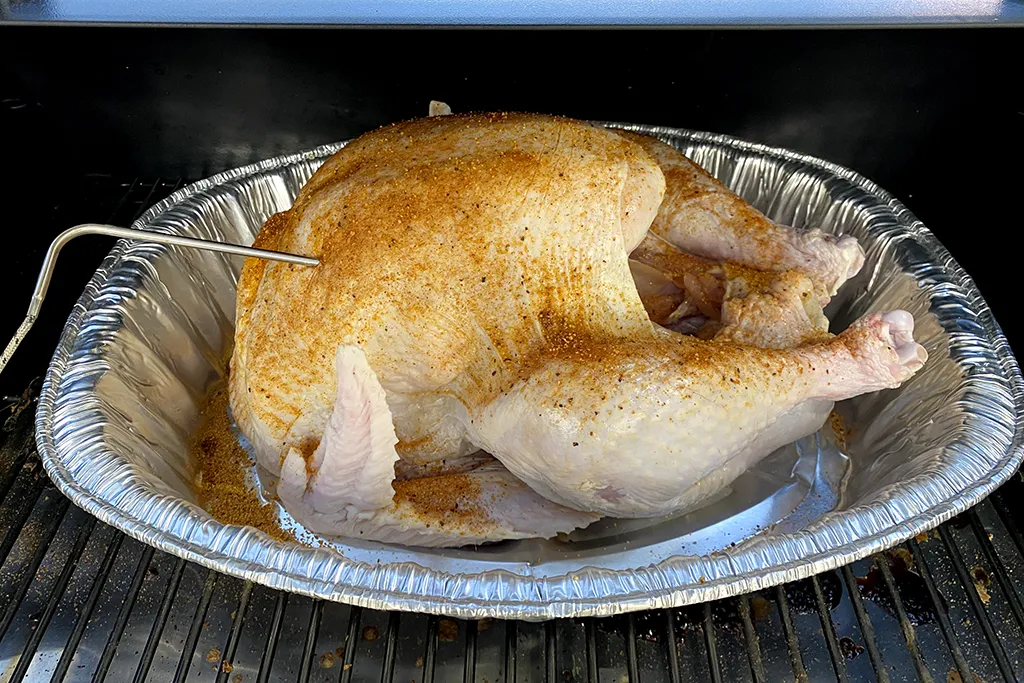
Smoking or cooking the turkey consisted of three parts: seasoning, smoking, and resting. Here’s what I did.
- I seasoned the turkey all over. Now, I seasoned it well, but it was not with traditional Thanksgiving flavors. We had some Blue Hog seasoning on hand so I used that plus some salt and pepper (spoiler: we liked it!)
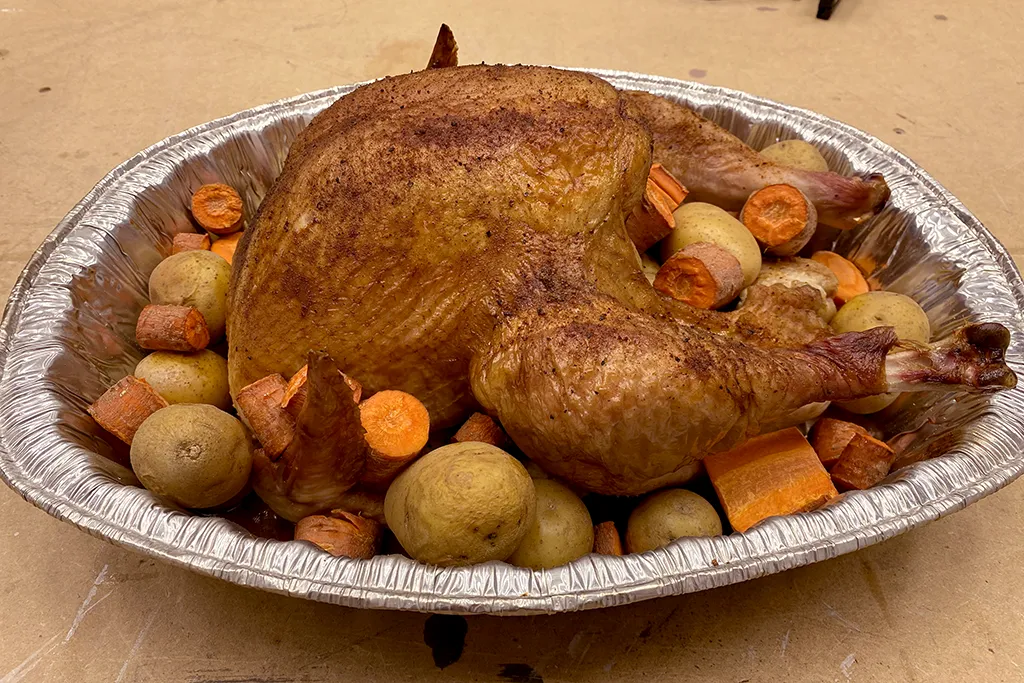
- Once seasoned all over I laid it in the roasting pan with the turkey on its back. We didn’t, but if you plan on smoking veggies and potatoes with your turkey then we recommend adding them now.
- I filled the hopper with pellets and preheated my pellet grill to 225-degrees.
- Once preheated I placed my roasting pan with the turkey onto the lowest rack in the pellet grill. I then placed the meat probe, which is connected to my pellet grill, into the thickest part of the breast. Don’t place it so deep that you hit bone. If you do, just back up a little bit, otherwise you could have an inaccurate reading.
- Let the turkey smoke in the pellet grill at 225-degree for three hours.
- After three hours raise the temperature to 350-degrees and smoke for another three hours (checking in every hour), or until the internal temperature of the turkey reaches 165-degrees. Check in multiple spots. Our turkey was fully cooked after two hours.
- Take the turkey out of the smoker, and turn it off unless you plan to use it for something else. Loosely cover your turkey and let it rest for 30 minutes.
After your turkey has rested you are ready to move onto carving.
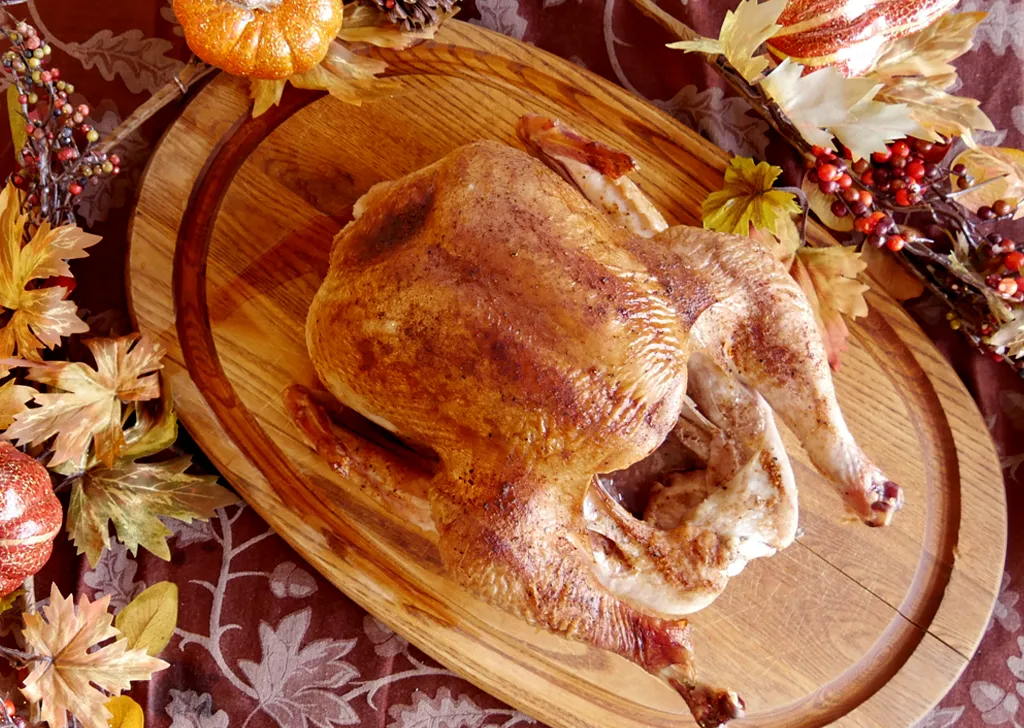
The Results
The one thing we would do differently
We would add the potatoes and veggies to the pellet grill in the beginning, not at the midway point when you raise the temperature like we did. We did this because we saw a lot of back and forth online about when to add these items and thought this was a safe bet. Wrong call.
Our bird cooked quicker than expected. The potatoes and veggies we added had barely any time to cook or soak up those flavors. We all agreed that cook times are unpredictable so it’s best to just put those items with your turkey into the pellet grill in the beginning if you want those. If gravy excites you more than just allow the drippings to collect at the bottom of your pan.
Either way, you won’t be disappointed.
Carving & Smoked Turkey Taste Test
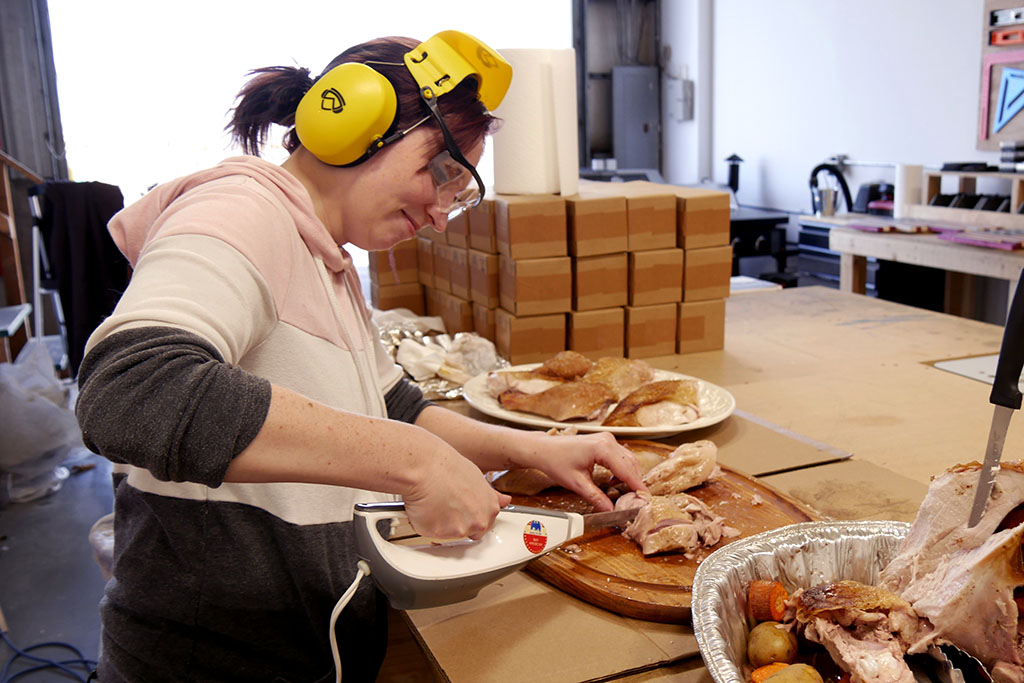
We allowed our turkey to rest and then Kiaya geared up and sliced that turkey for serving. We won’t lie, none of us had carved a turkey before. It’s handled by someone else in all of our families, but Kiaya makes roast chicken a lot and felt confident enough to do it.
This Bon Appetit video teaches you how to carve and plate a turkey way better than any of us could.
However, if you’ve broken down a whole chicken before, then you can carve a turkey.
Taste Test
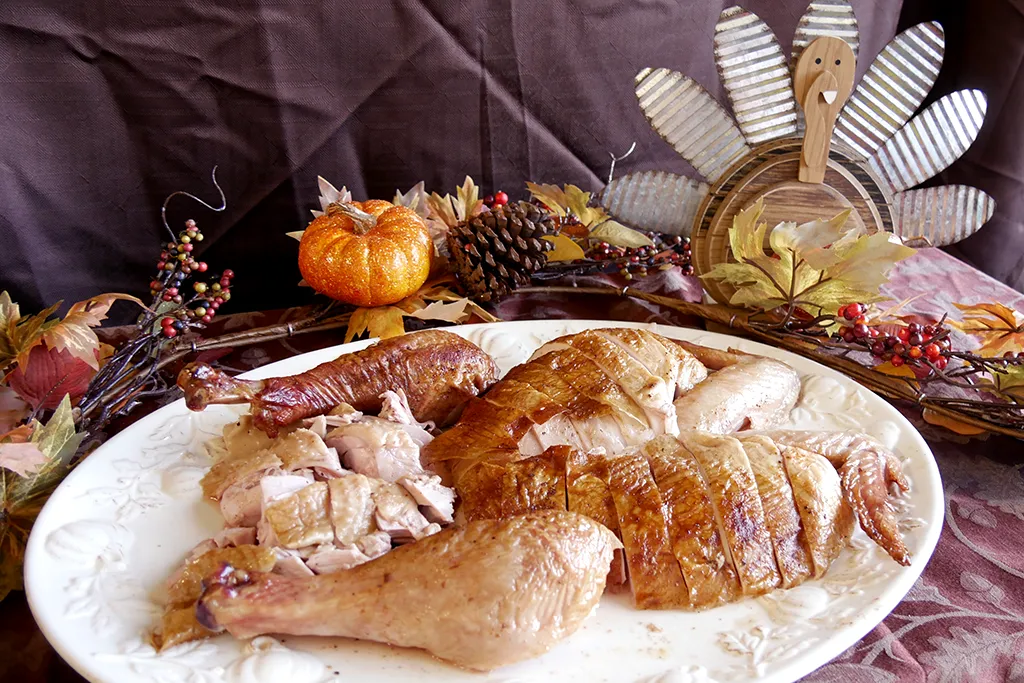
Delicious. No doubt about it. We all like smoky flavors and enjoyed getting that flavor on our turkey. Whether you were eating white or dark meat it was really moist and flavorful.
The smoke flavor was stronger on the skin and in the drippings than it was in the meat. We’d like to experiment with a stronger smoke taste, but I think the way this turned out made it appealing for all people.
10/10 would do again.
Pros & Cons of Smoking a Turkey with a Pellet Grill
Some pros that stood out to us for smoking a turkey with a pellet grill were…
- One less item in the kitchen. The oven is freed up for other entrees and sides.
- This particular pellet grill kept us aware of how the turkey was coming along. This helps a lot with time management, and it’s low effort so you can focus on your family and the other stuff going on in the kitchen.
We did have a few cons though…
- On the flipside the turkey is no longer in the kitchen. For families with one cook this might be an issue. However, the pellet grill was a great item to learn with so maybe it’s the perfect way to recruit some new help in the kitchen.
- As Midwesterners we also have to point out that using a pellet grill means you are outside and in November that can be quite cold. However, we’re also crazy and built different and do this stuff all the time.
Really, that’s all the pros and cons we have particularly for smoking a turkey with a pellet grill for Thanksgiving. The only other con comes down to preference. Some people just prefer a deeper smoke flavor or don’t want to mess with gadgets when smoking meat. I get that, but for a busy holiday I thought this was perfect.
How to Make Smoky Turkey Gravy
Our smoked turkey left us with this great amount of drippings and it would be a crime for us to let it go to waste. So, Kiaya made smoky turkey gravy!
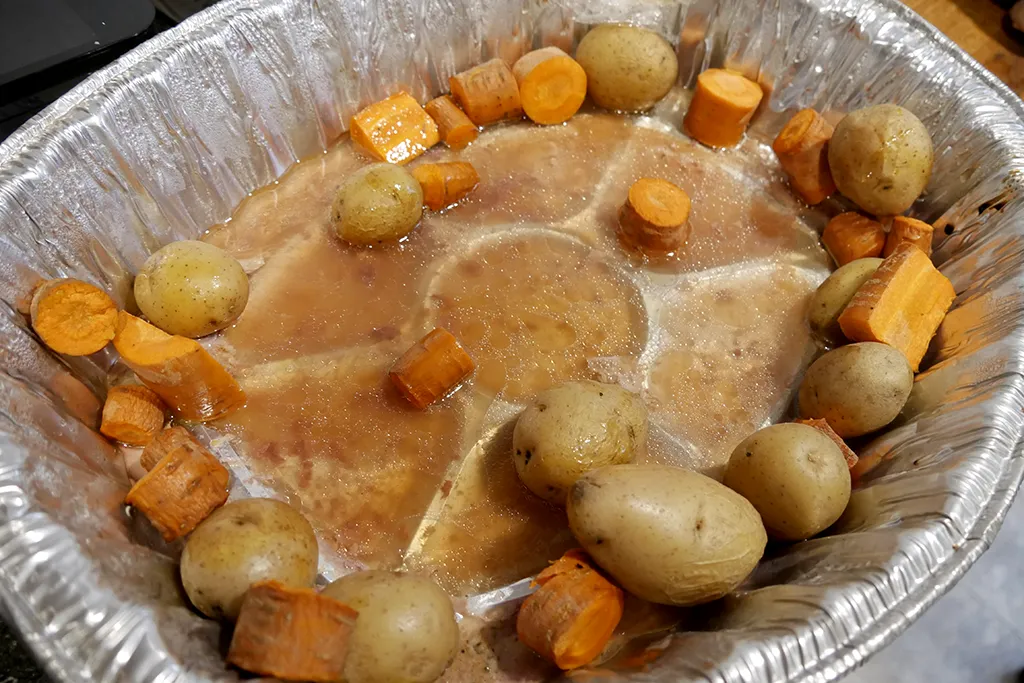
Making a gravy from drippings is pretty simple and feel free to stick with your preferred recipes. We kept our recipe extra simple because we wanted to see how much, if any smoke flavor would come through.
For this gravy you will need:
- Small to medium saucepan
- Whisk and/or wooden spoon
- Two cups of turkey drippings. Add chicken stock if you have under two cups of drippings.
- A quarter cup of flour
- Three tablespoons of butter/fat (we used bacon fat)
- Optional: aromatics (we used a tablespoon of sliced green onion and a teaspoon of minced garlic)
- Optional: our secret ingredient (stay tuned)
Gravy Instructions
- Heat the saucepan over medium to medium-low heat until warm, about three to five minutes.
- Add the butter, it should be foamy. If it isn’t foamy then your saucepan isn’t hot enough. If it melts quickly and browns then it’s too high. So, adjust as needed.
- Add the green onion and garlic and stir with the wooden spoon. Sautee for one to two minutes, or until fragrant, and don’t let the garlic burn.
- Add the flour and stir constantly. It only needs around a minute, but you want the flour to start to brown. It may clump together. That is fine. This is a roux.
- Switch to your whisk and slowly pour in about a 1/4 to 1/2 cup of drippings/stock. Continue to whisk. The roux may start to get pasty. Whisk until smooth before adding the next batch of liquids. Repeat this until all the liquids are in the saucepan (about four batches total).
- Turn the heat up to medium-high, continue whisking until the sauce starts to boil (this can take a while). Then reduce the heat down to low and let it simmer. Whisking or stirring occasionally.
- Let the sauce reduce and thicken. This usually takes five to 10 minutes. To test your sauce, dip in your wooden spoon and take it out. Run a line through your sauce with your finger. If the line holds then your gravy is done, if the sauce drips over the line then it’s too thin and needs more time. If you think your gravy is too thick then remove from heat and add in more stock or water until it’s the consistency you prefer. Note: gravy also thickens as it cools.
- Taste and season as you prefer. We found that the sauce was salty enough from the turkey seasonings and we could taste the smokey flavor. However, Kiaya felt like the gravy still needed something. For her secret ingredient she added around a teaspoon of pure maple syrup. It didn’t make it sweet, it alleviated some of the saltiness, and amped up the smoky flavor.
Final Review
Not only was the smoked turkey very juicy and delicious, but smoking it with the pellet grill was so simple. We are already thinking of more ways to use it. So, don’t think that’s the last time we have a smoker recipe and tutorial for you.
I hope you enjoyed learning with us on how to cook a turkey with a pellet grill. Tell us in the comments how you are cooking your Thanksgiving bird this year and if you are considering using a pellet grill.
