
Are you a guest at Thanksgiving this year and not sure what you should bring? Well we have a great DIY gift your host will love and incorporate it into an appetizer. Today we are showing you how to make a charcuterie board from scratch. And by “make” we mean both how to construct this custom DIY piece and how to plate the meats, cheeses, and more for a statement-making appetizer.
This charcuterie board tutorial is beginner-friendly and requires minimal tools, some you might even have on hand. We also included a few other variations that we experimented with.
Guide
Charcuterie Board DIY Supplies
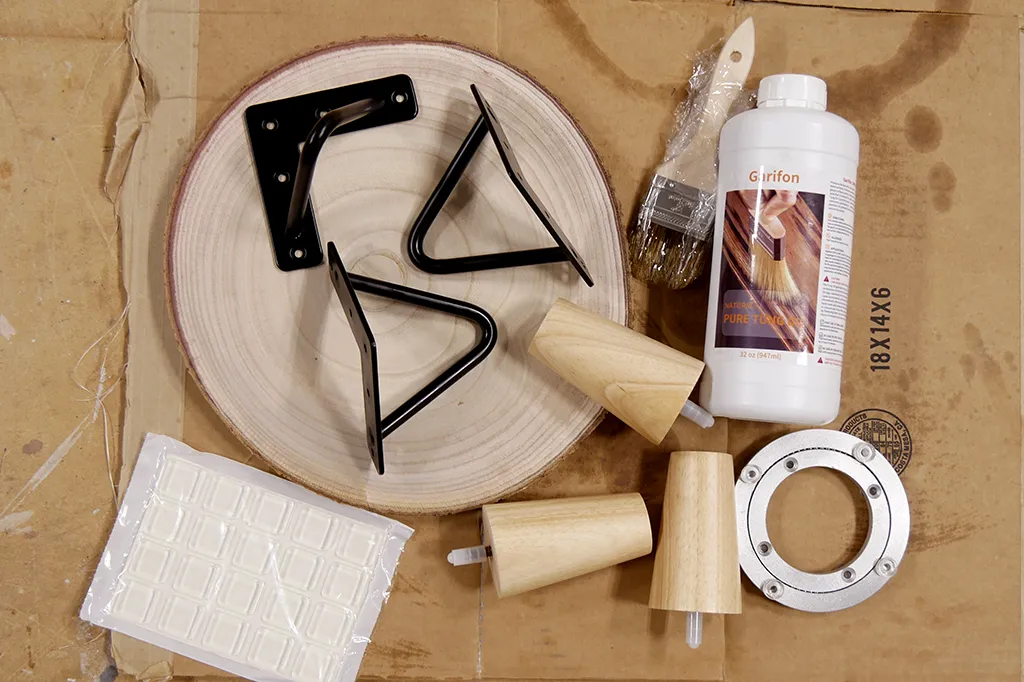
This is everything we used to make three different charcuterie boards.
- Drill/driver
- Large wood slices with bark, 4-pack
- Cutting Board Oil
- Natural fiber paintbrush
- Painter’s Pyramid stands
- Black hairpin legs, 4-pack
Supplies for Additional Styles
Step 1: Wood Prep

The first thing you need to do in this charcuterie board DIY is treat the wood. This process is really simple, but needs to be done at least two days before you intend to use your charcuterie board. We also recommend you apply the tung oil in a ventilated area and it is best to apply tung oil in a warm and sunny environment (which does not exist for us Midwesterners in November).
To do this…
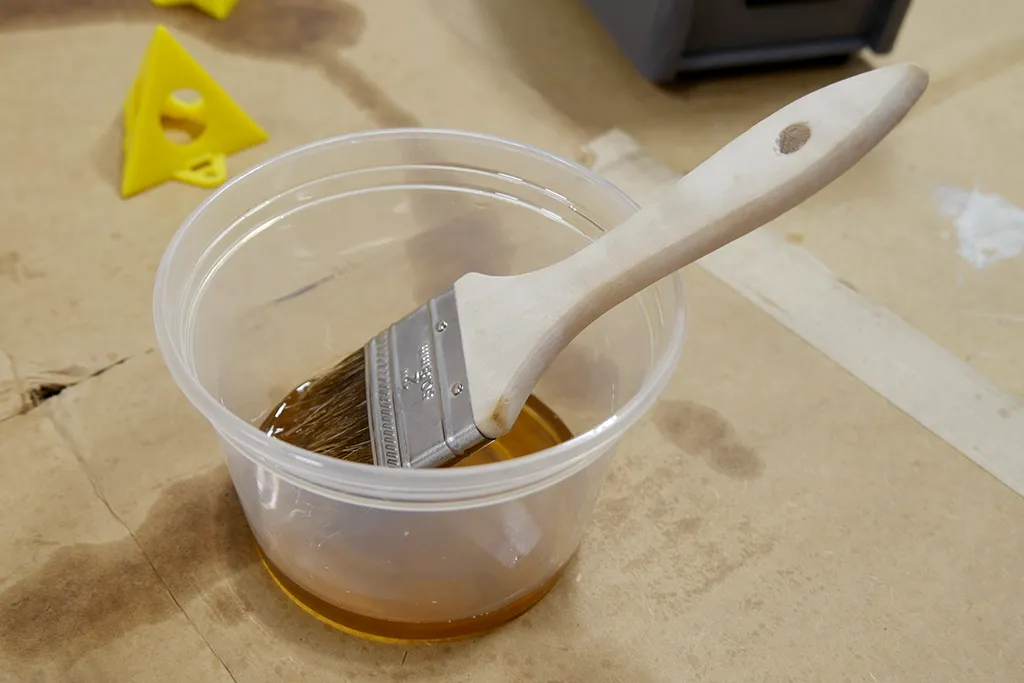
- Pour about a quarter cup of tung oil into a container
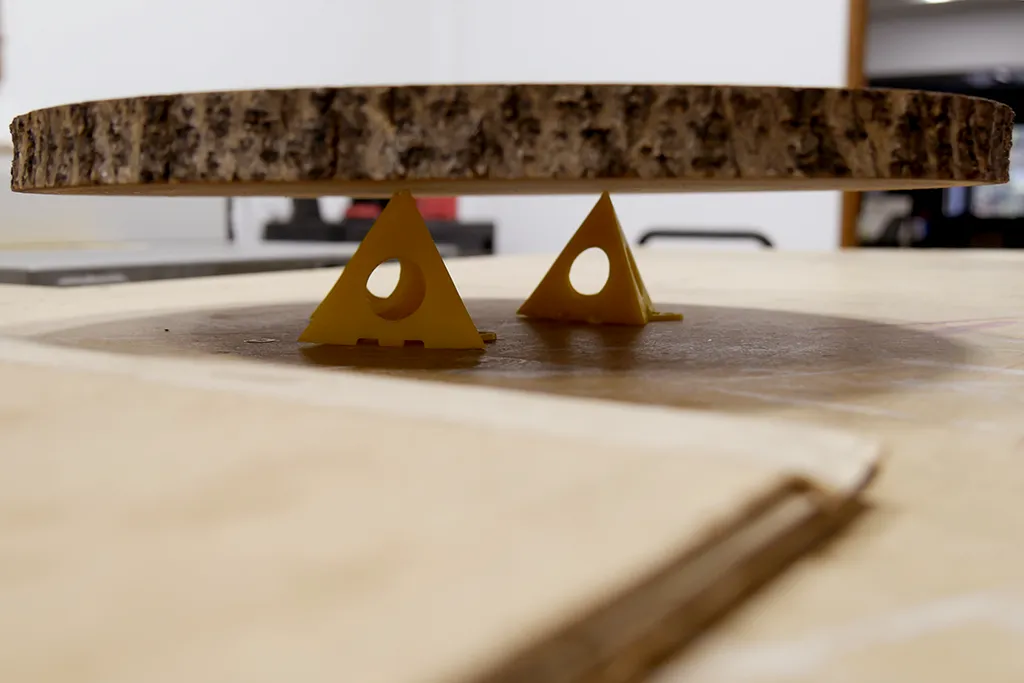
- Set out three Painter’s Pyramid stands and place your wood slice on top. Adjust as needed to stabilize the wood slice.
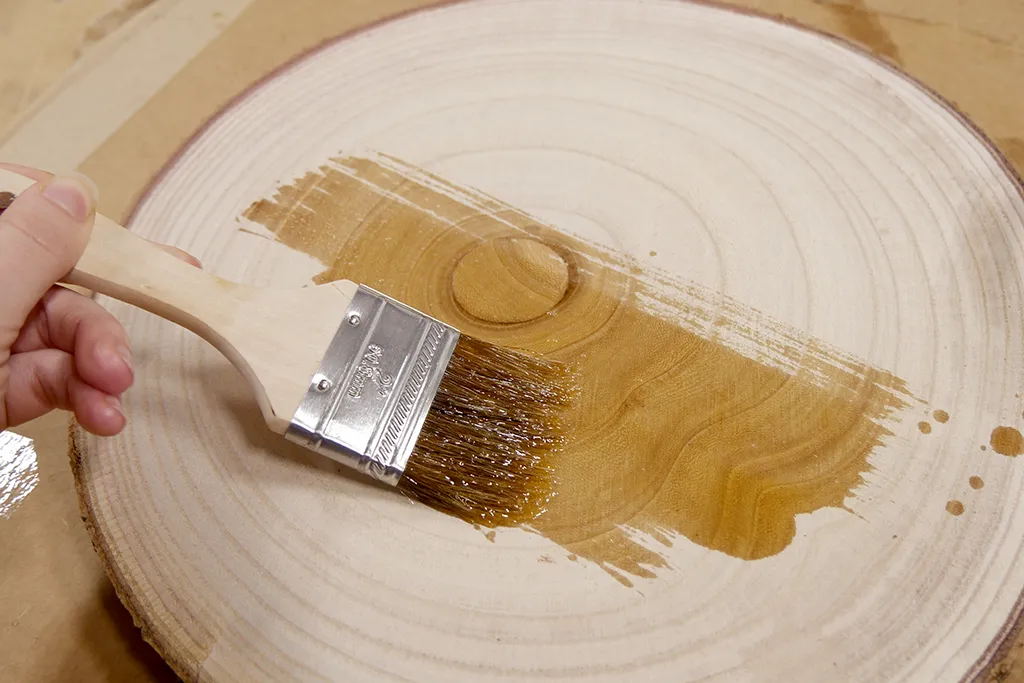
- Dip your brush in the tung oil and apply it evenly across your wood slice. You want to apply enough for the tung oil to be absorbed into the wood, but not so much that it drips. Once coated, flip it over and coat the other side.
- Once both sides are coated, apply a coat to the edge of the wood slice. Rotate the wood slice to easily coat the wood.
- Once coated, clean up your supplies, and set the wood to cure in a dry place for at least two days, or follow the directions on your tung oil. Once cured the board should no longer smell “nutty” and should be dry to the touch.
Once your board is cured you are ready to move on to the next step.
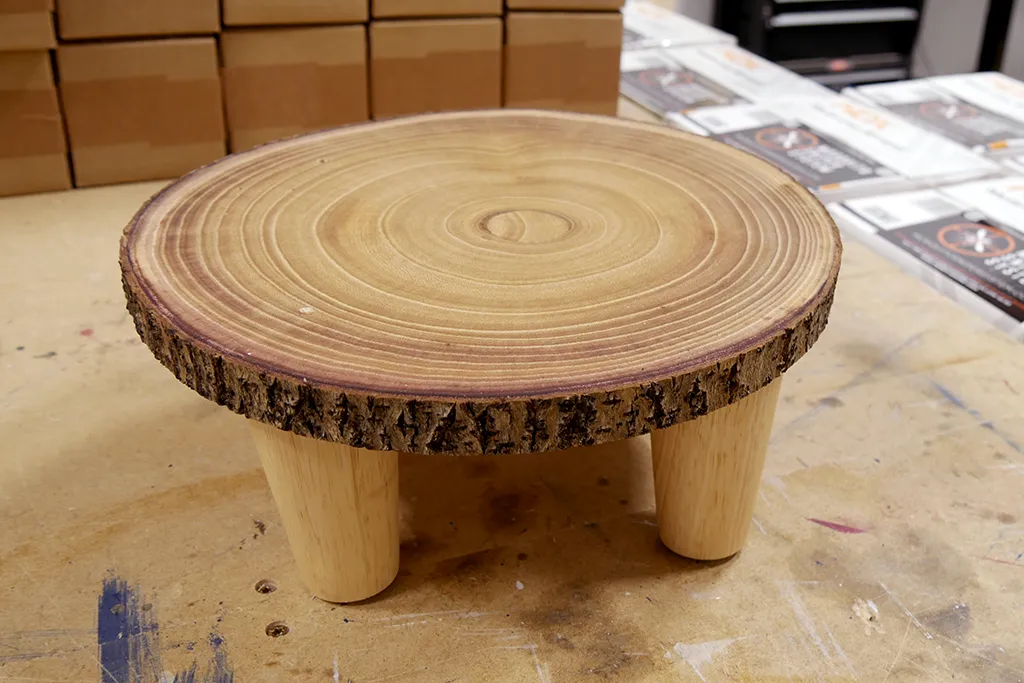
How to Make a Charcuterie Board with Hairpin Legs
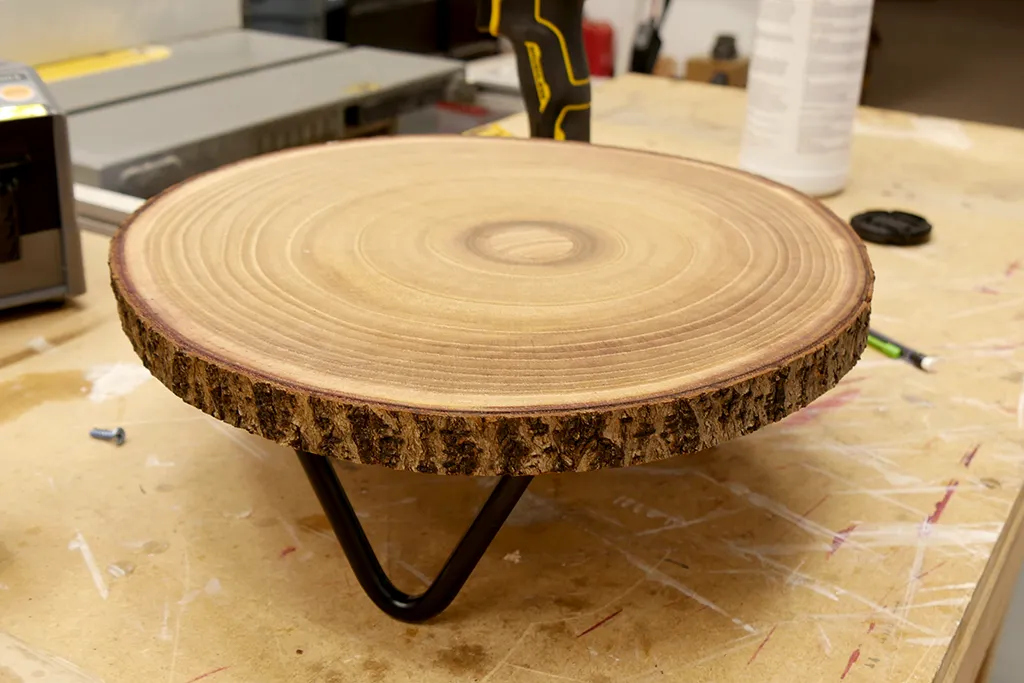
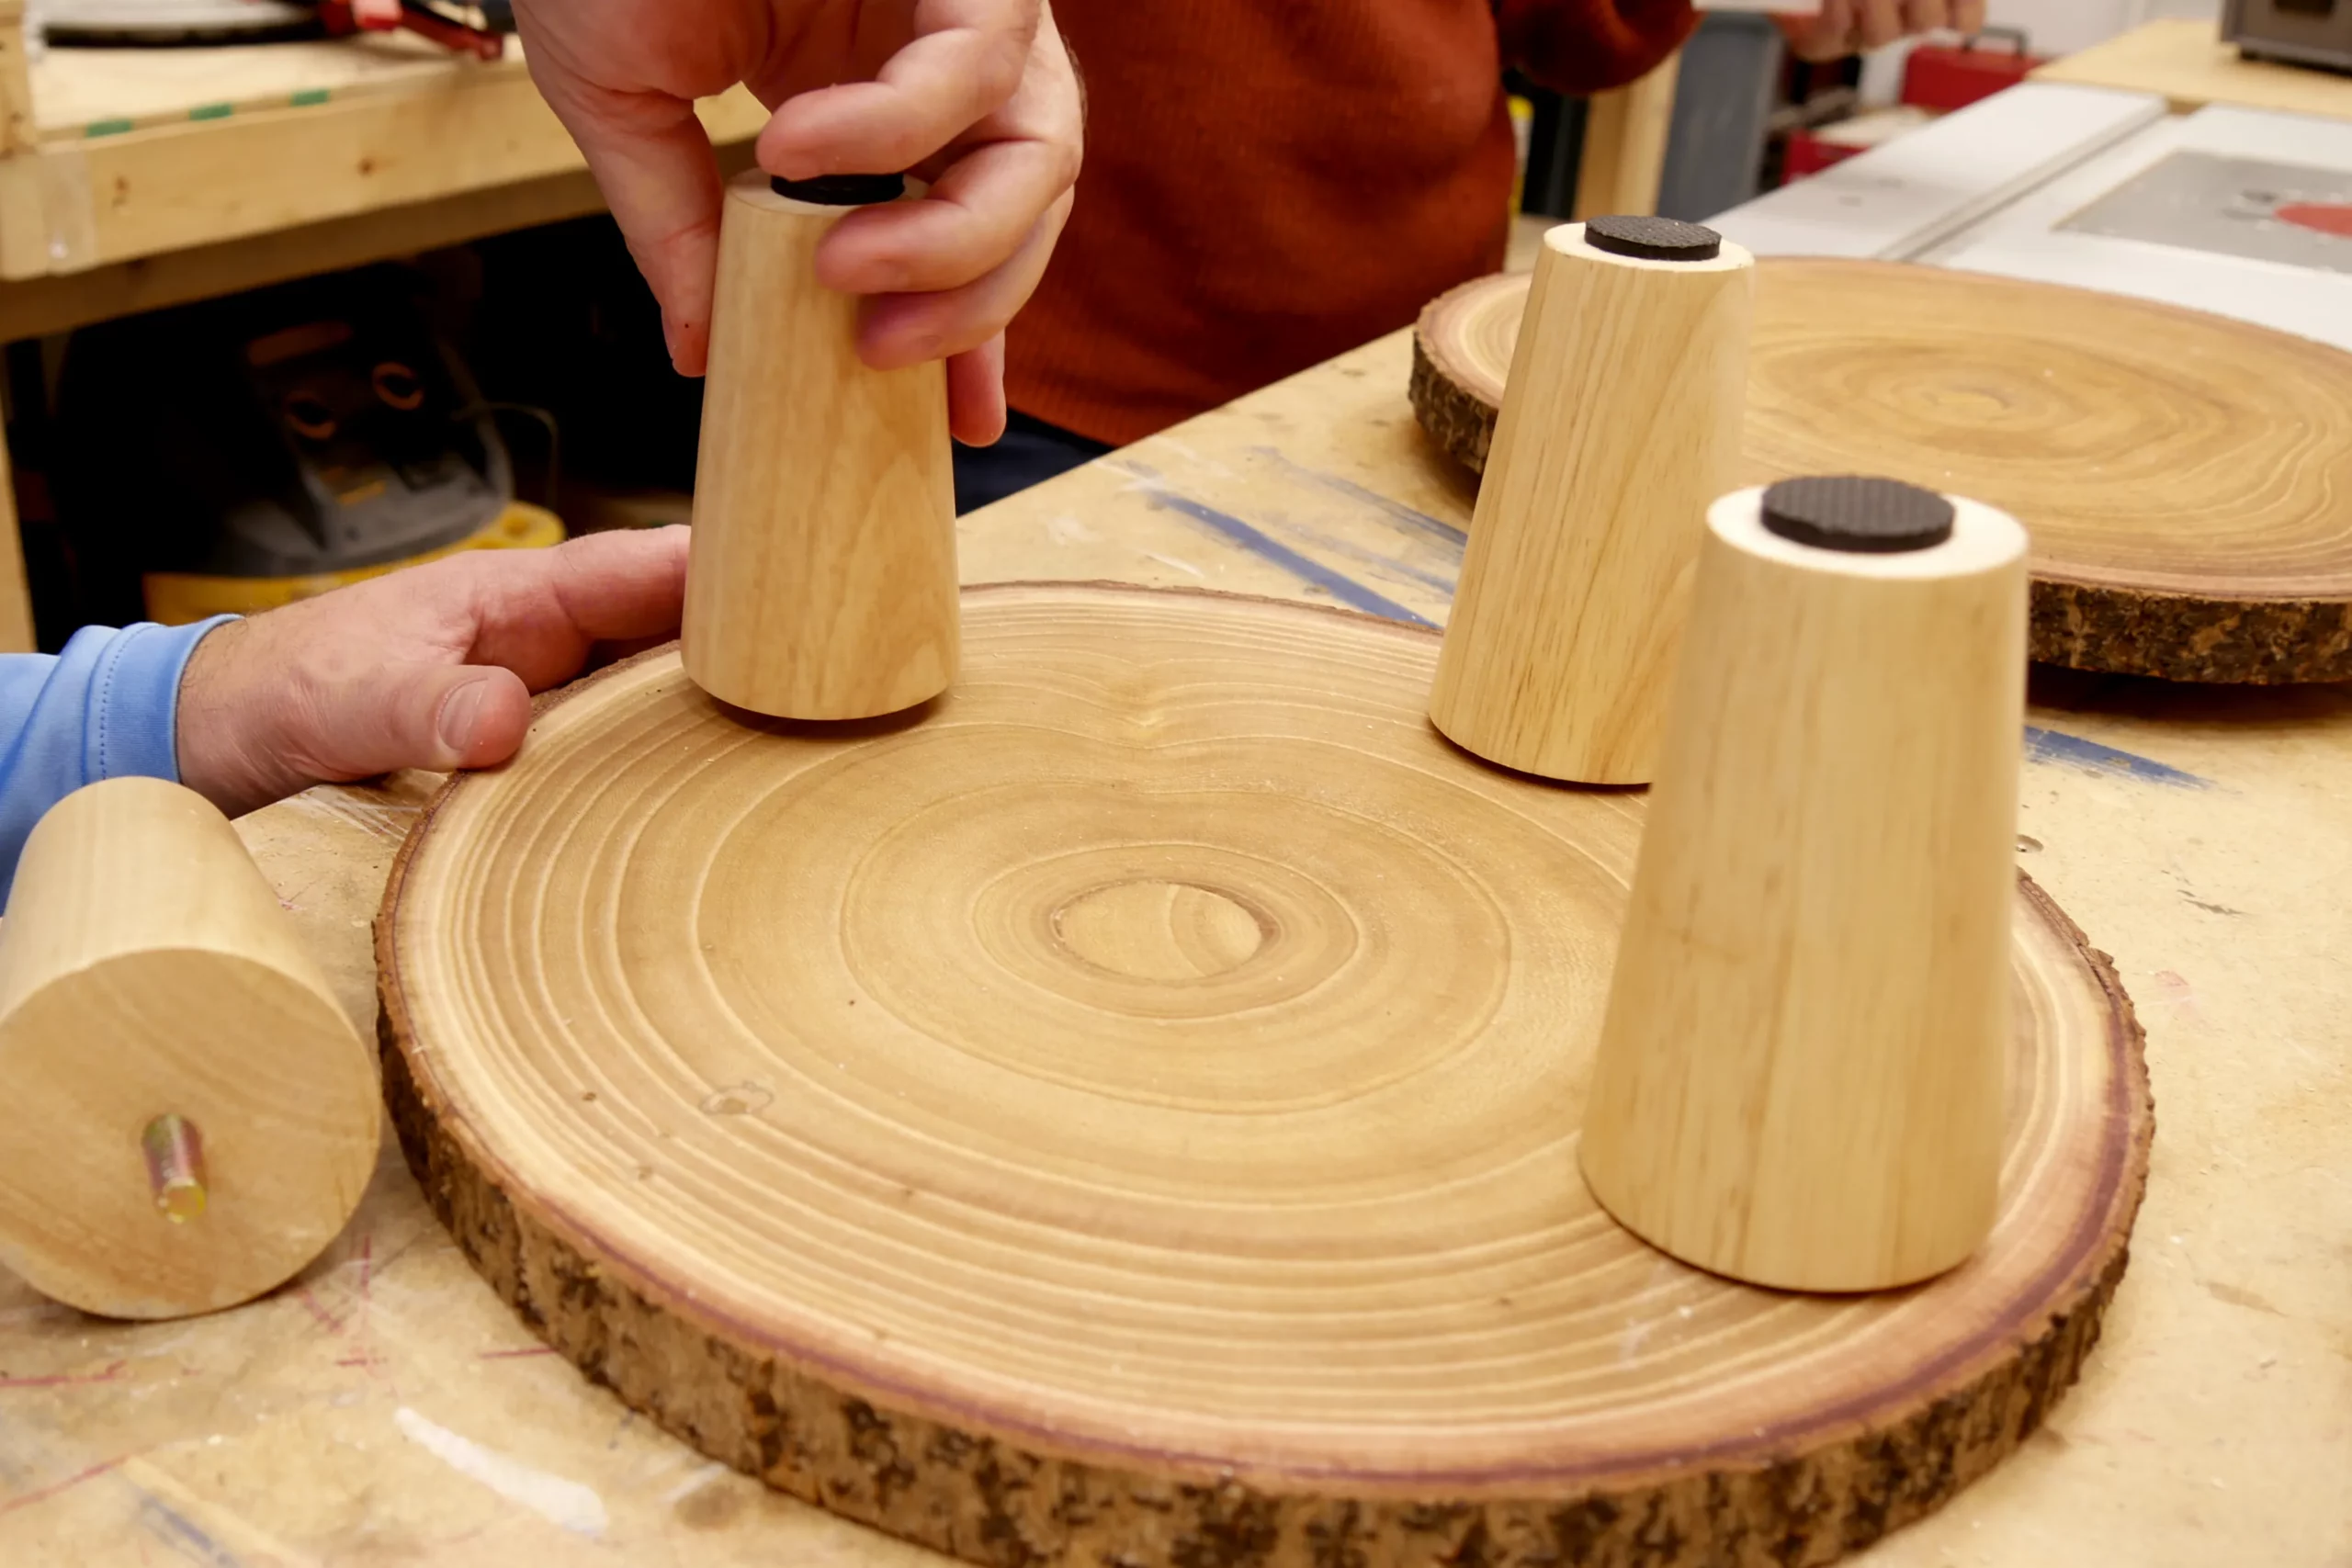
This first style uses the hairpin legs. The hardest part about making this charcuterie board is placing the legs because the wood slice is a little irregular and not a perfect circle. For this style we also only used three of legs. Our process went as follows…
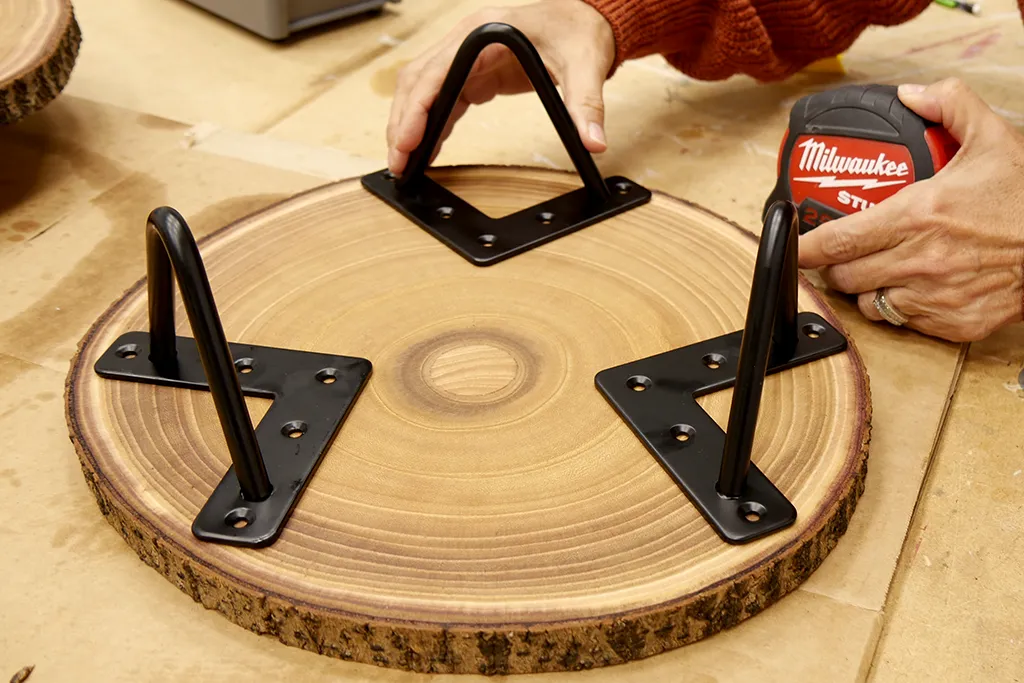
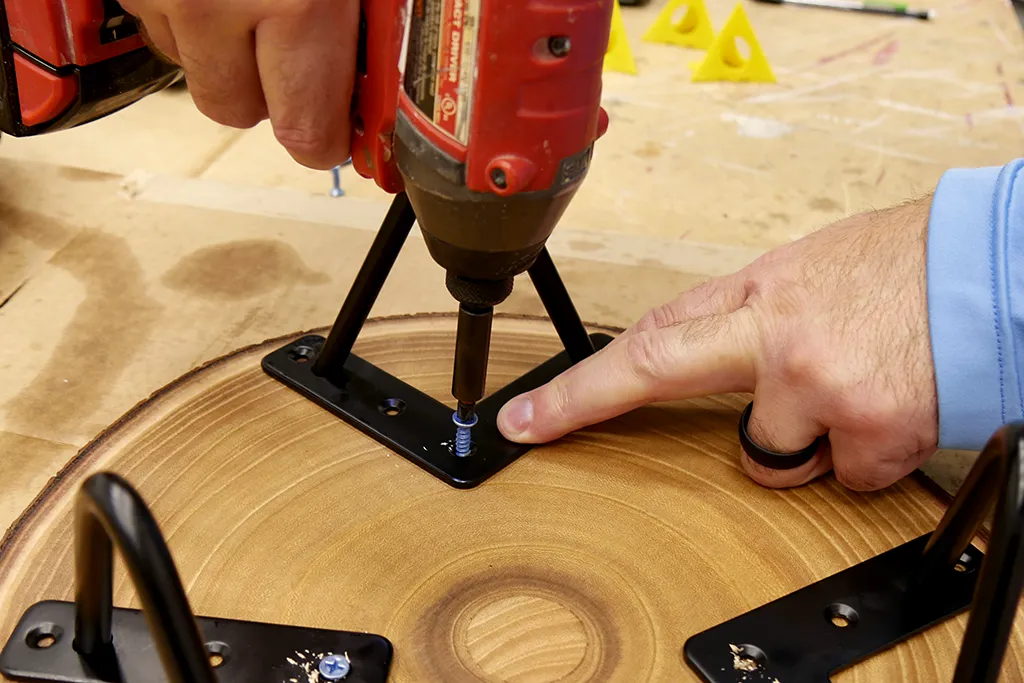
- Lay your wood slice on a flat surface and take out three hairpin legs.
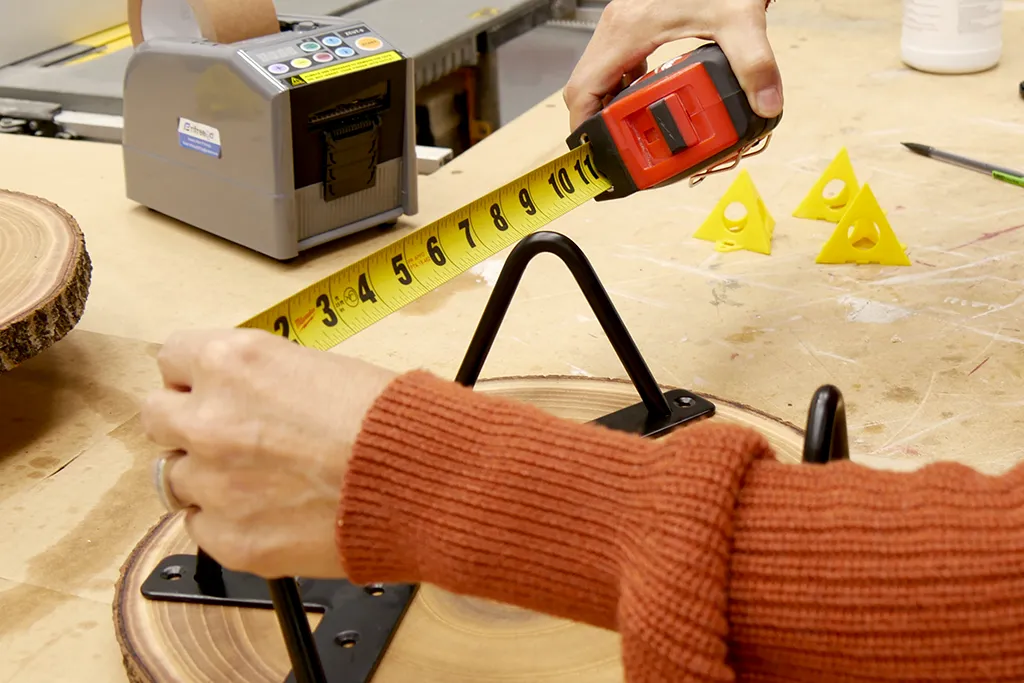
- You will notice that the base of the hairpin legs meet to make a 90-degree angle. Place the hairpins on the wood slice so the point of the base faces the center and then place the opposite ends of the base just inside the perimeter of the wood slice. Adjust the hairpins as needed so that they are equal distance from each other. You can double check your spacing with a measuring tape. The bottom of our legs measured eight inches apart.
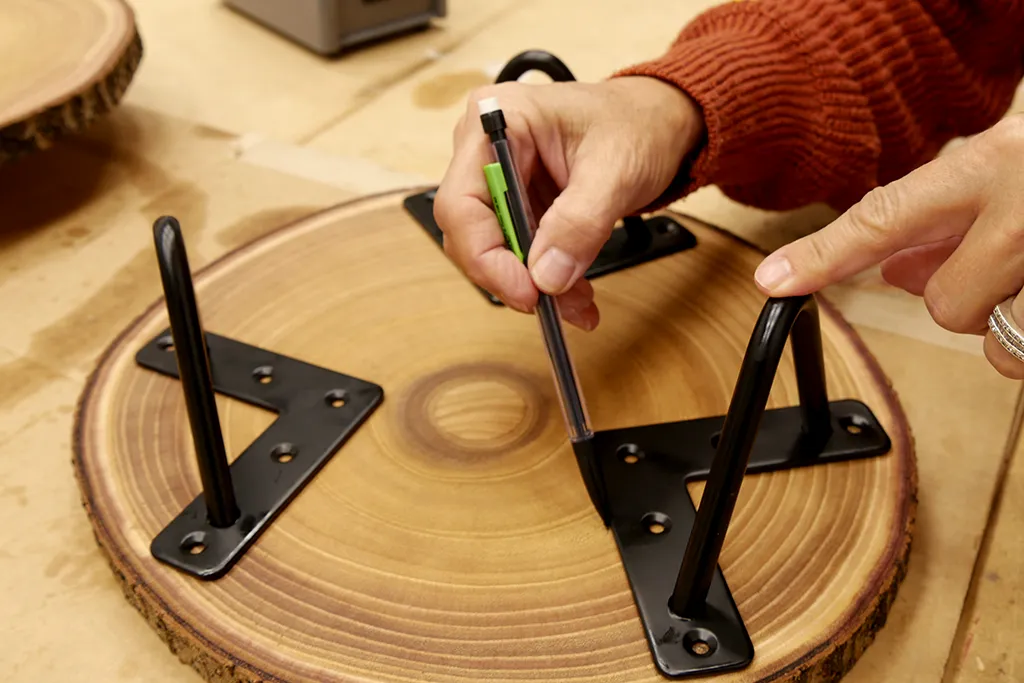
- Take a pen or pencil and trace the corner of the base and mark the openings for the screws.
- Start with your first hairpin leg and double-check its alignment with the marks you made. Grab your drill/driver (we used a Milwaukee M18 1/4 in. Hex Impact Driver) to drive in the screws that came with the hairpin legs. This is a soft wood and we found that it did not require pre-drilled holes. However, feel free to add that step in if you prefer. You can also screw down the point of each base first, or complete each leg before moving on to the next. Whichever is your preference.
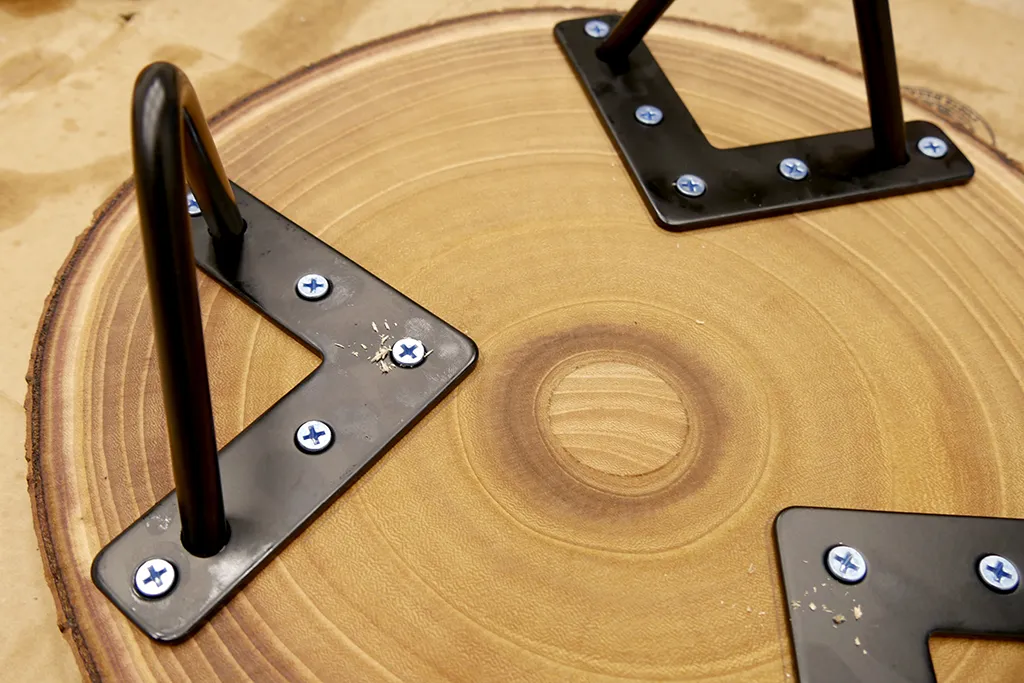
- Repeat step four for the two remaining legs.
- Take the rubber grips from your leg kit and attach them to the part of your hairpin legs that rests on the ground.
- Flip it over and you are good to go!
Note: We pre-drilled the holes on the center points of each base with a DeWALT 20V 1/2 in. Drill/Drive (model# DCD800) but found the wood was so soft that this step was unnecessary.
Other Charcuterie Board Styles
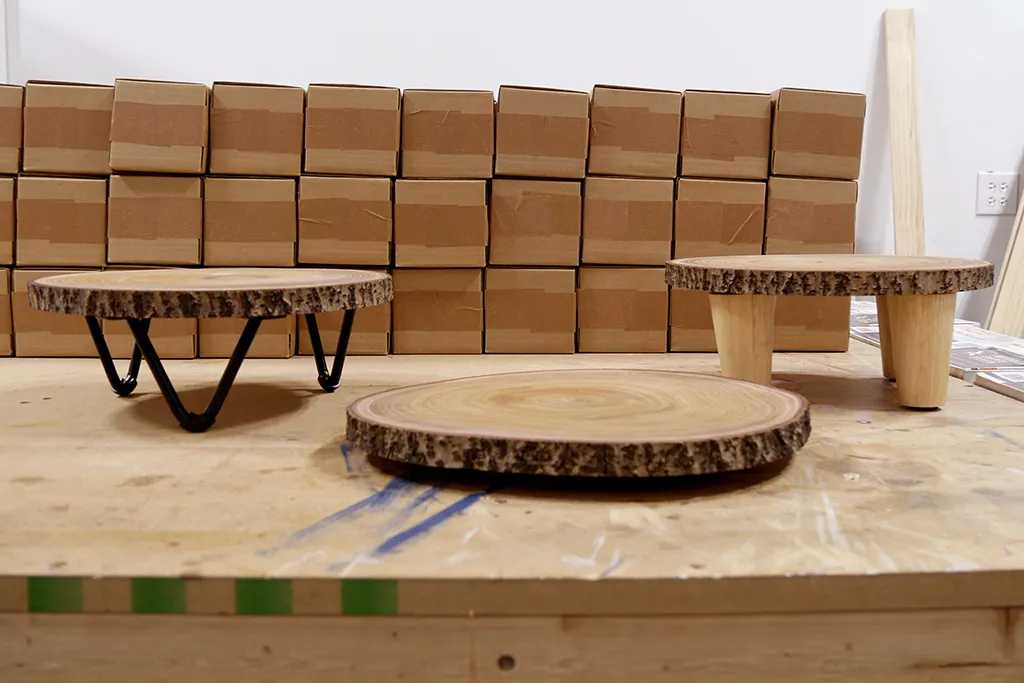
Our wood slice was a four pack. So we took this as an opportunity to construct different styles. Check them out and comment if you want us to share the step-by-step process for each one.
How to Assembly Your Charcuterie Board
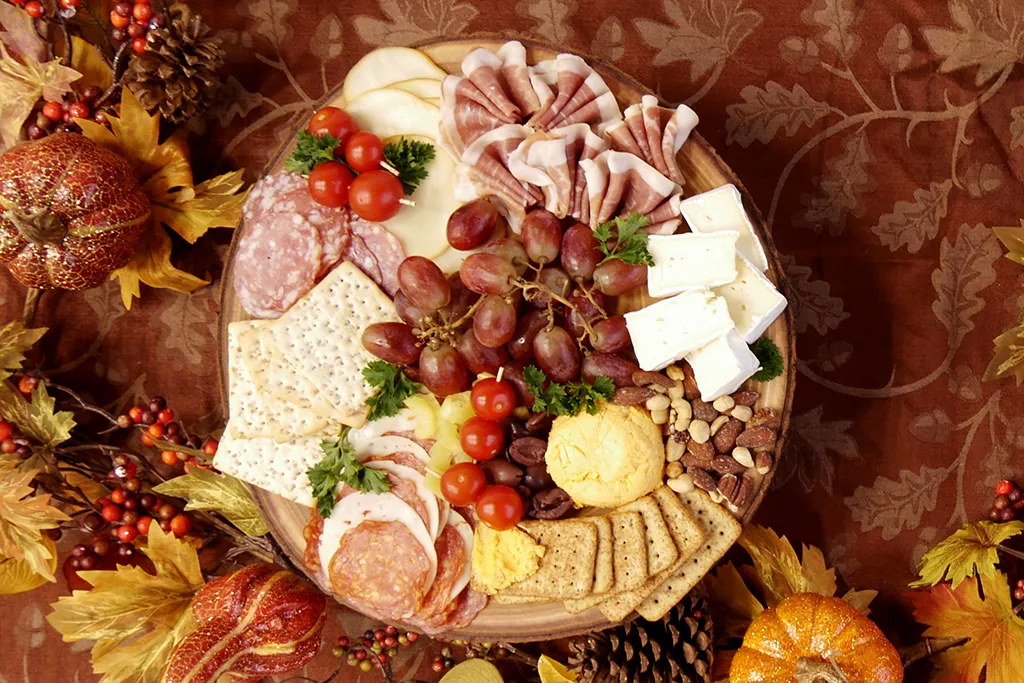
Now for the best part…assembling your charcuterie board. Honestly, there is no wrong way to do this, but we do have a few tips.
- Pick three meats and cheeses: For meat prosciutto, salami, and soppressata (fancy pepperoni) are staples. For cheese, I like to do one sliced, one spread, and one wedge. The wedge is almost always brie. I avoid blue cheese because it’s messy, not everyone likes it, and it’s very pungent.
- Get a vehicle: Meat and cheese are great on their own, but adding something to carry these items can make your charcuterie board less messy and more pleasant to eat, adds another way for guests to customize their snacks, and can provide some crunch. Crackers are great for this. I usually grab a variety pack, but things like pretzels and cheese crisps are other great options.
- Create paths: “Paths” create visual interest and help highlight the variety of your charcuterie board. The easiest way to do this is to alternate between light and dark colors. Your paths can move in straight lines or curved. With smaller boards I recommend keeping paths straight, small and simple. Medium to large sized boards have more room to weave throughout the board.
- Add something sweet: Meat, cheese, and crackers give you savory, umami, and sometimes spicy flavors, plus soft, chewy and crunchy textures. Add something sweet and/or tart to hit the full spectrum of flavors and textures. Fruit, honey, raisins/craisins, and chocolate/dessert spreads are great suggestions.
- Fill the gaps: You’re bound to have gaps in your board. Sometimes this is just how things lay out, sometimes you’re trying to prevent wet and dry items from touching and it creates a gap. Fill these spaces with nuts, fruits, skewers, or items like brie or spreads that don’t really work as paths. Think of these spaces as “pit stops” along your charcuterie board with more unique pops of flavor and texture.
- Ideas for allergies and specialty diets: Sometimes you have an outlier guest who follows a special diet due to beliefs or allergies, such as gluten-free or vegan. I suggest putting these items on their own board with signage about their specialty designation (ex: “gluten-free”, “kosher”, “vegan”/”vegetarian”, etc.). Veggies and hummus are great substitutions for most people on specialty diets, along with dips and sauces made for those diets.
- Don’t overthink it: I know Pinterest can make you question your charcuterie board skills, but you don’t need to buy hundreds of items and spend hours decorating your board. In fact, no one is going to know if you buy a pre-made charcuterie kit and put it on your own board. Or, at least I won’t tell anyone.
Leftover Thoughts
We were so impressed with how quickly we were able to make this statement-making charcuterie board. This was a super simple DIY that makes a great gift OR item for your own home. Give it a try and tell us how it went for you.
If you liked what we suggested for an appetizer just wait for what we suggest as your Thanksgiving entree…
