
Archived from the Tools In Action forum (Around The House). This thread is read-only.
couldn’t find any holders for these guys so I decided to make one based off a picture I found online…
I guessed at the majority of the measurements by eyeballing spacing and such, I did however use a square for centering things but overall im please for less than $15 in material and I have lots left to build more with that same $15 lol
ENJOY!
Nice Chewie, great idea!
nice work man!
thanks guys, felt like filling up an afternoon and it worked. im looking into some more projects that will take some more time hopefully by the end of the summer ill have a custom center console in my truck to show off!
Looks good buddy. I have various side bits everywhere! They never seem to find their way bag to those PIA plastic bags and horrible cases.
Looking forward to the truck console project.
That looks good bud real organized
Sent from my SGH-I337M using Tapatalk
they might never end up there again either however, they started there so it was worth the time to make haha.
and the truck console is going to take a while because I need to decide on a plan for it, I have thoughts but I don’t want it to look simple I want it to be easy to make but high quality finish. (no piano hinges basically) so if it goes well ill show it off, if not then no one will know I attempted it so win win
Very cool chewie!!
i am totally taking your idea, thank you.
That’s a great idea
Sent from my iPad using Tapatalk
its simple and easy, no need for plans just that picture works. the reason why I did the hole sizing on the front was a quick way to make sure the bit got put in the right spot and if I had say a piece of what I needed to make the hole for say a bolt I found in the garage, just put the bolt up to a hole close and see if it fits, I know that’s not always the easiest or effective way to do it but hey it works and makes the piece a little more than just spaces for bits
Nice idea and it came out well, putting any kind of finish on it or just au natural?
ill just leave it the way she is. for the amount of time it took to make and the cost, ill just make another one in a year or two.. whenever it gives out.
Hey Chewie, great Idea! I like how you have the holes laid out on one side. Makes it easy to fit the right size hole for your application, just stick the bolt or dowel in the hole that fits and bam, there’s your bit. Kinda reminds me of one of my son’s wooden block toys.
This is a great idea! May have to give it a go.
Nice Job chewie! This is a spade/self feed drill box I made 10 years ago in school. It’s placed in a toolbox I made at the same time but is removable, and the drill bits fold up like in the pictures
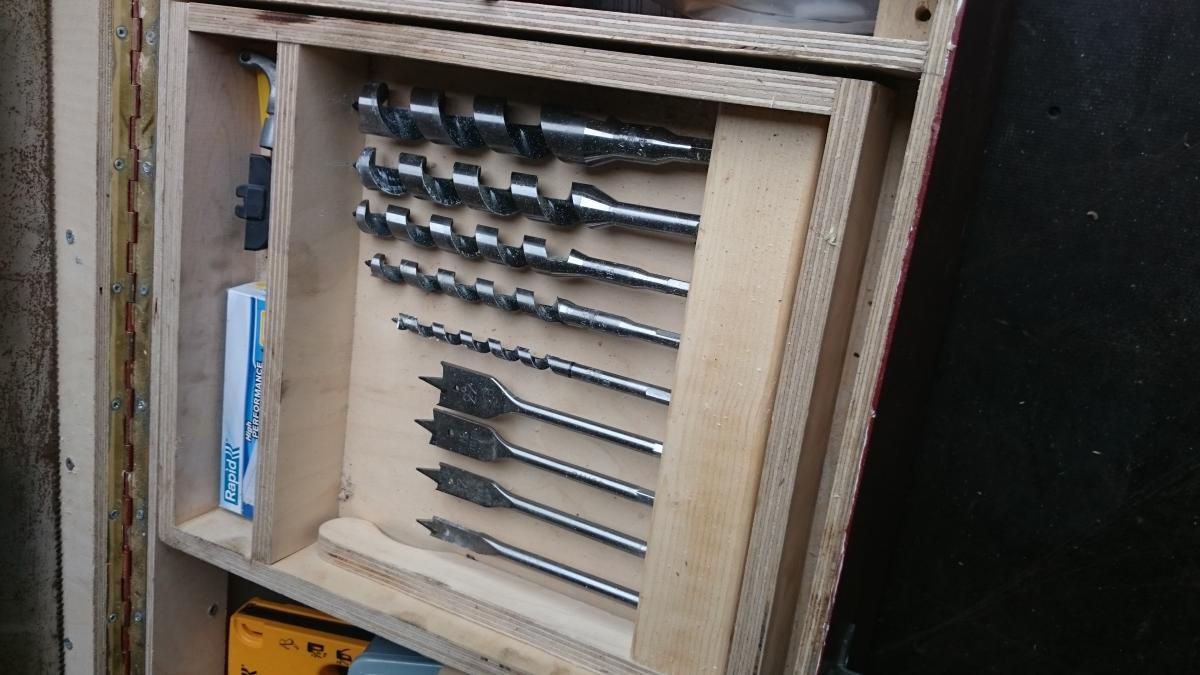

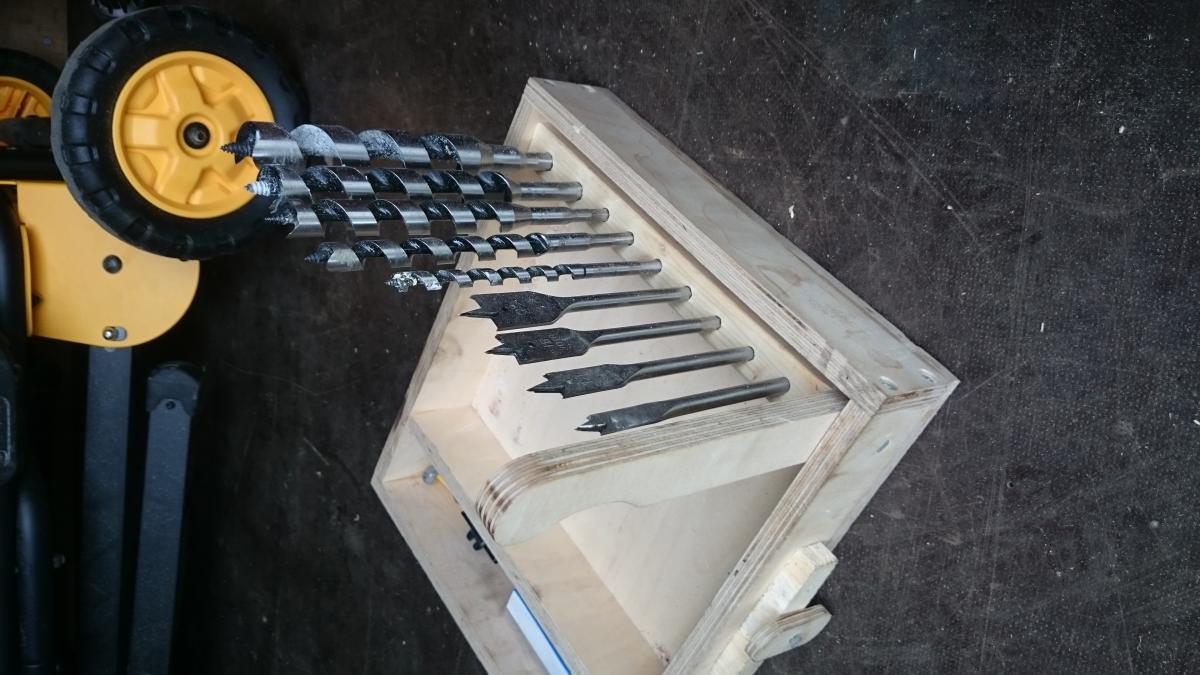

Nice work guys going to have to make a couple of these!
Sent from my iPad using Tapatalk
thanks for all the input and the love, Moitas that was a nice and simple idea that is probably the better suited option for your application with it fitting inside a toolbox. once I buy the Milwaukee chest I will be looking at these pictures again to steal the idea haha.
chewie17 wrote:
thanks for all the input and the love, Moitas that was a nice and simple idea that is probably the better suited option for your application with it fitting inside a toolbox. once I buy the Milwaukee chest I will be looking at these pictures again to steal the idea haha.
Thanks Chewie! Really simple, and takes almost no time to put together after you have measured everything so all the drill bits fit. To ahead and copy it. That’s why I uploaded the pictures. Sorry about the orientation of the pictures. First time I uploaded pics here so I don’t really know why they all got rotated 90 degrees
could have been the way the camera was set up to take them or the forum itself just misread the way they should have been
I really like this idea. I’m always messing around with spade bits when unknown dowel/pipe sizes are involved being paranoid it will be too snug etc. The glory holes in the side let you stick the pole in knowing instantly if it will fit or not. For use in my Milwaukee toolbox I think I might lay your concept on its side at a smallish angle and put the glory hole board in front of the bit holder so you pull the bit out and check the dowel. Just to make it more compact. Thanks for posting.
Great tip, neat idea having the actual hole size added to the storage.
chewie17 wrote:
couldn’t find any holders for these guys so I decided to make one based off a picture I found online…
I guessed at the majority of the measurements by eyeballing spacing and such, I did however use a square for centering things but overall im please for less than $15 in material and I have lots left to build more with that same $15 lol
ENJOY!
I picked up some bits a week or so ago and have been trying to figure out where to put them. I think I just found my project for tomorrow. Thanks for the idea!!
It looks really good, I love those Daredevil spade bits I drilled maybe a hundred holes with 7/8″ the other day with no problem.
Justin Hernandez wrote:
It looks really good, I love those Daredevil spade bits I drilled maybe a hundred holes with 7/8″ the other day with no problem.
the bits are never the issue with drilling holes its finding the right drill to get 100 holes out of say 1 battery.
I find the bits to do well in certain situations, I would use them for rough framing where a fairly clean hole isn’t needed because I do find the tear out from them to be rather excessive. however they get the job done quick
chewie17 wrote:
the bits are never the issue with drilling holes its finding the right drill to get 100 holes out of say 1 battery.
I find the bits to do well in certain situations, I would use them for rough framing where a fairly clean hole isn’t needed because I do find the tear out from them to be rather excessive. however they get the job done quick
I agree with you on the bad tear out but I use them for electrical rough so no problem there
Justin Hernandez wrote:
I agree with you on the bad tear out but I use them for electrical rough so no problem there
then you have the best bits! I assume you have a nice big 18″ ship auger bit too?
No, we don’t have stick houses here, we use cinder blocks for exterior walls and steel studs for interior there’s little wood used in new construction here. The only time there 2x is when somebody is cheap and doesn’t use steel or its an old house with 2×4 interior walls.
I live in a Hurricane zone, the steel studs are 25 gauge and theres some steel posts and I beams that hold the second floor. We use wood truss for the roof and second floor the termites here are some of the worst in the country. So as little wood as possible the better, you’ll be surprised how low the prices of the homes are here.
I don’t think I would ever want to live in a home that wasn’t 2x construction… ive dealt with the flimsy steel studs up here and they say the don’t bend and they say the are strong but let me tell you, they do and they aren’t… you cant attach a sheet of drywall to them, you cant hang anything remotely heavy on a wall because the only thing to use is plugs in the drywall… theres no way I would ever buy one.
ill build my own if that was my only option. luckily the termites here are few and far between, and there are very few tornadoes (yes the ones you guys call a windy day) lol so wood for the house and I would brick the outside. if I lived in a rural area I would double brick and insulate the crap out of her.