
Archived from the Tools In Action forum (Woodworking). This thread is read-only.
Our assistant pastor asked about building a gaming table. Looked online and saw the WW had a guild build for a gaming table. After a week of researching we bought the plans. He doesn’t know much of anything about wood or building but I’m making him help with the project. I took him to my local wood store and he decided on cherry (my personal favorite). I got the last bit of the wood today and we were able to get started after he got off work. With eating dinner we were able to get the legs cut and flattened for glue up. We got them glued up and they are currently in clamps. I’ll finish dimensioning them later today. Might get some of the other pieces rough cut as well.
Sidenote: spoke with the father in law and he won’t be able to start my leg vise screw until next month. Was able to use the bench as a glue up space anyhow.
I’ll be taking donations for more clamps. [External image (uploads.tapatalk-cdn.com), not copied]
Sent from my Pixel XL using Tapatalk
Looking forward to watching this progress …
rule #1 of woodworking: One can never have too many clamps.
@jronman agreed. I actually had some pipe clamps I didn’t use.
I got the legs all but milled up. Need one more pass on the planner and thicknessing will be done. I filled the dust collector bag and just haven’t gotten back to it yet. Need to come up with a good way to cut tapers on the legs without a band saw. No jig either but could make one.
[External image (uploads.tapatalk-cdn.com), not copied]
Sent from my Pixel XL using Tapatalk
Make a jig for table saw not to hard and I bet he would be amazed, people never understand what it takes too make these ideas they have so that is cool ur letting or making him help.. can’t wait to see what it turns out looking like..
Haven’t updated in a while. Honestly haven’t gotten that far though since both of us have gone on vacation lol. Been trying to push it this week though. I got the leg mortises cut out and the lines drawn for the tapers. Even with a taper jig like the microjig taper jig where the leg doesn’t sit on it my saw comes up just a little short of a full cut. Not a big deal right now though. I can take it to cu woodshop and they will cut whatever I need. I am currently waiting g to hear back on a bandsaw as well so hopefully I can add that to the garage.
I got the aprons and top pieces cut and rough dimensioned out. After I cut the 8/4 boards in half I let them acclimate a little and I feel they have bowed some. Joining them on my short bed jointer is becoming a pain. I think I am going to go the hand plane route here a little so I don’t chew away too much board. Since I still am waiting on my workbench screw I had to come up with another way to hold the long boards for some record plane love. Actually worked out pretty darn well considering. [External image (uploads.tapatalk-cdn.com), not copied][External image (uploads.tapatalk-cdn.com), not copied][External image (uploads.tapatalk-cdn.com), not copied]
Sent from my Pixel XL using Tapatalk
[External image (uploads.tapatalk-cdn.com), not copied]
I think I finally got the bow out of the boards. This wasn’t even all of it lol. [External image (uploads.tapatalk-cdn.com), not copied]
Sent from my Pixel XL using Tapatalk
I finished milling the rails and top pieces to thickness tonight. Hopefully this weekend I can get the accessory rails cut and the plywood base dado cut as well.
[External image (uploads.tapatalk-cdn.com), not copied]
Cut the aprons and top to width and length. Cut the dados in for the accessories and the table bottom.
Up next is making a jig to cut the leg tapers with the bandsaw. After that is cutting the tenons on the aprons. [External image (uploads.tapatalk-cdn.com), not copied]
Sent from my Pixel XL using Tapatalk
Made great progress today. Got the leg tapers cut and planed down. The t track cut in as well. Also started to do the tenons but didn’t get very far. Good day overall. My bandsaw blade I believe drifted on me in these cuts. The leg was solid against the jig while doing the cut. Initial cuts look ugly but they turned out just fine. Ordered a few proforce bandsaw blades from Laguna tools tonight to replace the factory bandsaw blade. [External image (uploads.tapatalk-cdn.com), not copied][External image (uploads.tapatalk-cdn.com), not copied][External image (uploads.tapatalk-cdn.com), not copied][External image (uploads.tapatalk-cdn.com), not copied][External image (uploads.tapatalk-cdn.com), not copied][External image (uploads.tapatalk-cdn.com), not copied]
Sent from my Pixel XL using Tapatalk
Beautiful work bro, love watching this project come together
Thanks! A lot of planing yesterday. Buy it is getting closer and closer to actually being a table. Once I get the tenons cut I can do a rough mock up and that is exciting. The bridle joints for the top should be interesting to do. Will wait until the new blades get here. Before I do that.ChrisK wrote:
Beautiful work bro, love watching this project come together
Also forgot, our assistant pastor comes over once a week to help with the build. Told him he had to if he wanted it built. He has a PhD in physics but not in woodworking. Got him to use a hand plane for the first time yesterday. [External image (uploads.tapatalk-cdn.com), not copied]
Sent from my Pixel XL using Tapatalk
@rrich1 you gonna create your own custom attachments for the rail thingy or just use the ones Marc built?
Jronman wrote:
On 9/5/2017 at 4:39 PM, Jronman said:[mention=50861]rrich1[/mention] you gonna create your own custom attachments for the rail thingy or just use the ones Marc built?
@Jronman I think a mixture of both. Depends on what he wants.
Sent from my Pixel XL using Tapatalk
Got some work done tonight! Decided to cut the top and bottom of the tenon by hand. Used my veritas dovetail saw for the first time and like it a lot. Very comfy. Paired it with a flush trim saw and made pretty quick work. Had to fit the tenons to the mortises so that took some finessing. Some are tighter than others but all have some sort of friction fit to them. Need to make a jig for the t track access then it is on to the rails! [External image (uploads.tapatalk-cdn.com), not copied][External image (uploads.tapatalk-cdn.com), not copied][External image (uploads.tapatalk-cdn.com), not copied][External image (uploads.tapatalk-cdn.com), not copied]
Sent from my Pixel XL using Tapatalk
I got the table taken down and I cut the access holes into the t track rail. I had some chip out but managed to glue them all back on. All the chip outs were in the exact same corner. Frustrating.
On the plus side the Makita dust collection hood works really well even with a busing guide. Im sure it would suck up everything without the guide. Took 3 different adapters for it to fit on my Bosch hose. [External image (uploads.tapatalk-cdn.com), not copied][External image (uploads.tapatalk-cdn.com), not copied][External image (uploads.tapatalk-cdn.com), not copied]
Sent from my Pixel XL using Tapatalk
Got the bridle joints cut on the long rails. Rough chiseled one out. Three more to go and to fine tune them. Will have to wait for tomorrow. My table on the bandsaw was too high so I had to use my leg chop plus some plywood to bring it up to level. [External image (uploads.tapatalk-cdn.com), not copied][External image (uploads.tapatalk-cdn.com), not copied][External image (uploads.tapatalk-cdn.com), not copied][External image (uploads.tapatalk-cdn.com), not copied][External image (uploads.tapatalk-cdn.com), not copied]
Sent from my Pixel XL using Tapatalk
Got the rails cut. Still need fine tuning to get exactly where they need to be. Got it fitted enough do a mock-up and see how this table is really going to look. The corners are all proud by 1/8″. They will be rounded over to give a really nice look and feel. [External image (uploads.tapatalk-cdn.com), not copied][External image (uploads.tapatalk-cdn.com), not copied][External image (uploads.tapatalk-cdn.com), not copied]
Sent from my Pixel XL using Tapatalk
That looks awesome man.. it looks like the new saw is cutting very good how you liking it?
So far so good. It runs smoothly. Still new to bandsaws so can’t say it is better or worse than others.Jscott wrote:
That looks awesome man.. it looks like the new saw is cutting very good how you liking it?
Sent from my Pixel XL using Tapatalk
Got most of the routing done for the plywood top pieces. Still need to do one more pass. Then I will soften all the edges of the bridle joints and on to glue up. Should get the routing done tomorrow as well as start on the pilowing of the joints. [External image (uploads.tapatalk-cdn.com), not copied]
Sent from my Pixel XL using Tapatalk
Ok. Progress. Got all the Corners of the bridle joints “pillowed”. I used a 1/8″ round over bit to go over the outer edges of the top. Today I also glued the first bridle joints together. Thankfully titebond 3 has a longer open time. Took me a few minutes to get it to seat all the way where I wanted it to. [External image (uploads.tapatalk-cdn.com), not copied][External image (uploads.tapatalk-cdn.com), not copied][External image (uploads.tapatalk-cdn.com), not copied][External image (uploads.tapatalk-cdn.com), not copied][External image (uploads.tapatalk-cdn.com), not copied][External image (uploads.tapatalk-cdn.com), not copied][External image (uploads.tapatalk-cdn.com), not copied]
Sent from my Pixel XL using Tapatalk
Last set of joints is glued and in clamps. Will do some sanding after work tonight. Then I can put in the vertical sub frame pieces. Those glue to the top rails and make the walls of the inside of the playing surface.
Thank goodness for a workbench! I would have had a place to glue these up otherwise. [External image (uploads.tapatalk-cdn.com), not copied]
Sent from my Pixel XL using Tapatalk
Sanded the bottom side of the top. Glued the first sub rail on last night and glued the second one this morning. [External image (uploads.tapatalk-cdn.com), not copied]
Sent from my Pixel XL using Tapatalk
Both side sub rails are glued on. Next steps are to clean up the glue joints and then mark out the legs where the sub rails will drop in to. Those will be routed out. Getting closer!
Sent from my Pixel XL using Tapatalk
[External image (uploads.tapatalk-cdn.com), not copied]
Getting some work done on the table today. Tyson came over yesterday and we got the legs notched out for the sub rails to go into. They some how came out long even though I measured. Actually worked out on my favor because with the original plans the notches on the table bottom would match up with the sub rails meaning they would have to be pretty darn exact. I extended the notch in the leg so the plywood would slide into the notch. This gave me a lot more leeway when cutting the plywood by the legs.
Had to sand the sub rails and only good way to do it was clamp it to the workbench.[External image (uploads.tapatalk-cdn.com), not copied][External image (uploads.tapatalk-cdn.com), not copied][External image (uploads.tapatalk-cdn.com), not copied][External image (uploads.tapatalk-cdn.com), not copied]
Sent from my Pixel XL using Tapatalk
Had about an hour of shop time today. Last night I sanded all of the legs. Today I finish sanding all of the rails and made the support strips for the rails. Got two glued in. Need to glue the longer strips in after work and also sand the maple plywood bottom. Then I can glue the whole bottom up! [External image (uploads.tapatalk-cdn.com), not copied][External image (uploads.tapatalk-cdn.com), not copied]
Sent from my Pixel XL using Tapatalk
Got the lower pieces of the table all sanded and was able to get the long rails and legs together before work. Depending I might try and finish the glue up after work. We’ll see.
[External image (uploads.tapatalk-cdn.com), not copied]
Sent from my Pixel XL using Tapatalk
Got the rest of the base glued up. Clamped a straight edge to the top and will chisel out the waste on the corners so I can start on the panels on Monday! [External image (uploads.tapatalk-cdn.com), not copied][External image (uploads.tapatalk-cdn.com), not copied][External image (uploads.tapatalk-cdn.com), not copied]
Sent from my Pixel XL using Tapatalk
I got The base all glued together last night after work. This morning I chiseled out the corners of the rabbets where the plywood top panels will be placed. I will start on those on Monday.
[External image (uploads.tapatalk-cdn.com), not copied][External image (uploads.tapatalk-cdn.com), not copied]
Sent from my Pixel XL using Tapatalk
That’s looking killer man!
Thanks. So close to being done! I’m really happy with how it’s turned out. Not too bad for my first really fine furniture piece. The vanity was nice as well but it was pocket jointed and didn’t use any mortis and tenons.BMack37 wrote:
That’s looking killer man!
Sent from my Pixel XL using Tapatalk
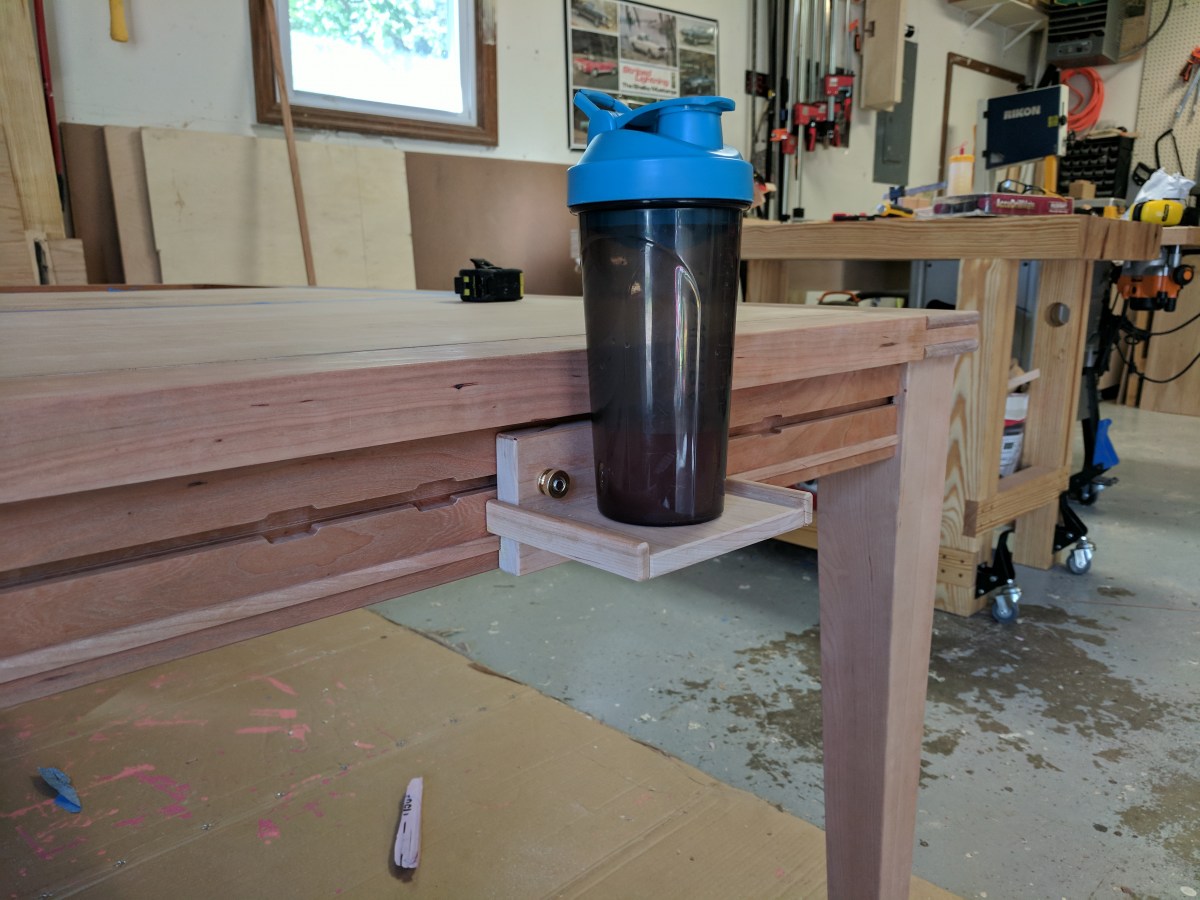
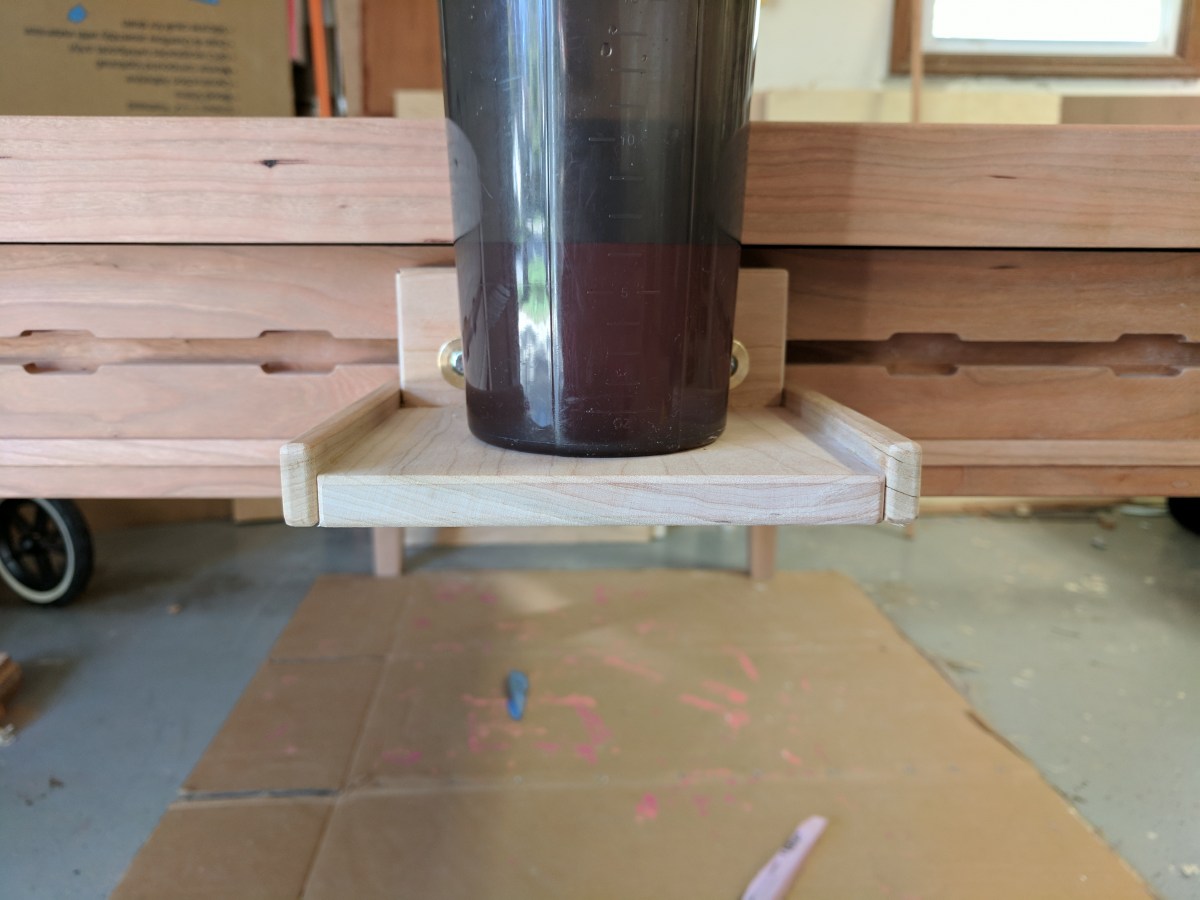
Today we got the plywood panels rough cut and got 4 cup holders cut as well. They still need to be sanded, rounded over, and glued together. They fit nicely though. [External image (uploads.tapatalk-cdn.com), not copied][External image (uploads.tapatalk-cdn.com), not copied]
Sent from my Pixel XL using Tapatalk
I finished the cup holders over a week ago. Added sides to them and rounded over all the edges. I also cut the plywood panels to their final size and glued on the first strips on one of the panels tonight. Need more clamps!
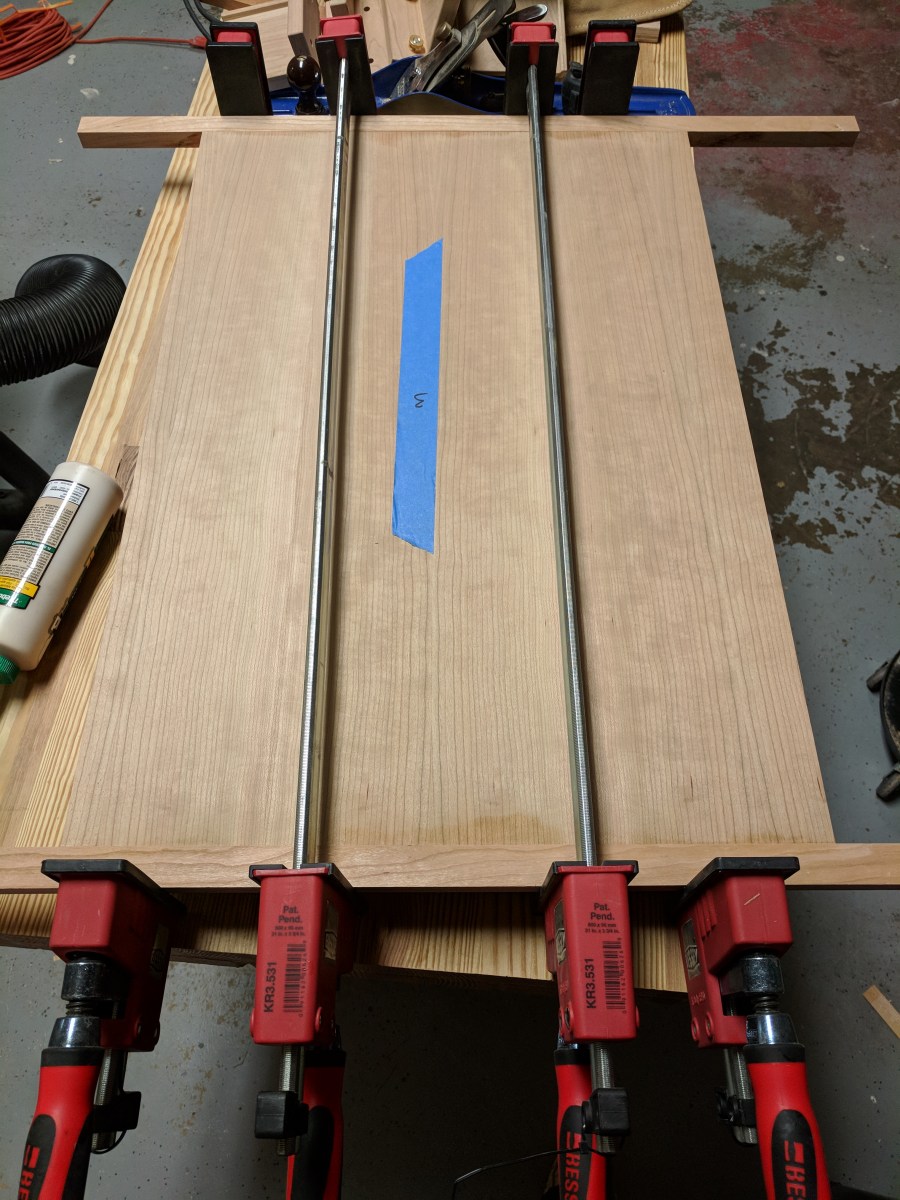
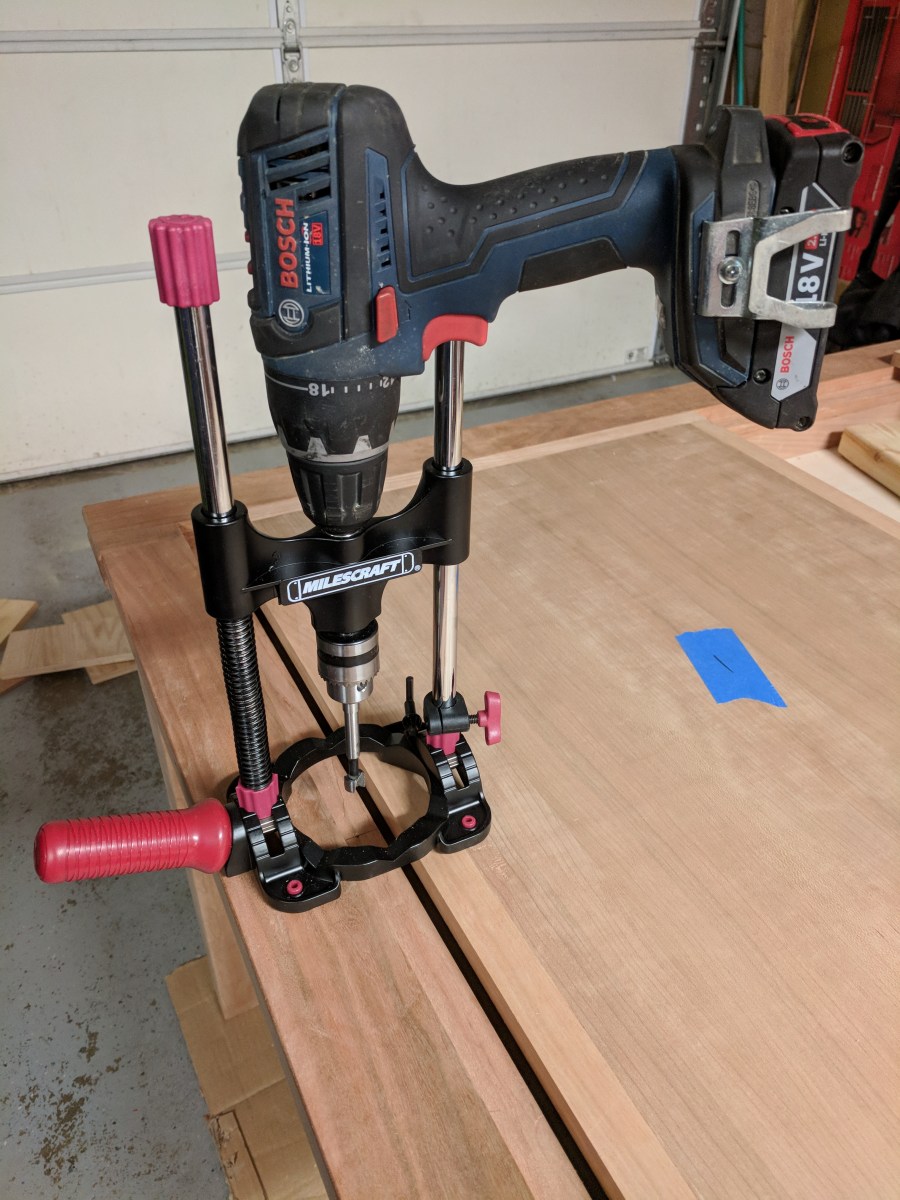
Getting closer. Between yesterday and today I got the rest if the panels glued and the tops router and planed down. I drilled a hole for the access pin I made. The pin is pushed up from underneath, through the rail, and it pushes one of the panels up. All that’s left to do is size the panels to the top with the dado stack and to slightly countersink the panels to the top. So close!
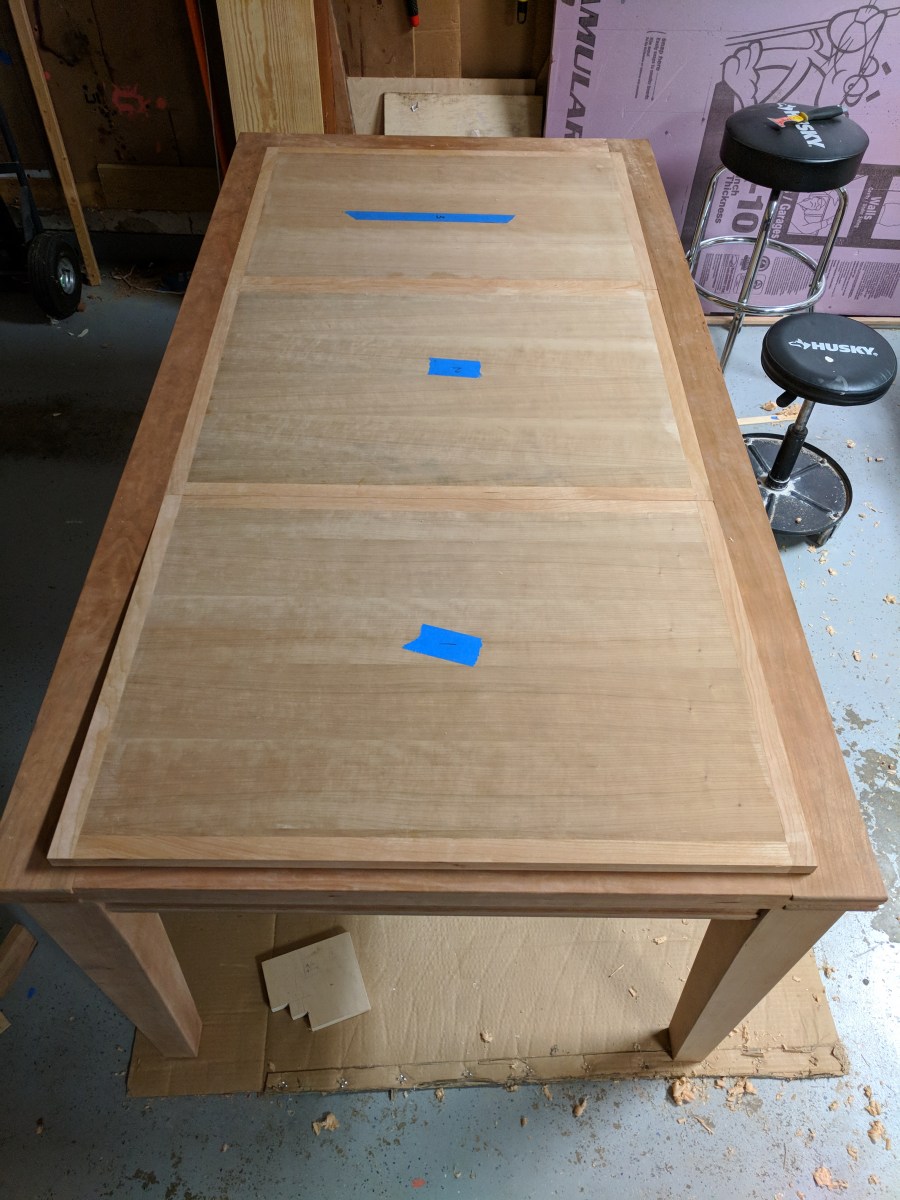

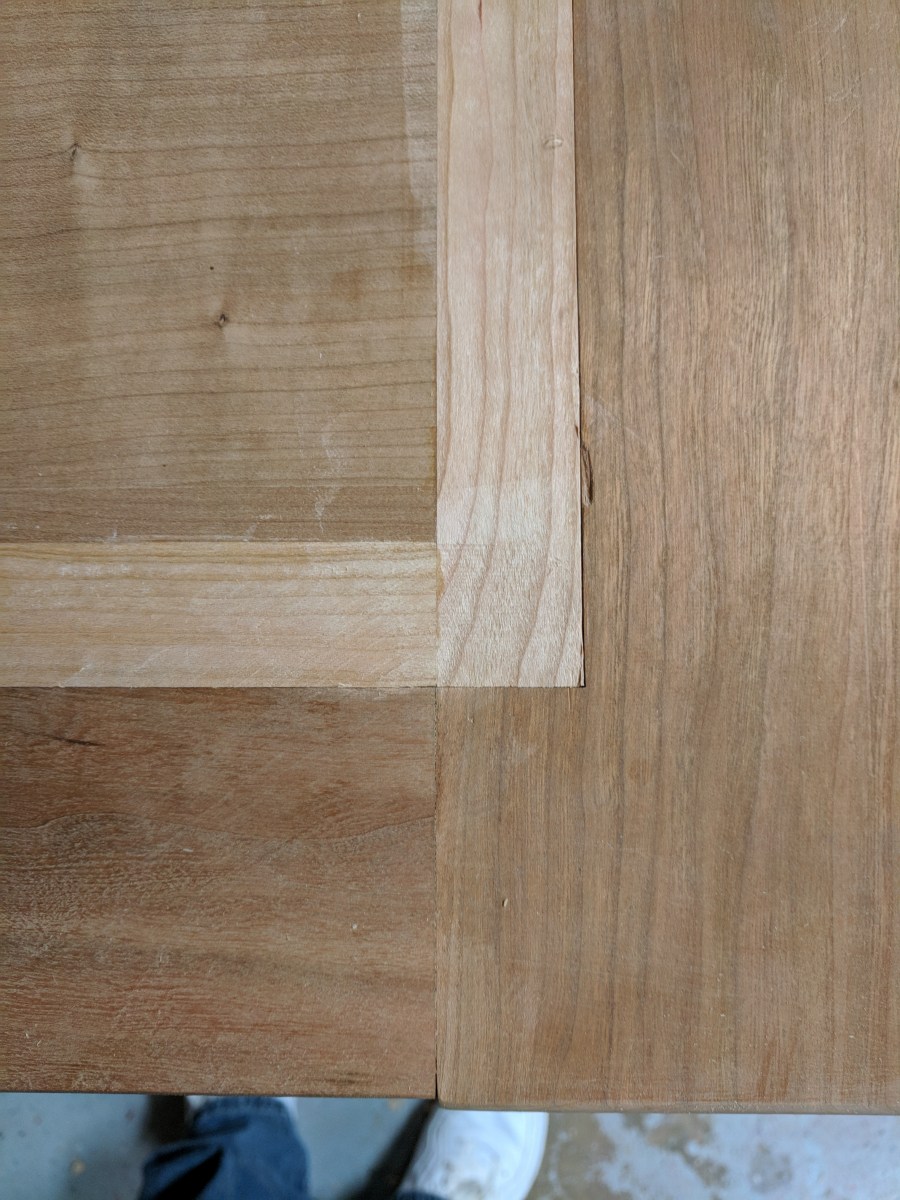
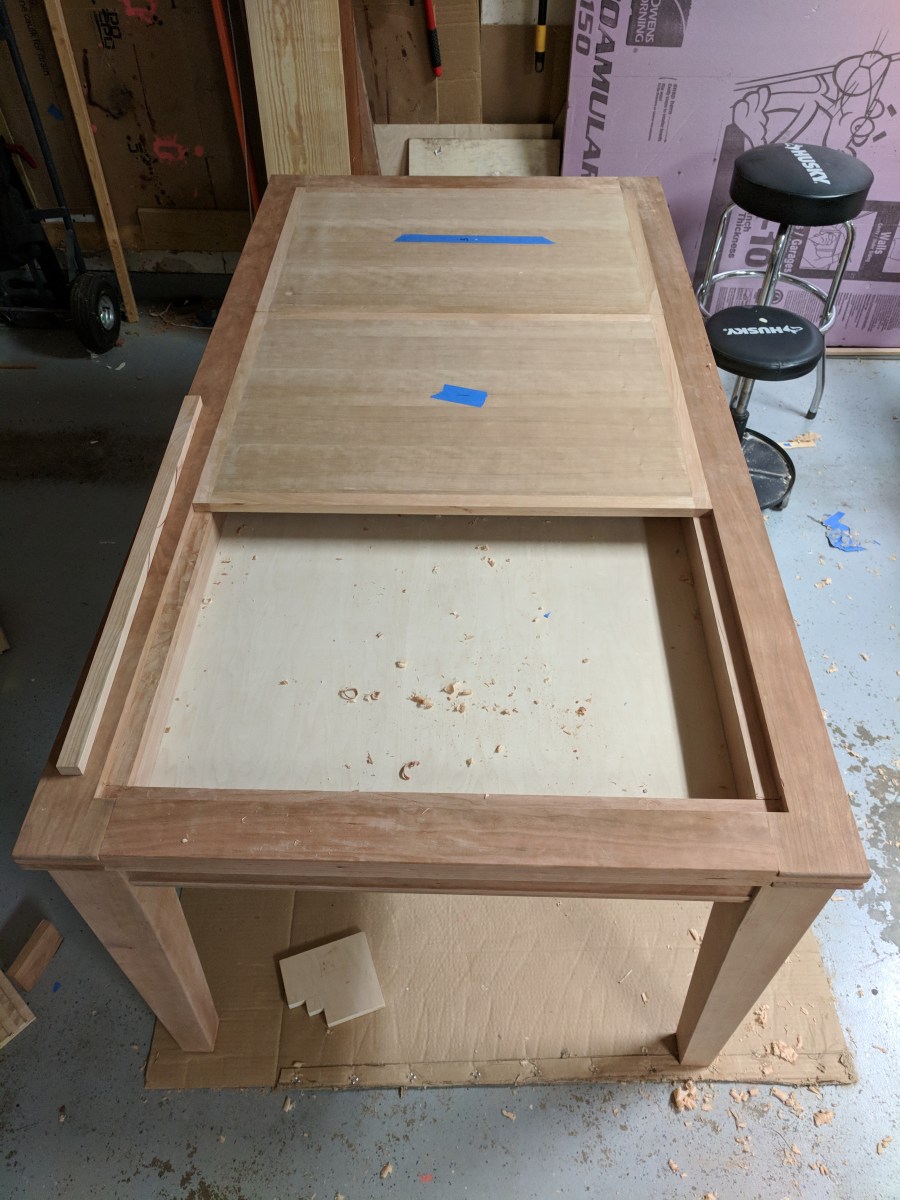
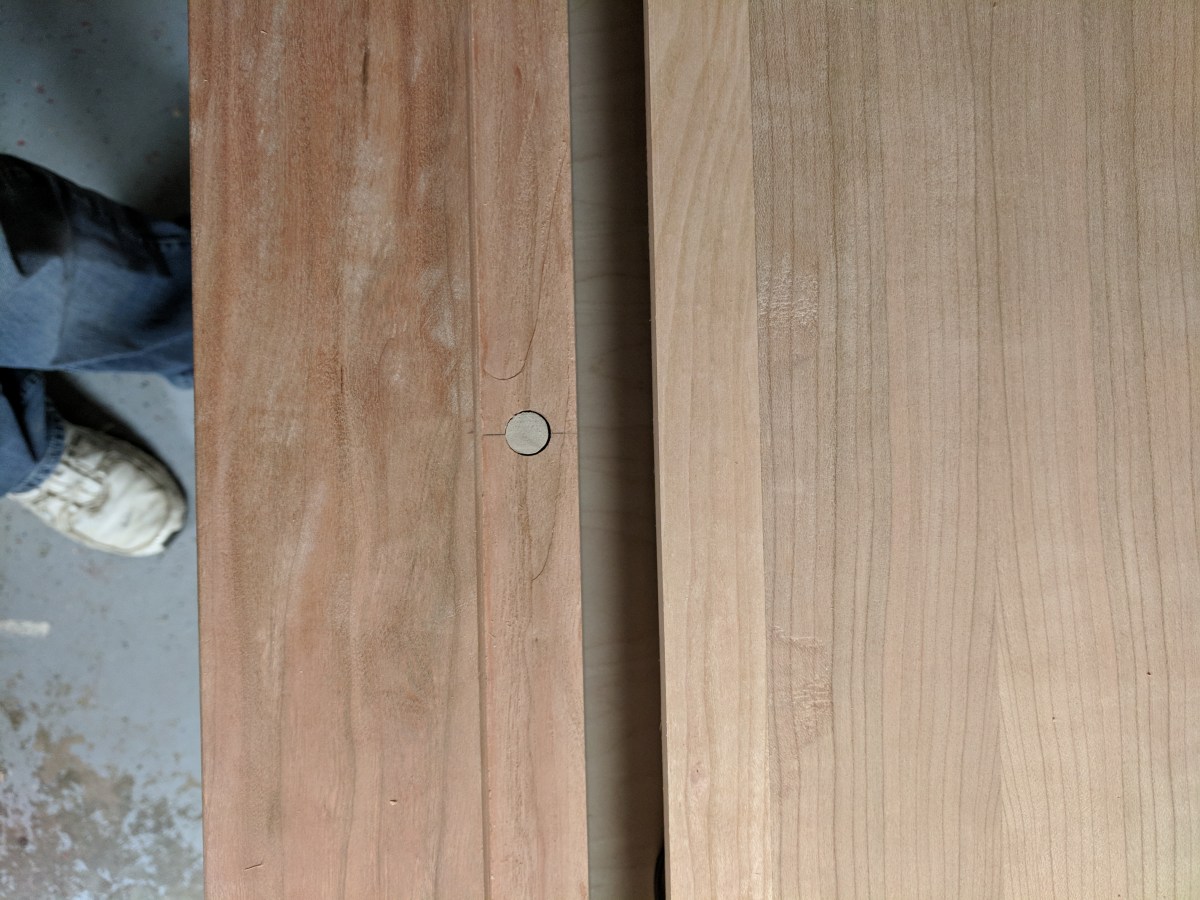
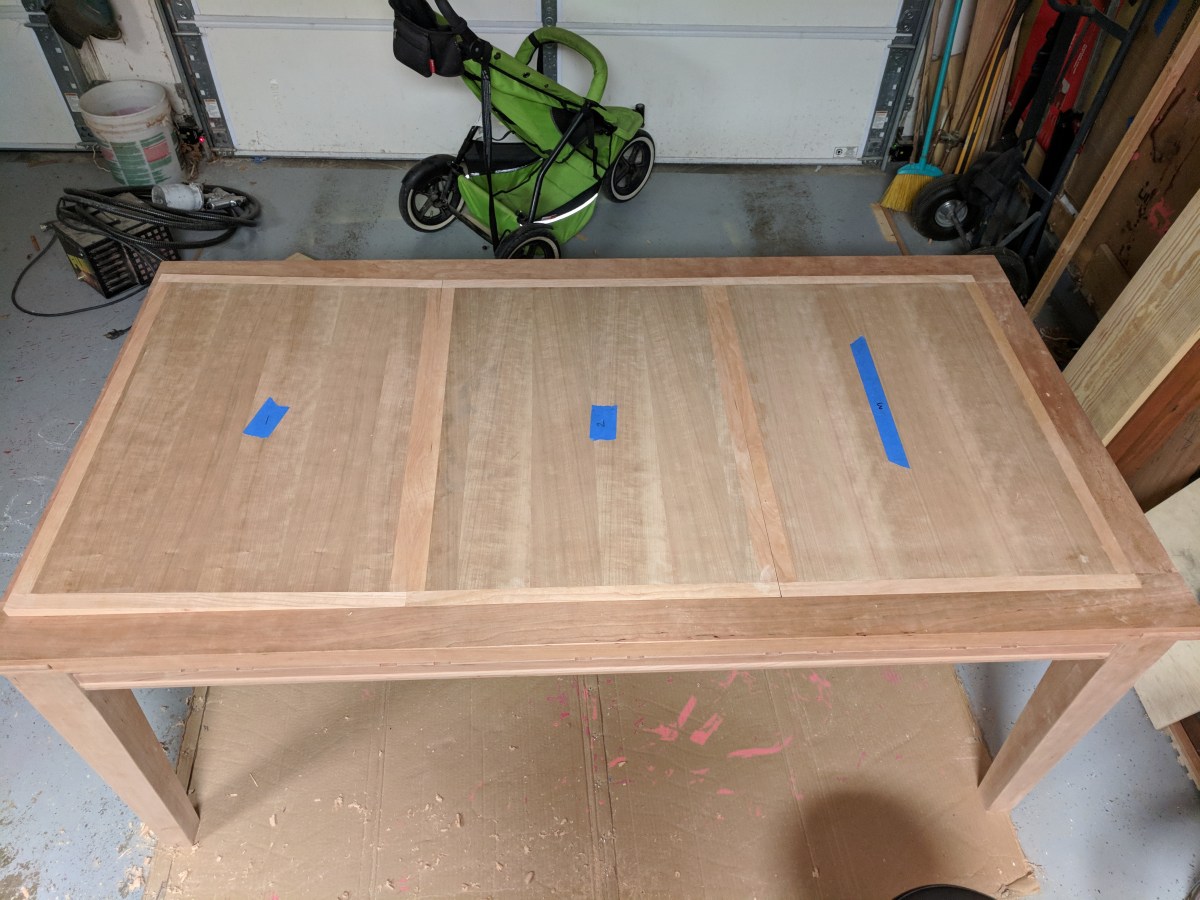
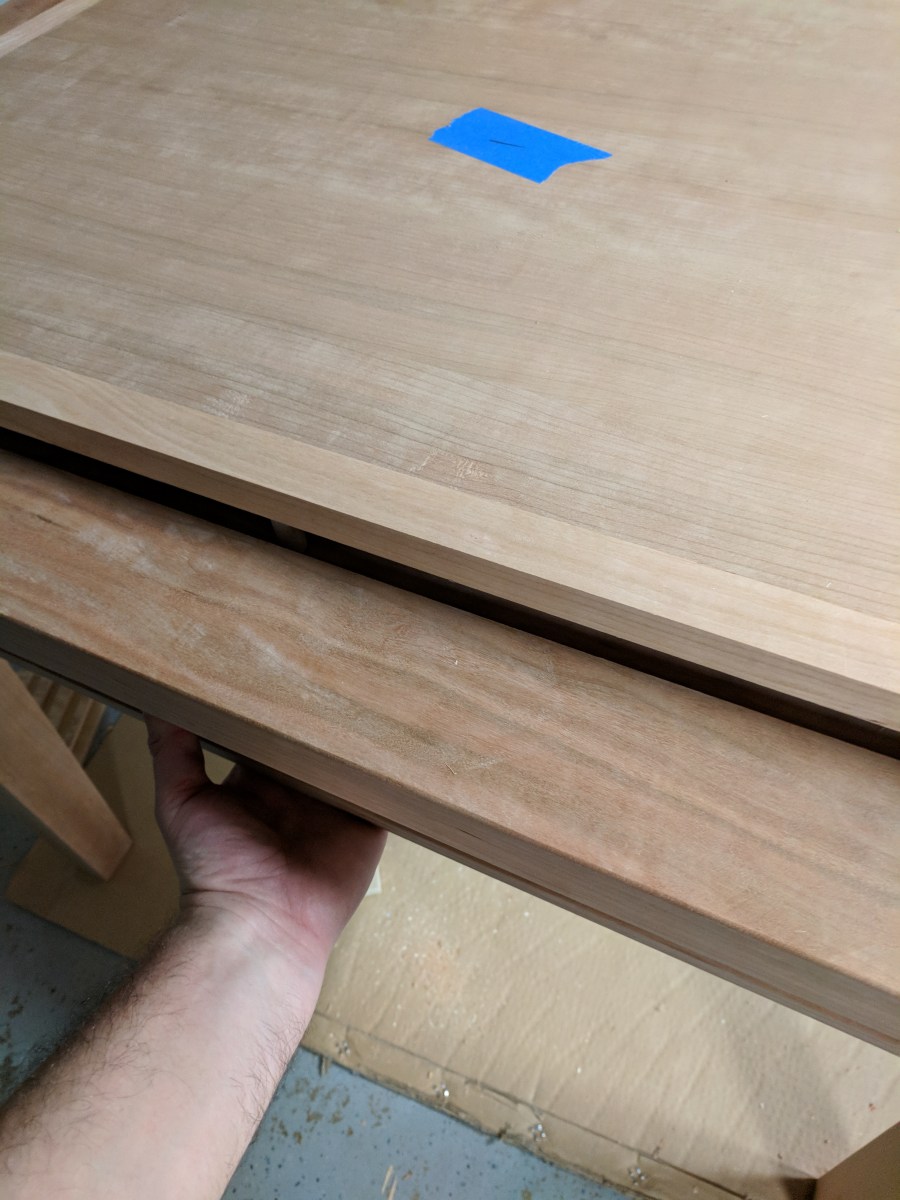
Rabbets cut into the panels and they fit! Little fine tuning to do on them but not much. Up next is sanding and finish!!


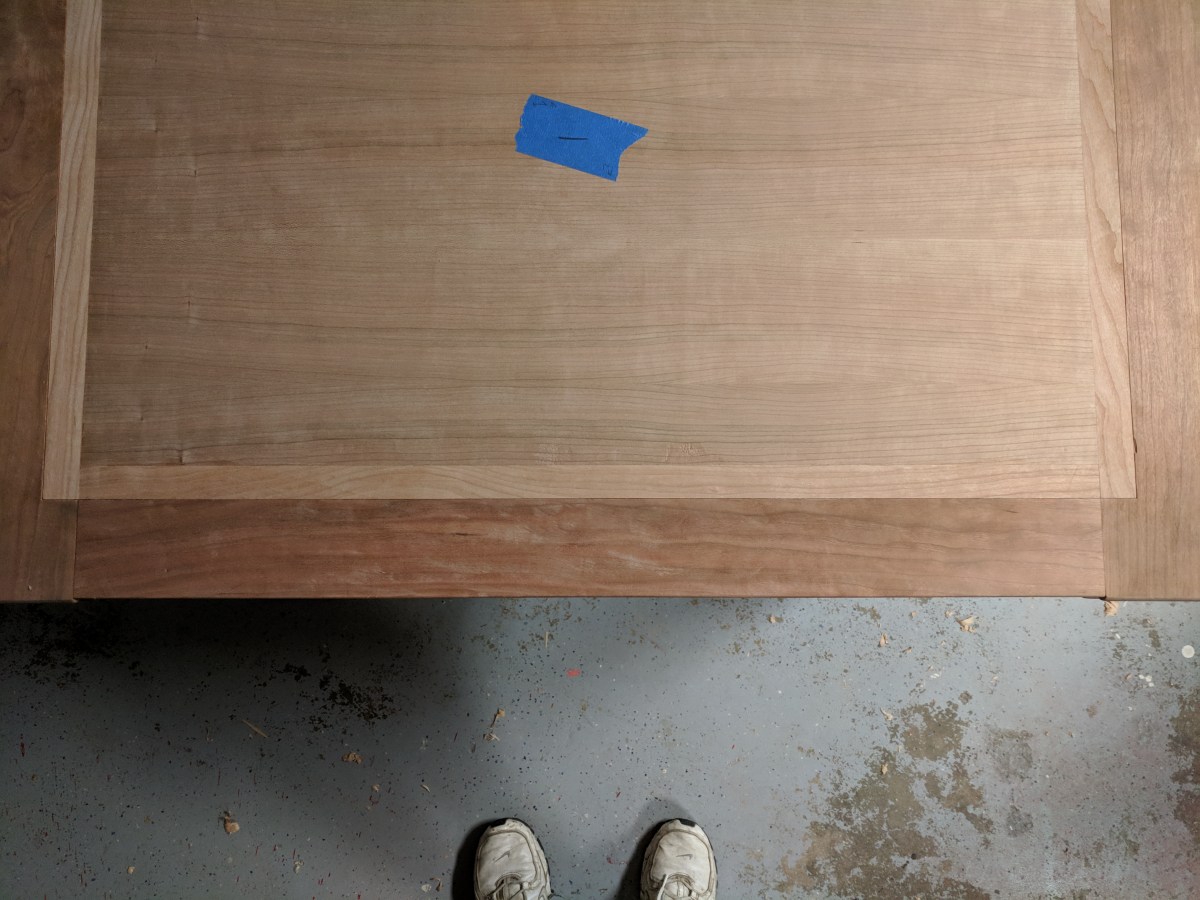

Table is looking really nice. A gaming table is on my “to build one day” list when I actually have room for one.
How’s that Milescraft AccuDrillMate working for you? I thought about getting one but then read some reviews that left me reconsidering whether it was worth the money.
jtkendall wrote:
2 hours ago, jtkendall said:Table is looking really nice. A gaming table is on my “to build one day” list when I actually have room for one.
How’s that Milescraft AccuDrillMate working for you? I thought about getting one but then read some reviews that left me reconsidering whether it was worth the money.
I only did the one hole with it but so far so good. Seems pretty well built. Heavier than I thought it would be.
Finish is getting put on this week! W00t!
First coat of dewaxed shellac then sanded with 320 grit. Then I got my first coat of armorseal on today. Will sand and put a second coat on tomorrow. Will do a minimum of 3 coats. I love how cherry looks with finish on it. [External image (uploads.tapatalk-cdn.com), not copied][External image (uploads.tapatalk-cdn.com), not copied][External image (uploads.tapatalk-cdn.com), not copied][External image (uploads.tapatalk-cdn.com), not copied][External image (uploads.tapatalk-cdn.com), not copied][External image (uploads.tapatalk-cdn.com), not copied][External image (uploads.tapatalk-cdn.com), not copied][External image (uploads.tapatalk-cdn.com), not copied][External image (uploads.tapatalk-cdn.com), not copied]
Sent from my Pixel XL using Tapatalk
3rd coat (2nd poly coat) went on last night. Hoping to get the last coat of poly on tonight. :). Just might be able to get it to them by Thanksgiving. Would like it to cure a little longer though.
Sent from my Pixel XL using Tapatalk
3rd coat is on and drying. Trying to figure out if I am going to buff this out or not. I’ve only buffed one thing out before. Going to need to do some research. Super happy with it so far!
Sent from my Pixel XL using Tapatalk
Gaming table is officially done! Very happy with the results. I need to be able to take better pics. Lol[External image (uploads.tapatalk-cdn.com), not copied][External image (uploads.tapatalk-cdn.com), not copied][External image (uploads.tapatalk-cdn.com), not copied][External image (uploads.tapatalk-cdn.com), not copied][External image (uploads.tapatalk-cdn.com), not copied][External image (uploads.tapatalk-cdn.com), not copied][External image (uploads.tapatalk-cdn.com), not copied][External image (uploads.tapatalk-cdn.com), not copied][External image (uploads.tapatalk-cdn.com), not copied]
Sent from my Pixel XL using Tapatalk
That looks awesome man!
BMack37 wrote:
6 minutes ago, BMack37 said:That looks awesome man!
thanks!
Table got picked up today and is in it’s new home. Time for the next project!
[External image (uploads.tapatalk-cdn.com), not copied][External image (uploads.tapatalk-cdn.com), not copied]
Sent from my Pixel XL using Tapatalk