
The Dremel Rotary Tool is one of the most popular tools for DIY’ers. From woodworking to jewelry making, to even simple repairs and customizations, a Dremel Rotary Tool can be used for a variety of applications — including saving money by DIY’ing your own gutter guard. This DIY Gutter Guard and installation is just one tutorial provided on the Dremel site, YouTube, and Dremel Community network.
Dremel partnered with Chip Wade for this DIY Gutter Guard & Installation tutorial. We have provided a breakdown of the steps and the tools and items needed for this DIY.
Guide
Dremel Rotary Tool
Dremel has been in business since 1932 and has become such a trusted name that the brand name “Dremel” has become synonymous with “rotary tool”. This simple tool has become a favorite among professionals and homeowners. Despite this success, the company has always focused on improving its products to continue to bring customers the best rotary tool on the market, along with other Dremel products.
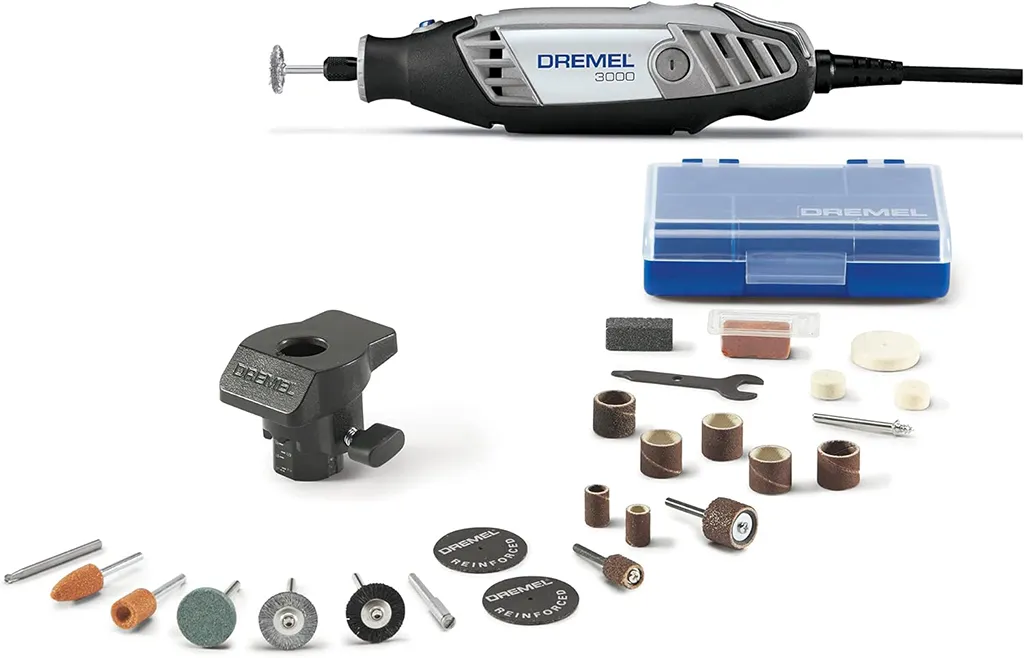
- Model Name: Dremel 3000 1/24 in. Rotary Tool Kit
- Features: 25-piece kits comes with a variety of rotary tool attachments and a storage case. 120 volts of power with that can do 5,000-35,000 RPM.
- Where to Buy: $64.99 on Amazon.
DIY Gutter Guard & Installation with Chip Wade
Dremel partnered with HGTV’s Chip Wade for this easy Gutter Guard DIY & Installation video.
PROJECT NOTE: We recommend cleaning your gutters prior to installing a gutter guard.
Tools & Equipment
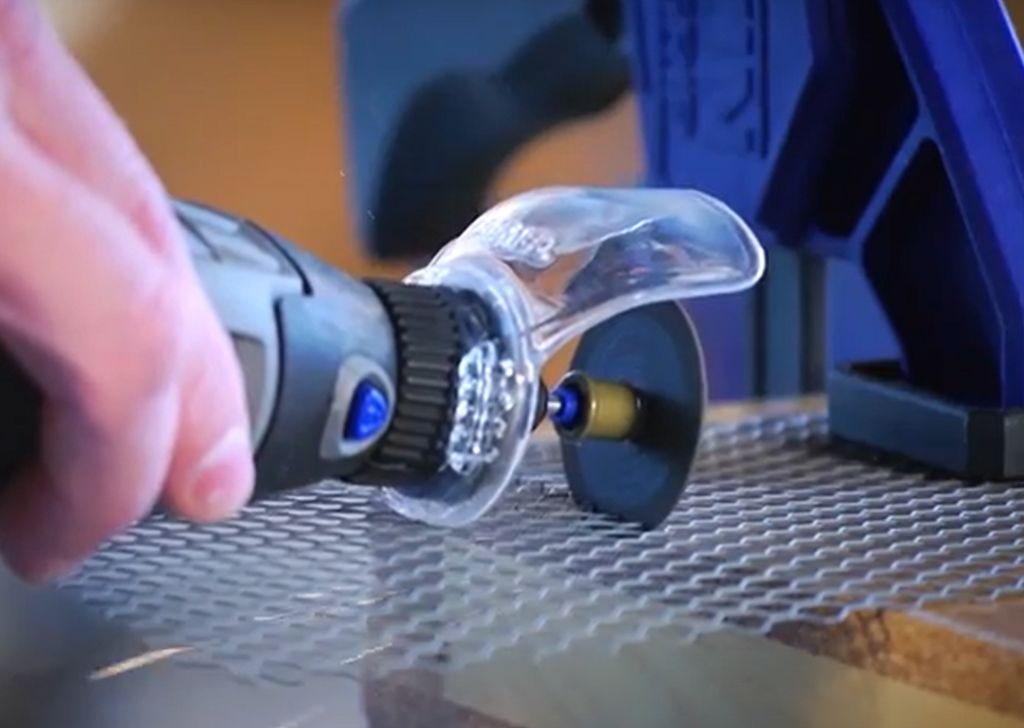
- Dremel Rotary Tool 3000 model
- EZ456 EZ Lock Cut-Off Wheel
- EZ402 Mandrel
- Wire mesh
- Tape measure
- Pencil
Step-by-Step Tutorial
- Measure length of gutter.
- Measure gutter guard to corresponding length and mark where cut is needed.
- Insert EZ402 Mandrel into rotary tool and attach the EZ456 EZ Lock Cut-Off Wheel.
- Follow line while making the cut.
- Snap gutter guard onto gutter. Be sure gutters are clear of debris before attaching.
More Dremel DIYs
Want to try your hand at more Dremel DIY tutorials? Check out the Dremel Project page or Dremel Community.
