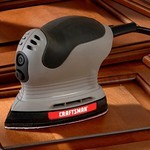
You may have guessed a detail sander is exactly what the name implies, it is a sander designed for detailed sanding. Such as in furniture, cabinetry and more. There are a lot of manufacturers who make detailed sanders, but this review is focusing on the Craftsman Detailed Sander. This was sent to us from a frequent visitor to our site and someone we have came to know over the years. Before we get started, if you would like to learn more about sanders, you can visit our sander page.
The Craftsman sander, model number 9-11647 comes obviously with the sander, but you also get 24 assorted sandpaper attachments for detail and finishing sanding as well as scrubbing and rust removal. You also get a small bag to store the sander and sand paper in. The handle has a nice rubberized grip to help keep control of the sander. One nice item is the dust sealed on/off switch to help protect the switch. In the past some companies were not using, and surprisingly some are still not using this dust sealed system. If you find a sander that doesn’t uses this type of switch, we would suggest staying away as we have seen more and more problems occurring where the switch can be be turned on or off. The sander orbits at 11,000 OBP, which isn’t too bad for a home sander. Another nice feature included in the kit is a finger attachment. The finger attachment has a nice point to get into those hard to reach areas that normally you would have to do by hand.
When we first picked up the sander, we noticed how well it fits in your hand. This is very important as it allows the user more control over their sanding. Now the sander is a little noisier than we would expect, but not too loud to where it drives you crazy. The vibrations are not too bad either. This is something you could use for an hour or two before you have to give your hand a rest. The finger tool is very nice and truly does get into tight spots. For the video we just showed a quick demonstration, but when we used it on a cabinet door, the finger was a nice add on. To add the finger to the sander, just unscrew the Phillip screw and you can attach the finger head.
May sound goofy, but one thing we really liked was the sandpaper that came with the sander or even the sandpaper Sears sells as a replacement. Normally some sanders are like ink jet printers. You can buy a cheap one, but where they clean house is the ink or in this case the sandpaper because you have to keep buying more and more. With detailed sanders you tend to wear out the tip of the sandpaper because that’s what is getting into smaller spaces and does most of the work. To attach the sandpaper, this sander uses a hook and loop fastening system, so basically the user just presses the paper on the bottom of the sander and they are ready to go. Sears uses perforated sand paper, so one sheet of sandpaper gives you three full tips or six ends. When you have the sandpaper on the sander and the tip becomes worn out, you can take the paper off and remove the head where it is perforated. You can then flip the paper around and you have a brand new or close to new head to finish your sanding job. You might want to watch the video and see what mean as it is a little hard to describe.
Overall, if you are looking for a do-it-yourself sander at a very reasonable price, the Craftsman sander is not too bad. The kit comes with everything you need to get started on your next project. The balance is good and the vibrations are not too bad for a detailed sander.


What a neat little tool for sanding in tight spots. I saw your review, so the next time I was out shopping, I bought it!