As you know we have been working on a project of installing a wood burning fireplace for some time. We already talked about the fireplace and the liner, now it is time to jump into the install process. Before we move on, this might be a great time to recommend using a professional to install your system. Not because it’s hard, but since they install these systems everyday, they can do it much faster and you will have the peace of mind knowing it was done right. If you are like us, then you will probably want to install it yourself, so we created this helpful install guide on how to install a wood burning fireplace.
Before we jump into what tools are needed for this project, I should point out you will need someone to help you. Preferably someone who isn’t afraid of heights, isn’t afraid to work and isn’t afraid to get dirty. I didn’t know anyone like that, so I asked Dan to help. I figured if I couldn’t find anyone like that, I might as well work with someone who would at least make me laugh.
Tools Needed – Blaze King Fireplace Install
- Reciprocating – Only if you need to make your opening bigger for the liner
- Philips screwdriver
- 1/4″ Wrench
- #2 Square Drive
- Tape Measure
- Level
- Flat Screw Driver
- Box cutter knife – To open the boxes
Tool Needed – DuraVent Liner
- Ladder – See Ladder Safety
- Rivet Tool
- Caulk Gun
- Weather Sealant Caulk
- Philips Screw Driver or Screw gun
- Tape Measure
- Safety Harness
- Rope
Now I am sure we probably forgot one or two tools, but that’s what is so important to having a helper like Dan. If you forget something, send him to grab the tool for you. Now Dan, or I mean your helper, may not return for an hour or so because he went to lunch, but that’s just the chance we take working with Dan, I mean your helper.
*Make sure you have your chimney cleaned before you install.
Install Blaze King Insert and DuraVent Liner
I would recommend reading the manual as we installed our fireplace insert a little different.
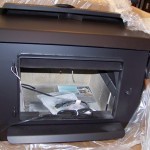
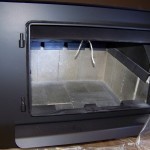
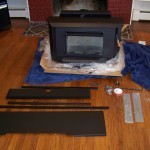
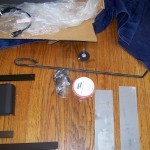
- Open all the boxes and inspect everything. Make sure everything is included and not damaged. Put all the screws and small pieces aside. You will see two small pieces of flat metal strips, you will need those for sliding the fireplace in place.
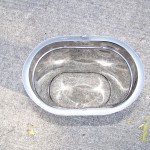
- Remove your damper. Mine was really easy to remove. Half of the damper just lifted right out. Now you may have to cut some of your damper out. We used an oval piece so it fit through the opening. Take the piece of DuraVent liner that will be passing through the damper (from your actual fireplace to the flue). Make sure this piece fits that area. If it does, you are in good shape. If not you will have to use your reciprocating saw and cut enough of the damper out so the liner will fit.
- Now lean your Blaze King backwards but not such much as to
cause all the brick to fall out of place. Install the front two leveling
bolts to the firebox. Repeat the process by carefully leaning the Blaze
King forward and inserting the rear two leveling bolts - Now you can install your DuraVent liner collar to the Blaze King using three sheet metal screws.
- Next tighten the Blaze King collar where the DuraVent liner is inserted into the Blaze King.
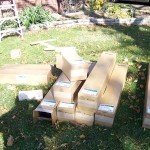
- Open all the DuraVent liner boxes. Make sure they are all intact and take out all the rivet bags. We kept our liner in the box when we were transporting them on the roof to help protect them. We made sure everything was secure and safe as this is the most important item to consider when on a roof.
- One side note. I had a small lip that protruted from the chimney. I wasn’t thinking and left mine on. Looking back I would have grinded this part off so when I installed the cap, everything was flush. By the time I realized this, I had everything installed and it was too late. So if you can make the top flush, now is the time to do it.
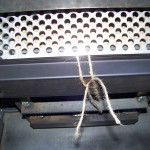
- The first piece of pipe you want to lower into your chimney is the flex piece as this will bend. If your flex piece doesn’t sit below the shoulders of your flue, you will need to use a sleeve. A sleeve is a piece of material you can get from DuraVent. It allows the flex piece to have a zero clearance. If your chimney doesn’t have enough room for the sleeve to make it down the chimney, wait until the whole liner is put together and install the sleeve from the bottom of the fireplace. Before you drop the flex piece in the chimney, we rigged it to have rope around that piece. This way we could lower the flex piece in the chimney and attach the next piece of liner.
- Have one person keep holding the rope and the other person keep fitting the liner together. When you attach the liner to each other in 4′ section, you can easily rivet the pieces together with your rivet tool (not included). This was much easier than I thought. The pieces went together very easily and were strong by the time we were done. Keep doing this until you have the proper length in place that will attach to the collar on the Blaze King and also have enough to be flush or protrude from the top of the chimney.
- Once we had the correct amount attached, we made sure everything was secure and released the rope to take that out of position. Before you release the rope make sure the liner is in place and will not drop.
- Get your Blaze King in place. Lay down the metal strips in front of the fireplace and place the Blaze King on top of the strips. You want the bolts you installed earlier to rest on these strips. You will see how easy it is to slide the Blaze King in and out of the fireplace. It is amazing how a small piece could make the install so much easier. Take this time to slide it in place for a dry fit and make sure the fireplace is level from front to back. You can use the bolts you attached to adjust the height.
- Now that it is in place, slide the fireplace back where you can attach the original liner collar you installed on the Blaze King to the liner you installed when you were on top of the roof. This can be done with the rivet tool. Overall it is a nice set up because when you clean the liner, you can loosen the sheet metal screws and the collar will come right off.
- Once everything is installed and fastened all together, move the Blaze King back out of the fireplace about three inches because you need to install the shroud.
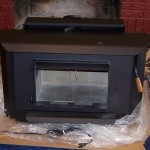
- We installed the sides to the shroud first by loosening a couple screws on the Blaze King. The side panels fit between the Fireplace and a metal sheet where you loosened the screws. Next we attached the top. After the top is secure, the trim will slide over the top and side (Put the trim together first with the corner brackets that are included). Next, place the convection deck on top of the Blaze King and screw into place. The last item is putting the catalytic thermometer in place which it just slides into the hole.
- You can now slide your Blaze King in place. Once you have a good idea where your Blaze King will sit, you can now use a level to make sure it is level from left to right and use your tape to make sure the fireplace is centered.
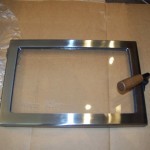
- The last item to install is the door. The door just slides right into the hinges with ease. You want to make sure the door has a tight fit. You can place a dollar bill between the door and the fireplace. Close the door and see if you can move the dollar bill around. If you can, you need to make an adjustment. Just loosen the bolt on the fireplace where the door latches. You can now turn the latch which will make a tighter fit.
Now it is time to return outside one more time
- Before I went on the roof, I put some crumpled up newspaper in the Blaze King and lit it on fire. I wanted to make sure there was a good draft with the door closed and everything was working, which it was.
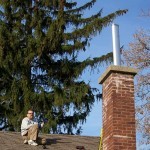
- Now that everything is attached, now comes the tricky part. Well not tricky, but it was the hardest part for me on the install. You have to position yourself so you have leverage, but are still safe. I wouldn’t recommend this, but for me it was sitting on top of the chimney. You have to pull up on the liner to get any bends out and make sure the liner is straight. One key I found was to install the brackets on the liner, just make sure the cover is in place first. This is the flat piece of metal that covers the chimney. These brackets hold the liner in the up position. I installed them so they were very tight, but I didn’t fasten it to the liner just yet. I would pull up on the liner and push down on the brackets. This gets very heavy so when I had to take a break, the brackets would still hold the liner in place. I had to do this several times to get the liner in place. Once the liner was in place, you can go ahead and fasten the brackets to the liner.
- Next you put the collar on which is very easy. This just protects water from getting between the chimney and the liner.
- Then place the cap on top of the liner, this protects water from getting into the liner.
- The last item is running a bead of weatherproofing caulk in any areas to protect the chimney and liner.
Final Thoughts
We tried to show everything in the video, but it was hard to install the Blaze King and DuraVent and still be safe. We also tried to cover all the steps, but sometimes it is hard to convey in words alone everything that we did. If you have questions, found a better way to install or have any feedback, drop us a line. We want to hear about your experience and we can add this so others can have an easier time with the install. At first Dan and myself thought this might be a hard project, but once we got into the install, we realized how easy it truly is. If you are someone who likes to be hands on, you can install this with no problems. For those who would rather kick back, have a beer and have someone else install the system, you can have a dealer do the install.
* The Blaze King has been installed for about a month, yes it took that long to write all these articles. We are a little slow. I have to say this system is awesome. The fireplace has been running everyday except one for the past month. I have only used about a half face cord of wood. The temperature outside has been around 40-50 degrees during the day and nights have been around 30-40 degrees fahrenheit. I love this system. My house is very inefficient. It was built in 1924 and has little to no insulation. Two things I did notice. When we let the fire go out and the house got cold, we had to run the stove on high for a while to get things to heat up again. If possible, don’t let the stove go out. I know you need to to get the ashes cleaned, but try to get the ashes cleaned up, once they are cold, then start the fire again. Your fireplace has to work hard to get the temperature back up. Not only are you heating the air in the house, but you have to get the furniture and everything else back up to a comfortable temperature. Heat rises, so our basement doesn’t get any heat. Not a big deal because I have a boiler system. I closed all the zones and just left the basement zone in place to heat the basement.
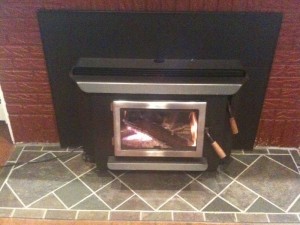
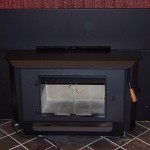
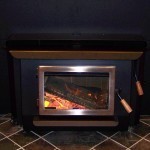
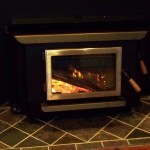
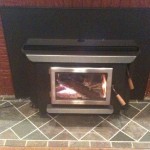
I can not say enough how awesome this Blaze King has been. The system exceeded my expectations. The overall look of the fireplace is great, the efficiency is incredible and I would highly recommend this to anyone looking at a fireplace insert.



I think that is the most comprehensive install article i have ever seen. Good Job
Very nice article. Bought the Princess for this winter and referred to your video and article. Thanks for the help. Also thanks for anwering my emails. Hope it wasn’t too many. The insert is awesome, huge savings all ready. Incrediable burn time. I have been able to leave the fireplace on low and just keeps up with the house needs.
Glad you like it and thanks for the feedback. Love the Princess. Worth every penny. We cut our home heating bill from $275 to $43 in Dec. Didn’t have to run the heater at all.
Holy cow this seems very nice. Nice review and how to. Looks like this is quality. We don’t have the money to buy one now. In fact we were going to get a cheap version. I guess now we should save or pennies and upgrade to the blaze king. Does the door get very dirty?
I installed mine and the shroud rattles. I have all the screws in, but when the fan is on med or high, I get a rattle from the metal against the metal. Can I put spacers in between to stop this.
I have heard other people say this also. When the insert cools down, just push it back farther into the fireplace. It should put more outward pressure on the shroud and stop the rattling. I would not use any inserts since it gets hot and could cause a fire.
i need to know the specs on the insulation for the blaze king. we have it surrounded by fire brick, but the fire marshall states we need to have 36″ and we have 26″ is that within guide lines for a home.
Thats a great question. I am not sure. i would contact them directly because they would know better than i would. Here is their contact page https://www.blazeking.com/EN/contact.html
I like how you pointed out some of the tools that are needed to install a fireplace such as a level, tape measure, and box cutter knife. My dad told me that he would like to surprise my mom with some renovations in their house when she comes back from Europe. I will suggest to him to think about installing a wood-burning fireplace so that my mom can spend time with him in a warm living room.