A few weeks ago, I was asked if I could help out with a simple “how to” series for Mother’s Day. The idea was to come up with a simple build that could be done in a weekend and given away as a Mother’s day gift. I thought this was a great idea and of course, I was on board.
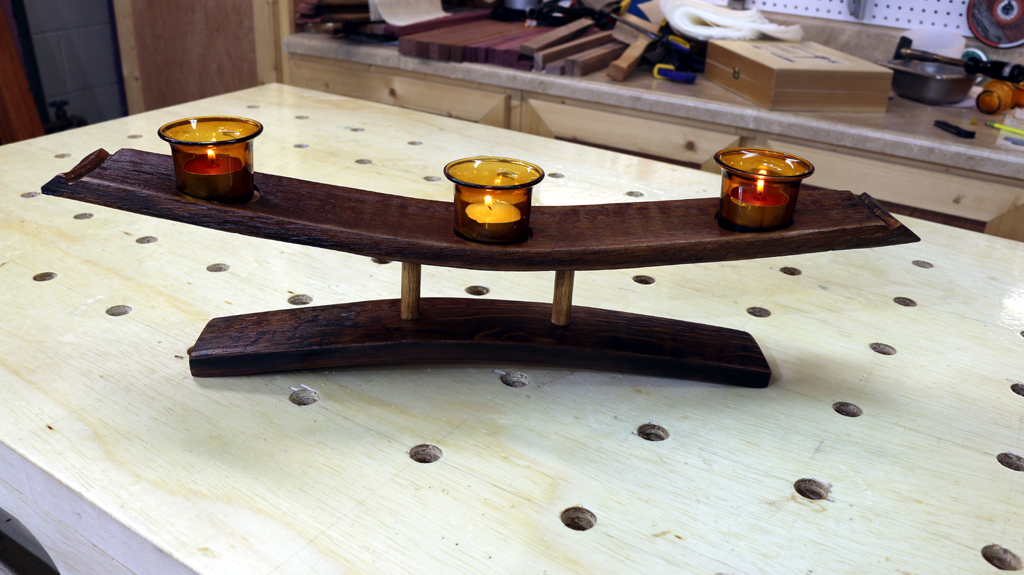
I had remembered seeing barrel staves for sale at a Rockler that I had visited recently and that reminded me that I had a few of those left over from a job that a bar wanted me to do for them. I know that wine barrel projects are pretty popular now, so I decided to make something simple and a little bit trendy. The bulk of this project can be done in about an hour or two.
Supply List
- Barrel Staves
- 1/2″ dowel rod
- Danish Oil
- Wood Glue
- Polycrylic (or any other top coat product)
- Foam Brush

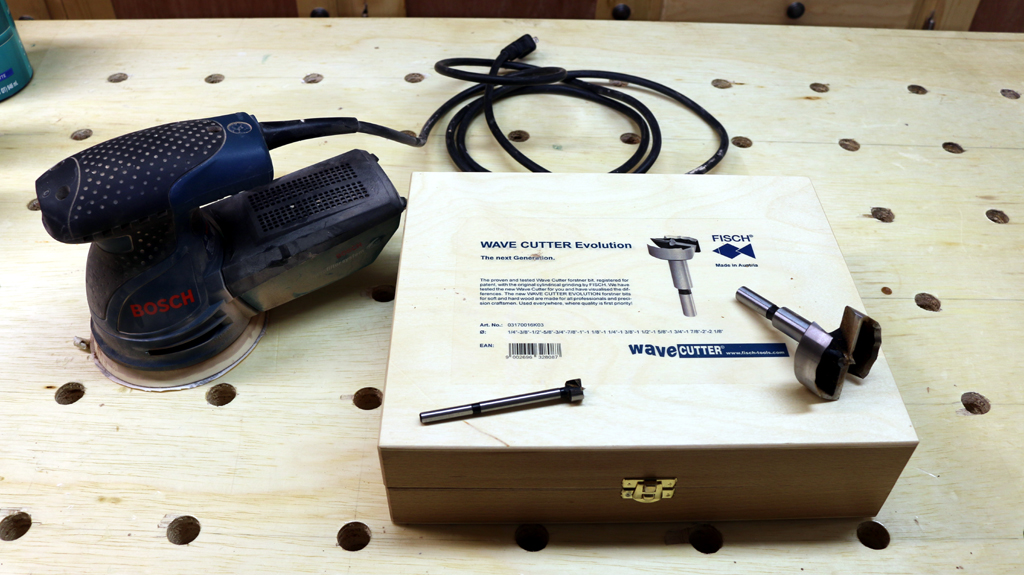
Tool List
- Sander
- Forstner Bits (1/2″ and 2″)
- Saw (Miter saw, table saw, bandsaw or hand saw)
- Drill (Drill Press preferably or a hand-held drill)
Instructions
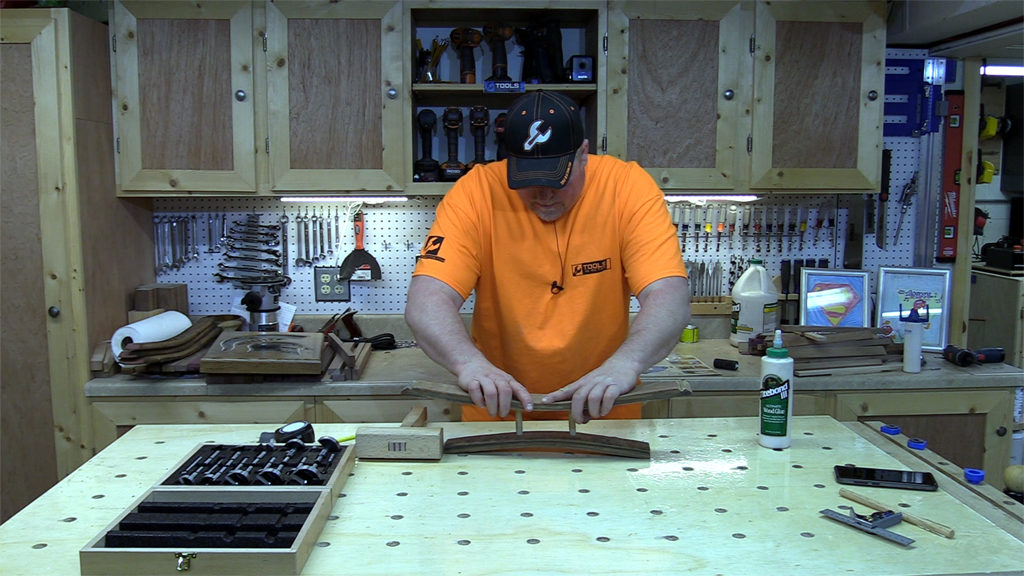
The very first thing to do for this project is to pick out the two barrel staves you are going to use. For this design, I like to use two staves of different thicknesses with the larger of the two making up the top part of the candle holder.
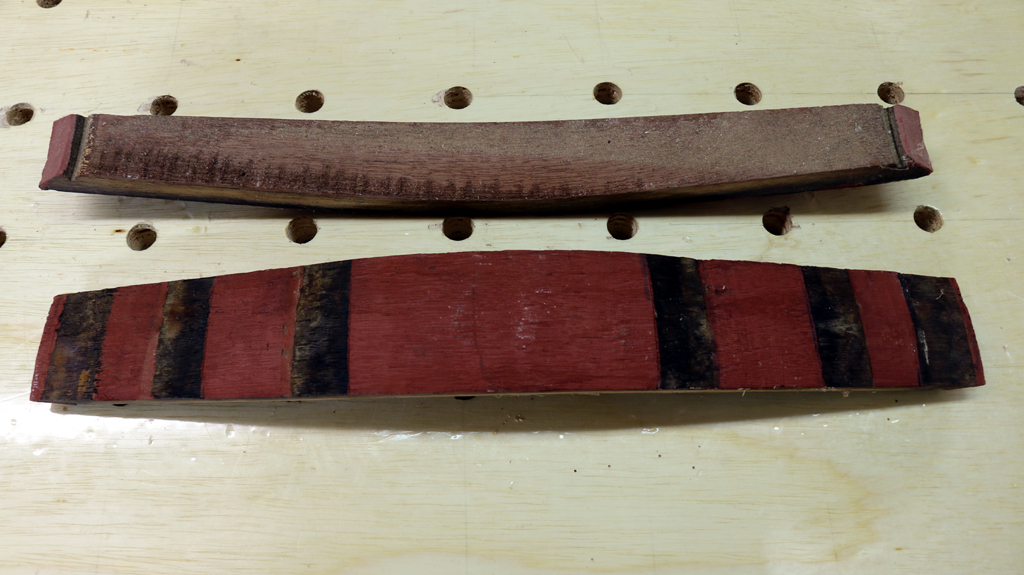
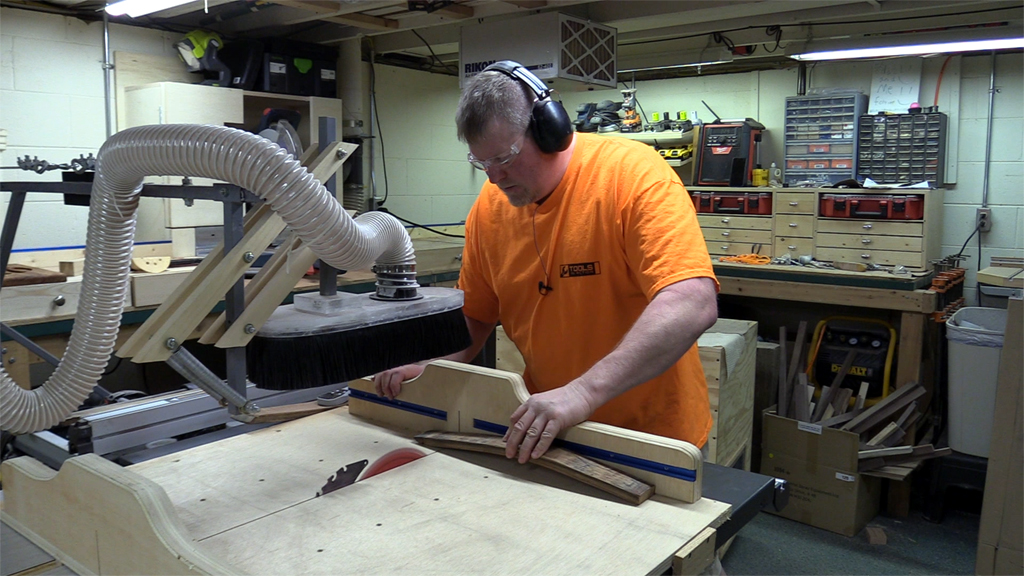
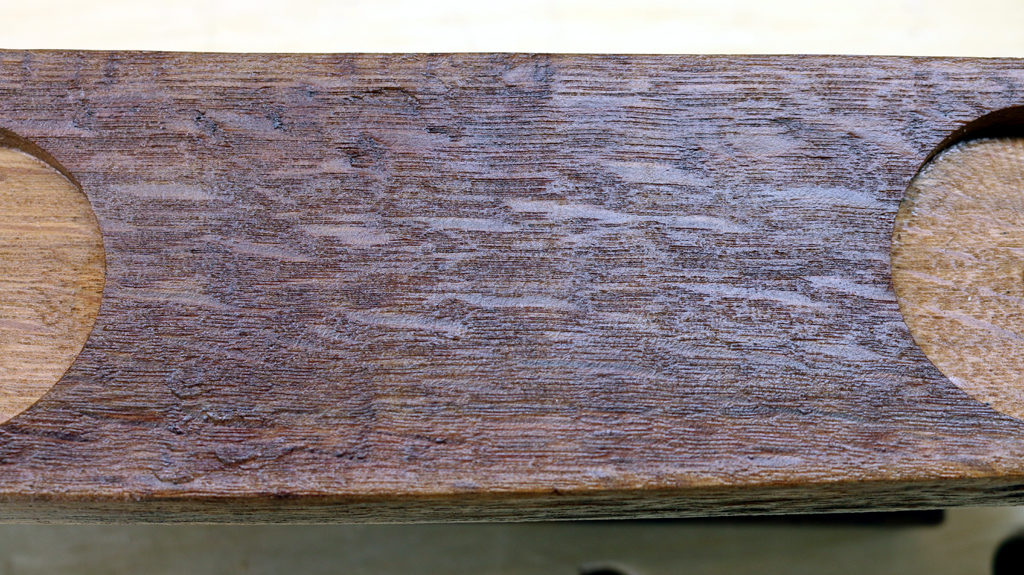
After you have identified your staves, it’s a good idea to give them a sanding. This step is going to put you on the path on how your final product is going to look. Most of the time when you sand a project, its done as one of your final steps and the point is to get as fine of a finish as possible. With this project, you need to decide if you want this to look rustic or finely finished. For me, I just wanted to take the red color off of the staves and keep it a little rustic looking. The staves are made of oak and I wanted to be able to see some of the wood characteristics in my final product.
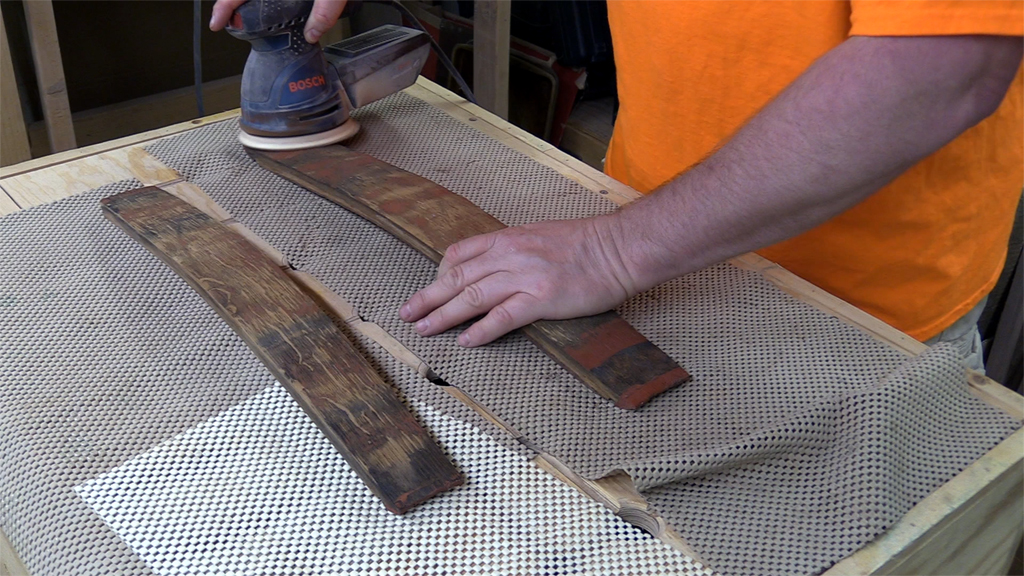
The size of this project is completely up to you. If you want to use the full length of the barrel staves, then you won’t need to do this next step, but for me, I like to have the bottom barrel stave shorter than the top one. In order to shorten the bottom stave, I cut a little from each end on my Ridgid table saw. If you don’t have a table saw, you could use another type saw such as a miter saw, bandsaw, or handsaw. Just take your time and be careful because the barrel staves have a curve to them.
 After you have your pieces sanded and cut, its time to drill the holes to receive the 1/2″ sections of dowel rods. Find the center of the barrel staves by measuring the width of the stave at both ends. Then find the center point of each end and draw a line connecting the two points. Since the stave is arched, you will need to use a flexible ruler or a string.
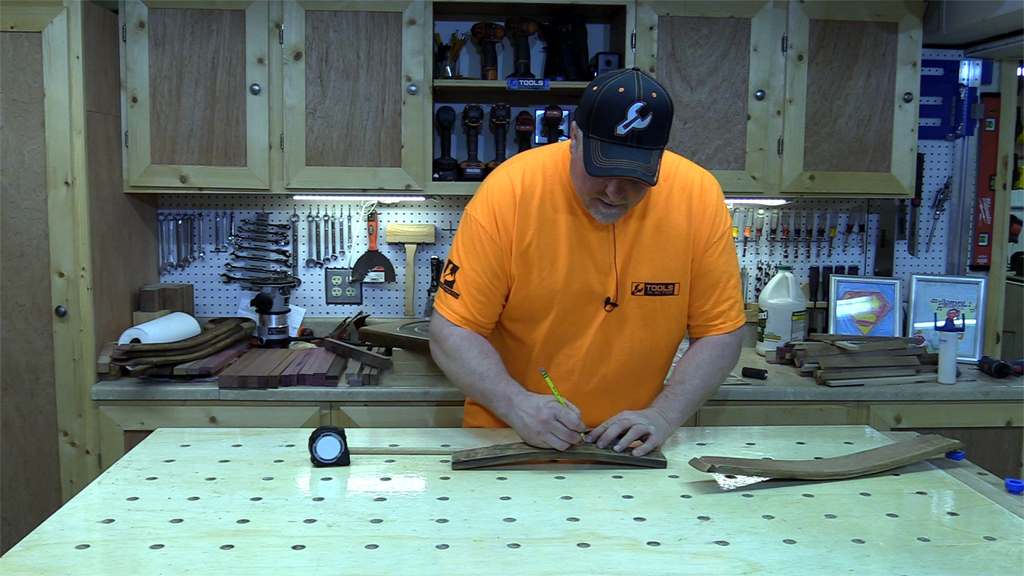
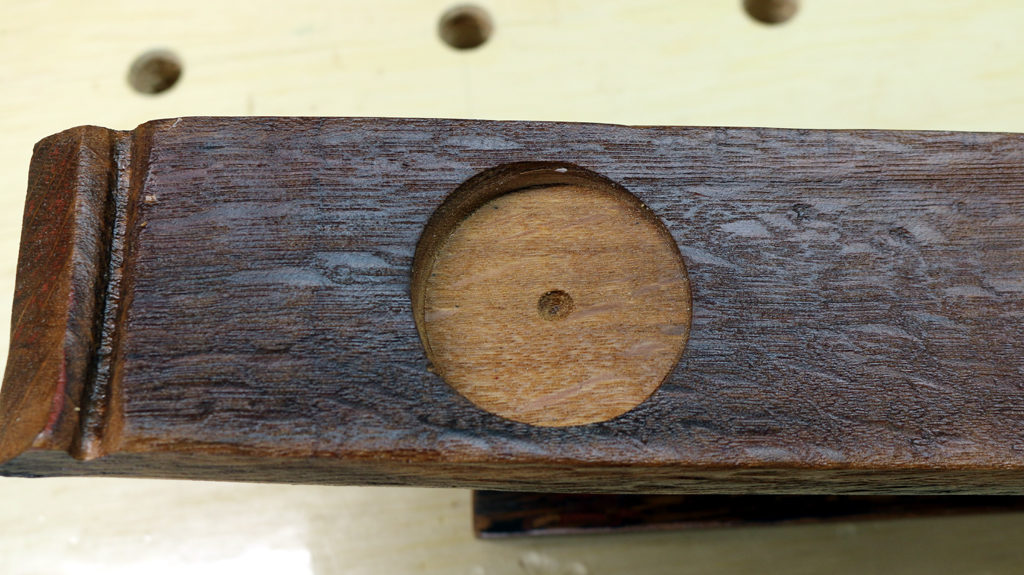
From there, find the center of the barrel stave and measure back 2 inches on both sides of the center. This is where we will drill our holes with a 1/2″ Forstner bit.
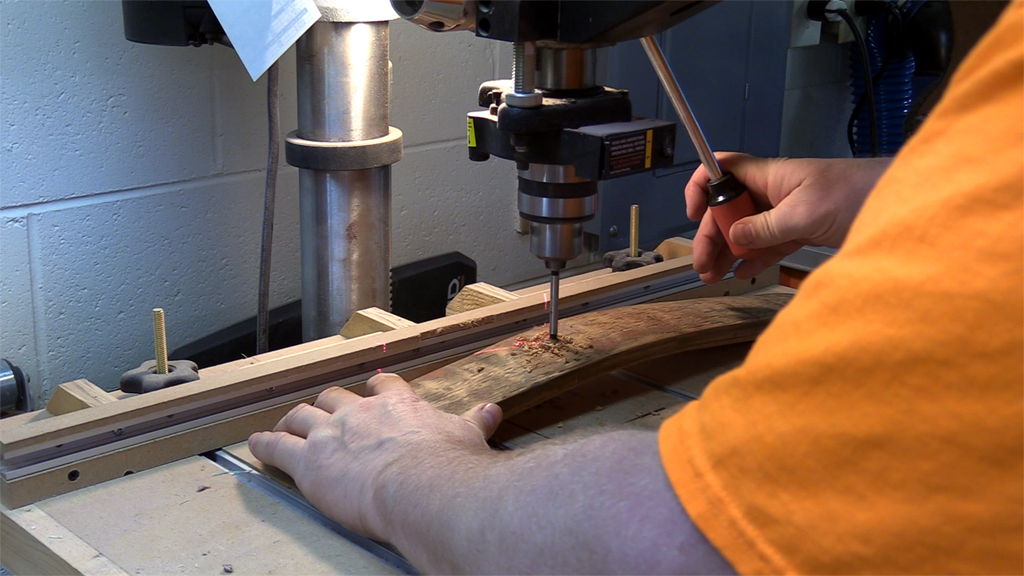
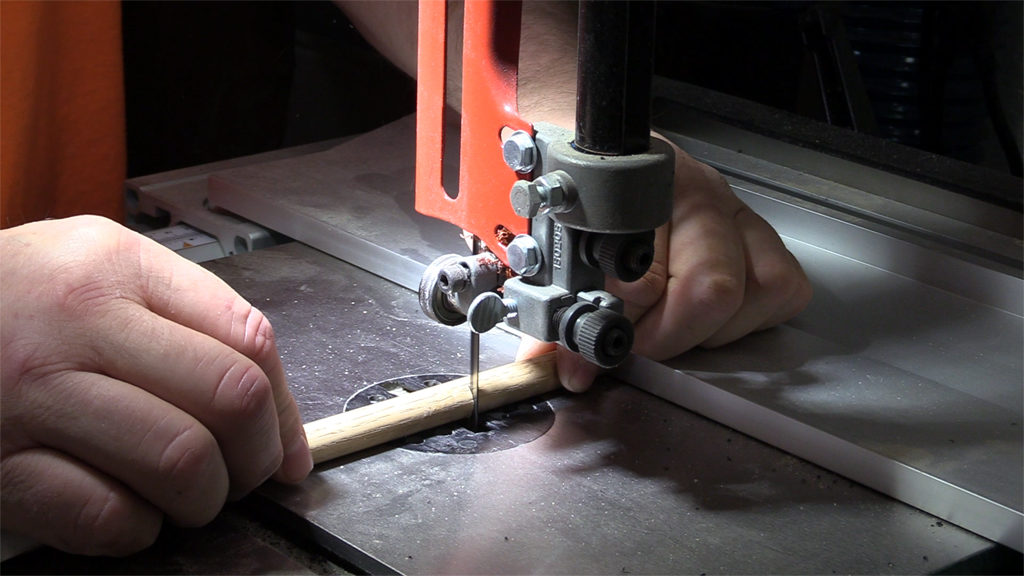
Next, you will need to cut two pieces of your 1/2″ dowel rod. The length of these pieces are completely up to you, but for this project, I believe I cut them to 2-inch lengths. Take your two pieces of dowel rods and glue them into the top and bottom barrel staves.
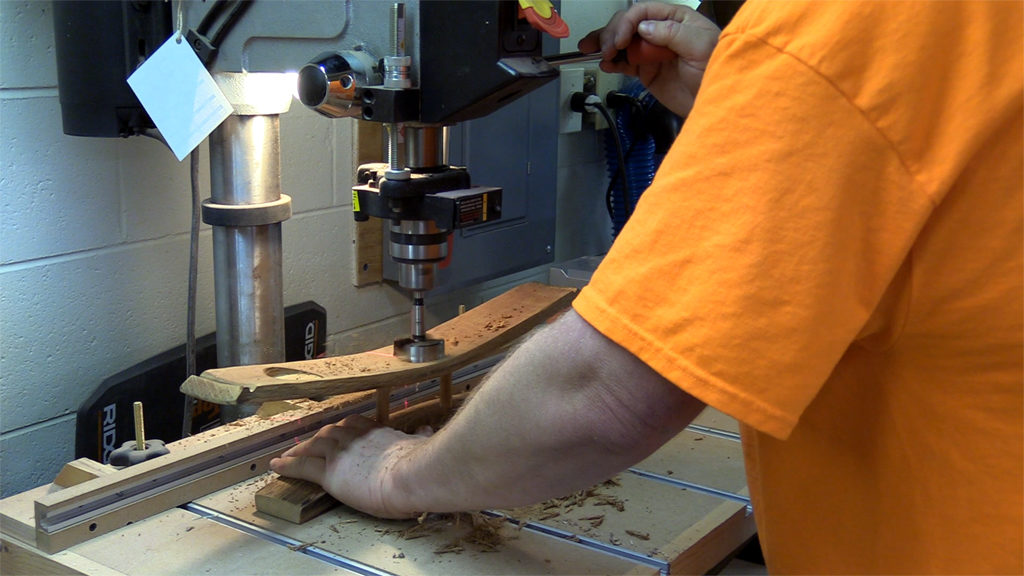
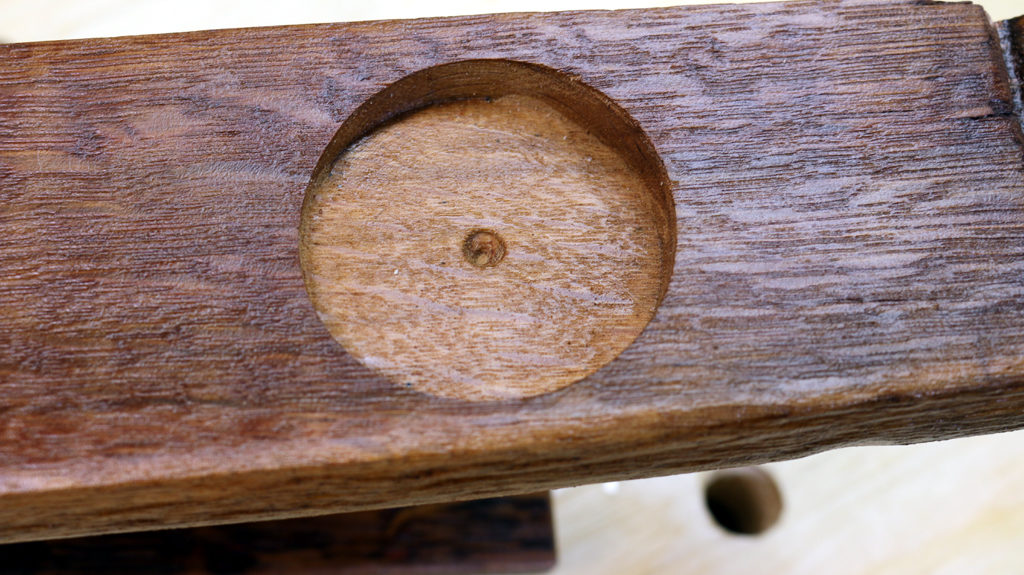
After your glue has had time to set up, it’s time to cut the recesses to hold the tea lights. Now, since the top barrel stave is curved up, you will be cutting level flat bottom holes to keep your tea lights in a safe position. The best way to do this is with a 2-inch Forstner bit and a drill press. Just like a couple steps before, find the center of your top barrel stave, and mark it. Then measure in 4 inches from each end and put a mark in the center. These will be your three holes for candles. Be careful when cutting these out on the bandsaw. Forstner bits work best if the center of the bit makes contact with the wood first, but in this circumstance, the outside of the bit is going to have to cut in first. This is where it is really nice to have sharp Forstner bits.
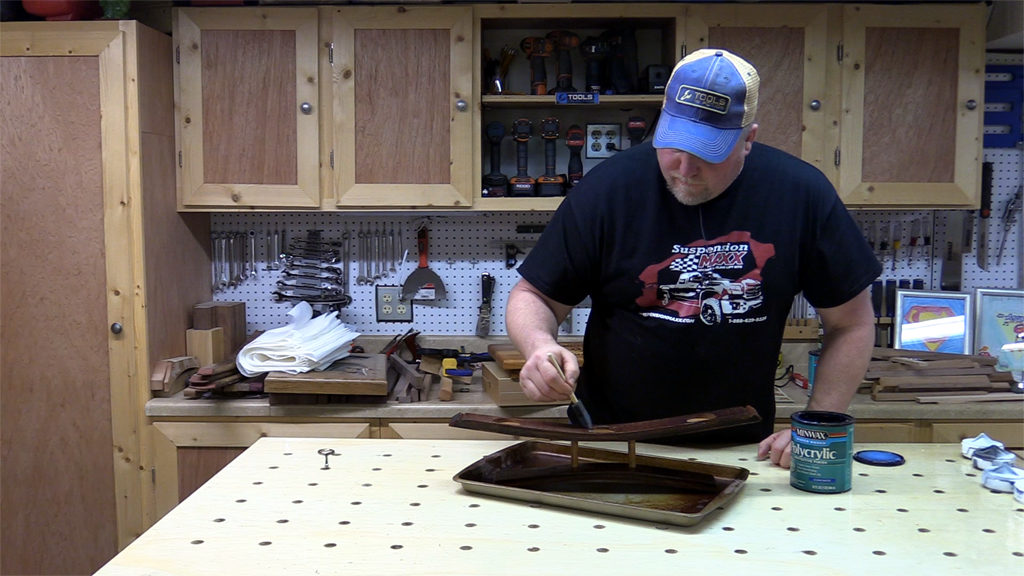
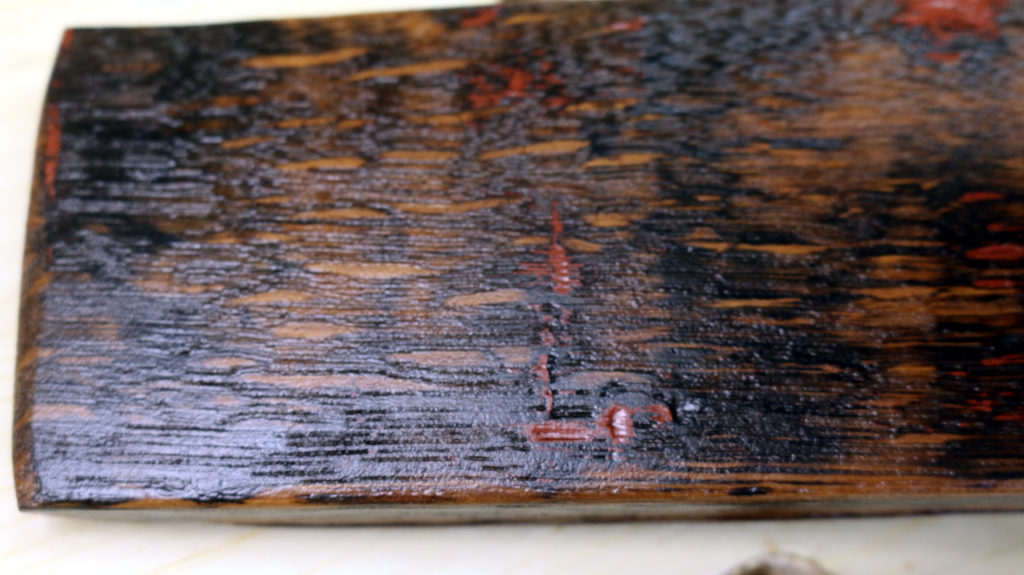
We are now in the final steps. You can do just about anything you want to finish this project. For me, I like to use Danish oil on projects like this. Its super simple to use and I like how it makes rustic projects look. Just wipe it on, let it soak in for about 15 minutes and if you want, add another coat.
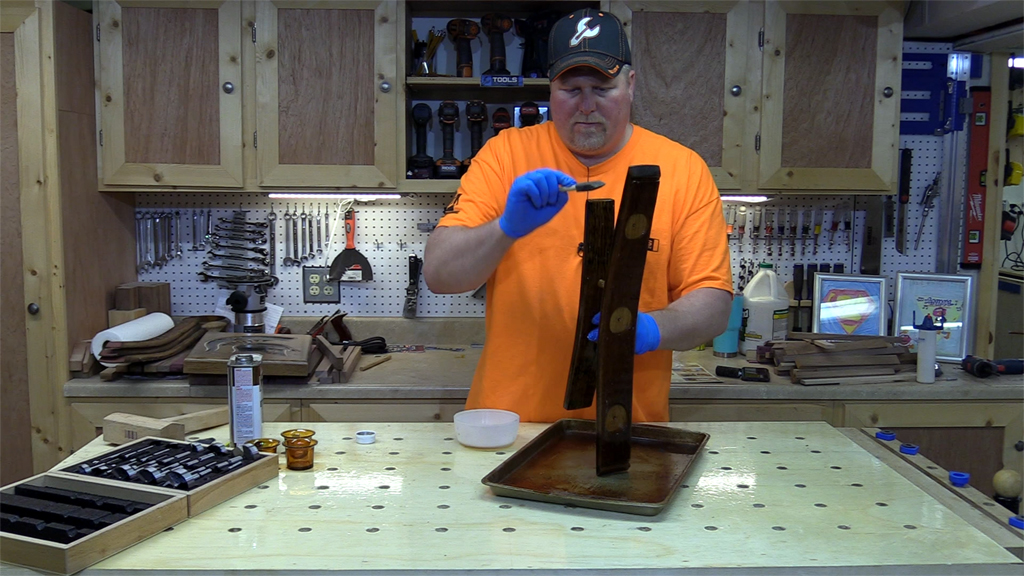
At this point, you could call it done if this look is what you want. I wanted to give this project a little bit of shine, so I added three coats of Polycrylic Clear Matte finish to it. Before adding a top coat Danish oil, its recommended to let the Danish oil dry for three days. So, if you want to be done in a weekend, you will need to skip this last step.
Conclusion
I really enjoyed this project. Mostly because of speed at which it can be completed. I’ve gotten quite a few compliments on this build and may have to make some more in the future to fill requests. Ironically, my wife is not a fan of the look and this project is going to end up going to someone else.
If you decide to try this project, I would love to see how it turns out for you. Go over to the Toos In Action forum and share some pictures of it.
