What Is a Sander?
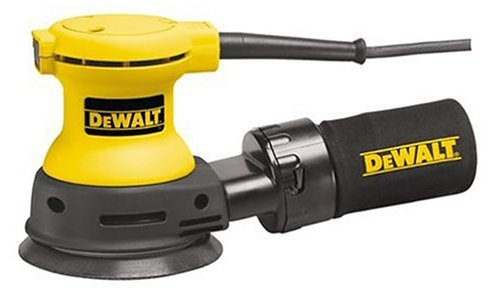
A sander is a power device designed to smooth, level, or strip surfaces, usually wood, metal, or paint. Whether you're prepping a tabletop for stain, knocking down a rough edge, or stripping old finish, a sander saves time and effort. It replaces hours of hand sanding with consistent speed, pressure, and finish quality. There are several types of sanders, each with its own specialty depending on the job.
History of the Sander
The earliest versions of power sanders showed up in the 1920s, starting with drum and belt-driven machines. Porter-Cable made a big leap in the 1950s with the introduction of the random orbit sander—a design that revolutionized sanding by combining consistent abrasion with swirl-free finishes. Since then, companies like Makita, Bosch, and Festool have refined motor designs, dust collection, and pad systems to improve control and performance on everything from rough stock to fine furniture.
What It’s Used For
Sanders are used in nearly every woodworking and finishing trade. Typical uses include:
What to Look for When Buying
Type of Sander
- Random Orbit: Most versatile, great for finish sanding with minimal swirl marks
- Sheet (Palm) Sander: Ideal for light sanding or smoothing between coats
- Belt Sander: Aggressive—good for fast material removal on flat surfaces
- Detail Sander: Small, pointed pad for tight spaces and corners
- Oscillating Spindle Sander: Used on curves or inside contours (usually bench-mounted)
Dust Collection
- Look for built-in dust bags or vacuum ports
- Good dust control keeps surfaces cleaner and extends pad life
Speed Control
- Variable speed gives more control for different materials and finishes
- Higher speeds for fast removal, lower for delicate work
Pad Size and Shape
- Round pads for orbitals, square pads for sheet sanders
- Larger pads cover more area; smaller ones give better control in tight spots
Ergonomics and Vibration
- Lightweight design and rubber grips make a big difference during longer jobs
- Anti-vibration systems reduce fatigue and hand numbness
Paper Attachment
- Hook and loop (Velcro-style) is fastest
- Clamp-style is more common on older sheet sanders
Pros and Cons
Pros
Cons
Grit Selection Basics
- 60–80 grit: Heavy stock removal, stripping paint or stain
- 100–120 grit: General sanding, smoothing edges
- 150–180 grit: Pre-finishing work, sanding between coats
- 220+ grit: Final finish prep, especially for stains or clear coats
Always start with the coarsest grit needed, then step up through finer grits. Skipping grits can leave deep scratches that show up after finishing.
Safety and Maintenance Tips
Who This Is For
- Homeowners refinishing cabinets, furniture, or prepping paint
- DIYers working on home improvements or woodworking
- Pros in carpentry, finishing, cabinetry, and auto body repair
If you’re building or restoring anything that gets painted, stained, or smoothed, a sander is a must-have.
FAQ
A random orbit sander covers 80% of general sanding tasks. For heavy stripping or tight corners, you’ll need a belt or detail sander.
Random orbitals have a spinning, circular pad and leave fewer marks. Sheet sanders move in tiny square patterns and are better for corners.
Dull paper, too much pressure, or skipping grits can all cause swirls. Let the tool do the work and keep fresh paper on it.
Final Thoughts
A good sander does more than just smooth, it saves time, effort, and frustration. Whether you’re leveling out a glued panel, prepping for stain, or removing old paint, the right sander can deliver clean, professional results. Know the job, match the type, and choose the right grit. When used right, a sander is one of the most underrated yet essential items in your workshop.

